7
Installing
the Chute Crank
Models 38439, 38440, and 38445 only
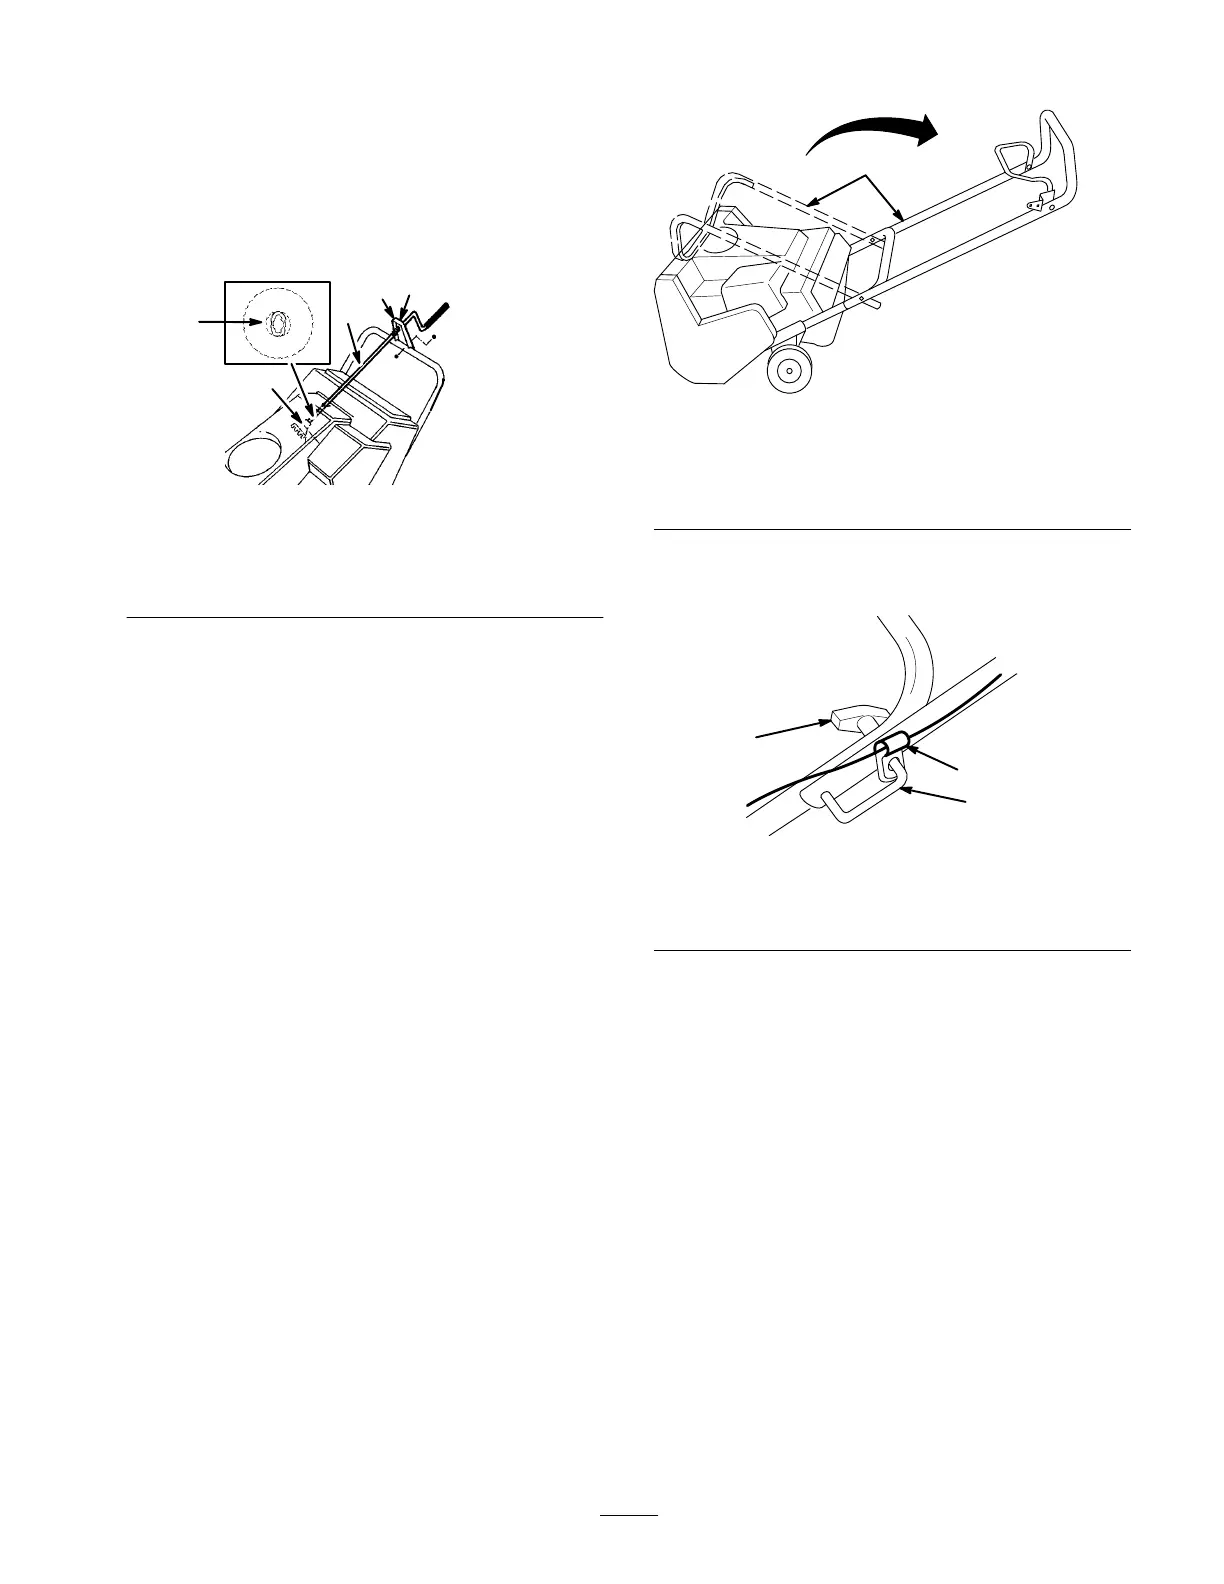
1. Insert
the flattened end of the chute crank through the
hole in the shroud while aligning the mounting bracket
with the holes in the lower handle (Fig. 4).
893
635
3
1
2
4
5
Figure
4
1. Chute
crank
2.
Mounting bracket
3. Gear
4.
Plastic bushing
5.
Hidden gear opening
2. Slowly
rotate the crank until the flattened end fits into
the hidden gear opening and the chute ring turns with
the crank (Fig. 4).
3.
Fully insert the plastic bushing into the hole in the
mounting bracket (Fig. 4).
4.
Secure the mounting bracket to the handle with two
capscrews and locknuts (Fig. 4).
Unfolding
the Handle
1. Cut
the tie that secures the control cable to the handle.
2.
Loosen the knobs and pull out the handle locks until
the upper handle rotates freely (Fig. 6).
3.
Position the upper handle as shown in Figure 5.
1
Figure
5
1. Upper
handle
Note:
Ensure that the cable guide is in the position as
shown in Figure 6.
1
2
3
Figure
6
1. Knob
2. Handle
lock
3.
Cable guide
4. Insert
the loose end of the control cable into the top
hole of the control bar as illustrated in Figure 7
(models 38413 and 38419) or into the bottom hole as
illustrated in Figure 8 (models 38439, 38440, and
38445).
 Loading...