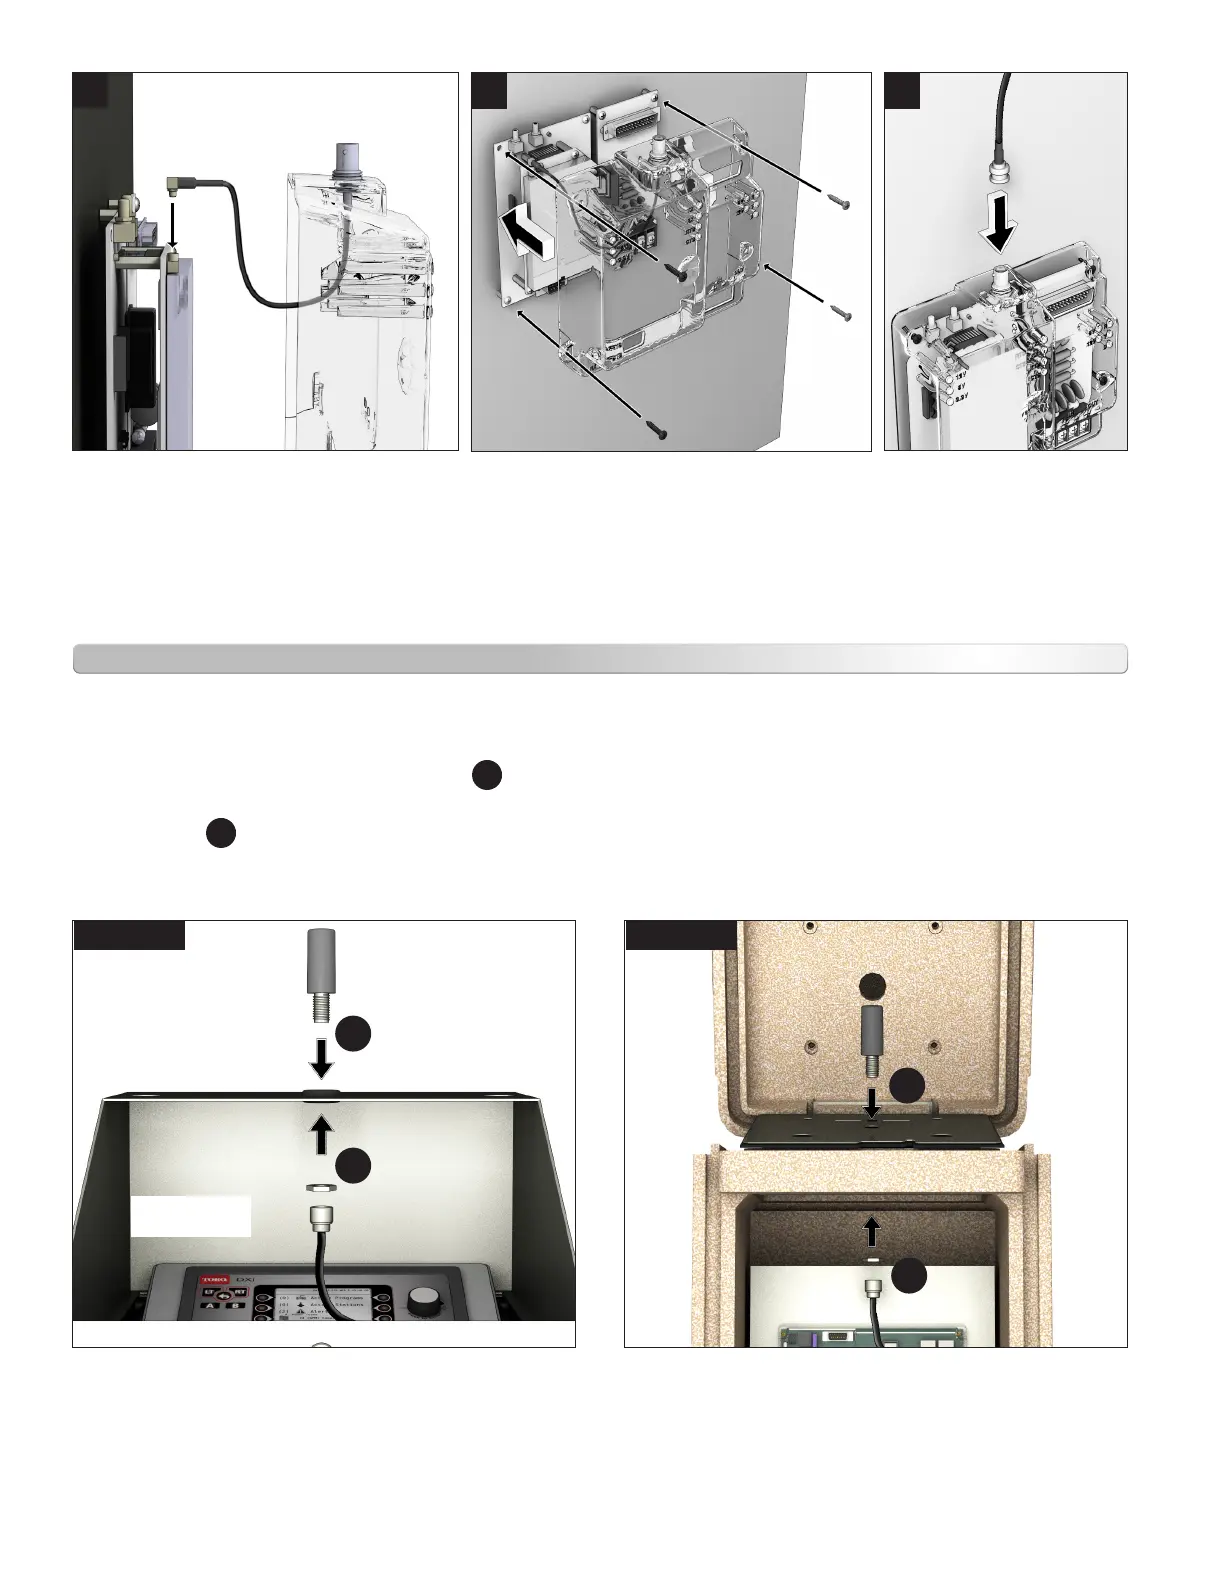
Antenna Installation
To install a UHF antenna for the DXi:
1. Insert included rubber grommet into the enclosure hole
for the antenna.
Insert antenna threading through the hole
1
.
2. Secure the large nut and antenna connector to threading
of antenna
2
.
3. Power on the controller and initialize the newly
connected UHF radio board.
4. e UHF radio uses the same frequency as the base
radio. Both Rx and TX are on the same frequency.
An FCC or IC license is required to operate the UHF
radio. If the base network is on the internet through an
Ethernet gateway, the “CLOUD ID” will be displayed
on the controller faceplate. Communication at the
Central can be veried by sending test commands via
the Sentinel WMS or Laguna software and looking for
acknowledgment.
Figure 8 Figure 9
Connect antenna’s cable to
BNC connector on cover.
Antenna installed on the top of
PSB, SPED, and wallmount enclosures.
Antenna fully contained within plastic pedestal
enclosure when lid is closed.
5
Connect the BNC from the cover
to the radio port.
3
Reattach the cover and secure
with screws and standos if necessary.
4
1
1
2
2
(lid x-ray)
 Loading...