6
InstallingtheRecycler
Blades
Partsneededforthisprocedure:
2
Recyclerblades(soldseparately)
Procedure
WARNING
Abladeissharp.Contactwithasharpblade
cancauseseriouspersonalinjury.
Wearglovesorwrapsharpedgesoftheblade
witharag.
Installtherecyclerbladesontothemower;referto
thePartsCatalogforyourmachineforthebladepart
numberandtheOperator’sManualforyourmachine
forinstallationinstructions.
7
ConvertingtheMower
DeckforRear-Discharge
Operation
Partsneededforthisprocedure:
6Flange-headcapscrews
PreparingtoRemovetheMulching
Kit
1.Preparethemower;referto1Preparingthe
Mower(page2).
2.Removetherecyclingblades;refertothe
Operator’sManualforyourmachine.
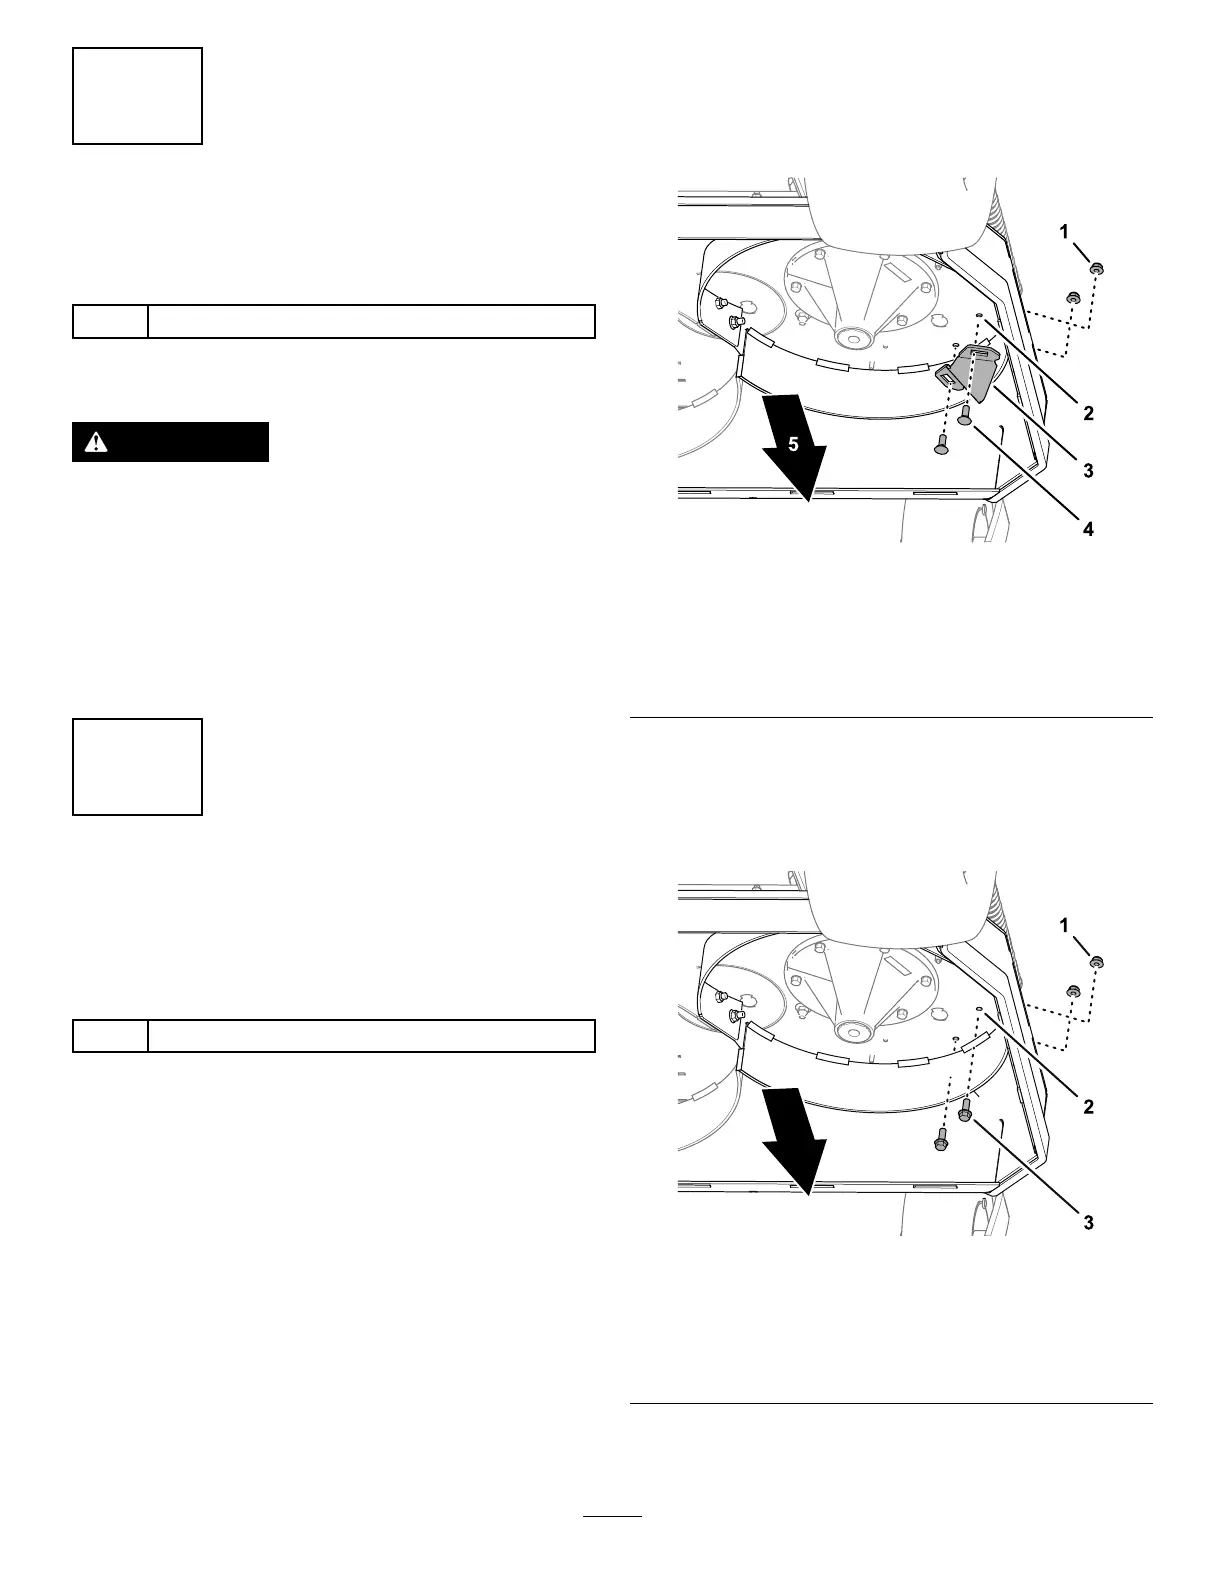
RemovingtheKickerFittings
Note:Determinetheleftandrightsidesofthe
machinefromthenormaloperatingposition.
1.Atthebottom,leftsideofthemowerdeck,
removethe2carriagebolts(3/8x1inch)and2
angelocknuts(3/8inch)thatsecurethekicker
ttingtothedeck,andremovethekickertting
(Figure7).
Note:Retainthecarriageboltsandkickertting
forinstallingthemulchingkit.
g283727
Figure7
1.Flangelocknut(3/8inch)4.Carriagebolt(3/8inch)
2.10mm(3/8inch)hole
(mowerdeck)
5.Frontofthemachine
3.Kickertting
2.Install2ange-headcapscrews(3/8x1inch)
intothe10mm(3/8inch)holesinthemower
deck(Figure8)andsecurethecapscrewswith
2angelocknuts(3/8inch)thatyouremoved
instep1.
g284329
Figure8
1.Flangelocknut(3/8inch)
3.Flange-headcapscrew
(3/8x1inch)
2.10mm(3/8inch)hole
(mowerdeck)
3.Atthebottom,rightsideofthemowerdeck,
removethe2carriagebolts(3/8x1inch)and2
6