ServicingtheBedbar
RemovingtheBedbar
1.Turnbedbaradjusterscrew,counterclockwise,to
backbedknifeawayfromreel(Figure48).
Figure48
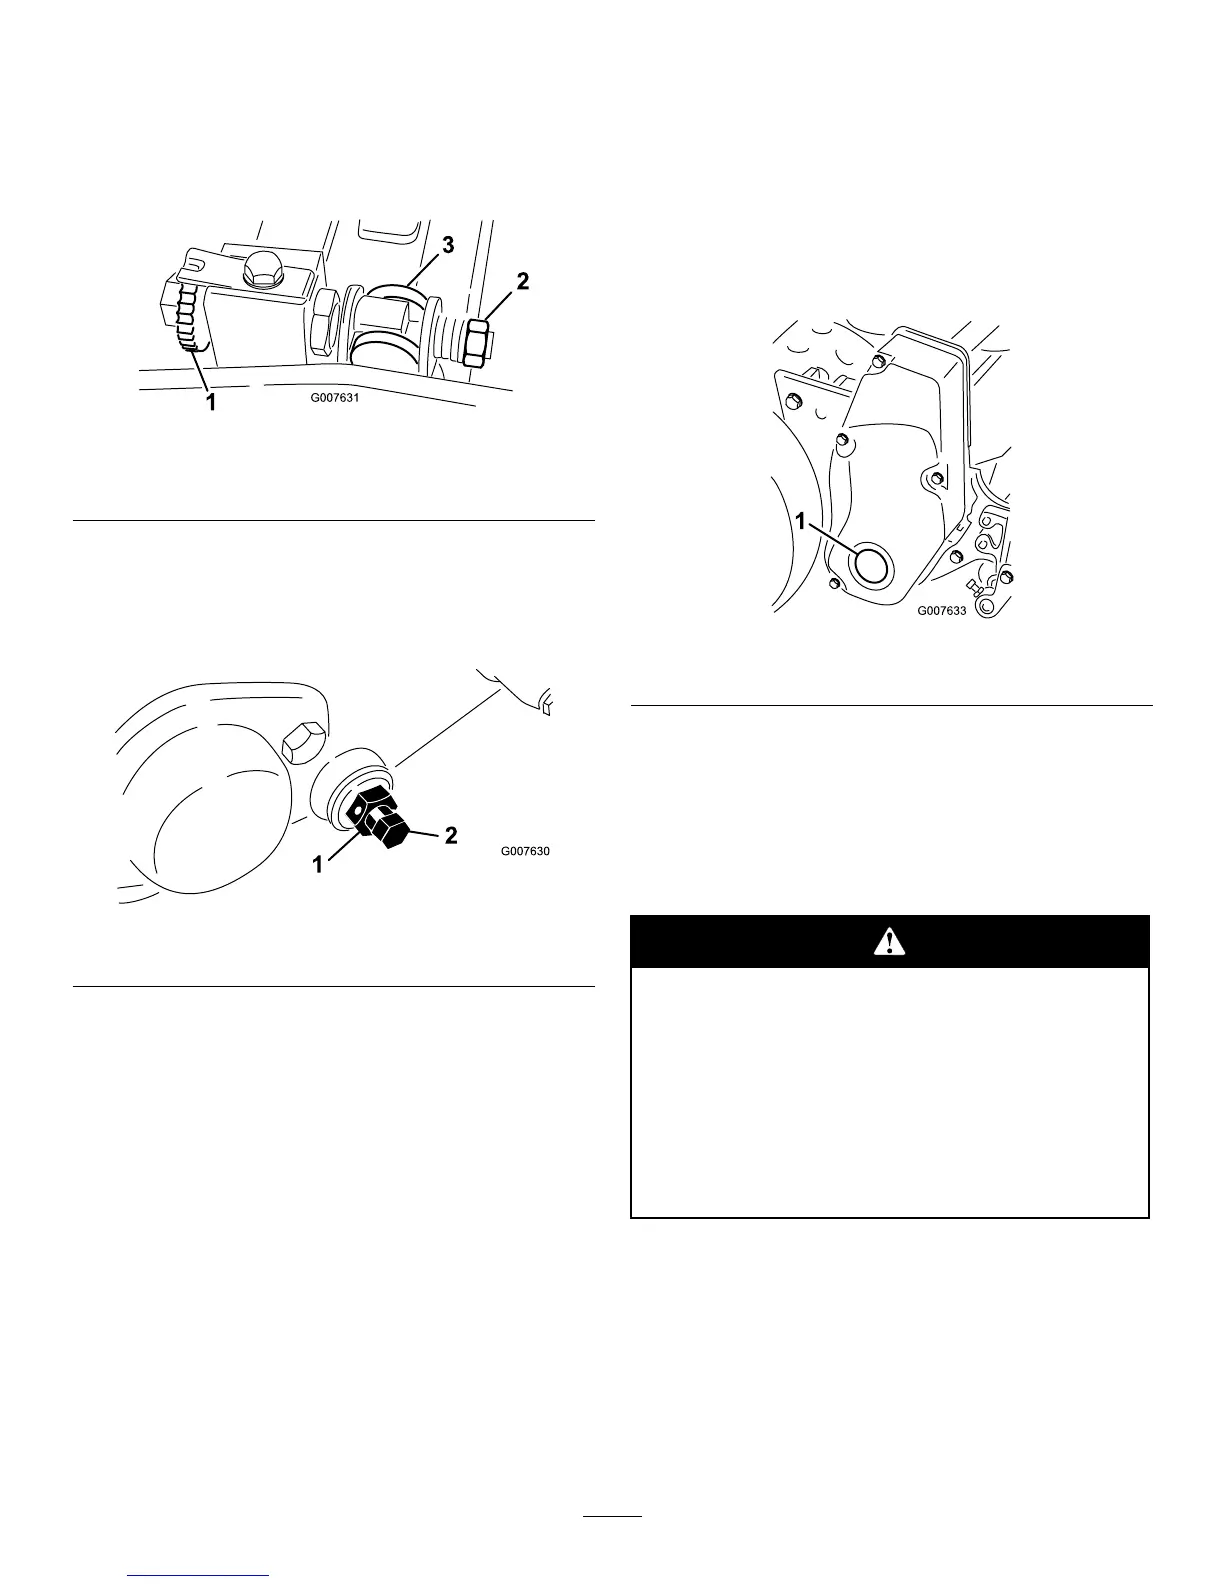
1.Bedbaradjustingscrew3.Bedbar
2.Springtensionnut
2.Backoutthespringtensionnut,untilthewasheris
nolongertensionedagainstthebedbar(Figure48).
3.Oneachsideofthemachine,loosenthejamnut
securingthebedbarbolt(Figure49).
Figure49
1.Jamnut2.Bedbarbolt
4.Removeeachbedbarboltallowingthebedbartobe
pulleddownwardandremovedfromthemachine.
Savethe2nylonand2stampedsteelwasherson
eachendofbedbar(Figure49).
InstallingtheBedbar
1.Installthebedbar,positioningthemountingears
betweenthewasherandthebedbaradjuster.
2.Securethebedbartoeachsideplatewiththebedbar
bolts(jamnutsonthebolts)and8washers.Position
anylonwasheroneachsideofthesideplateboss.
Placeasteelwasheroutsideeachofthenylon
washers.
3.Torqueboltsto240to320inch-lb(27to36N-m).
4.Tightenthejamnutsuntilthethrustwashersjust
rotatefreely.
5.Tightenthespringtensionnutuntilthespringis
collapsed,thenbackitoff1/2turn.
6.Adjustthebedbar;refertoAdjustingtheBedknife
totheReel.
BacklappingtheReel
1.Removetheplugintherightreeldrivecover
(Figure50).
Figure50
1.Coverplug
2.Inserta1/2inchsocketextension,connectedtothe
backlappingmachine,intothesquareholeinthe
centerofthereelpulley.
3.BacklapaccordingtotheprocedureintheToro
SharpeningReelandRotaryMowersManual,FormNo.
80-300PT.
Contactwiththereelorothermovingpartscan
resultinpersonalinjury.
•Stayawayfromthereelwhilebacklapping.
•Neveruseashorthandledpaintbrushfor
backlapping.PartNo.29-9100Handle
assemblycompleteorindividualpartsare
availablefromyourlocalAuthorizedToro
Distributor.
Note:Forabettercuttingedge,runaleacross
thefrontfaceofthebedknifewhenthelapping
operationiscompleted.Thiswillremoveanyburrs
orroughedgesthatmayhavebuiltuponthecutting
edge.
4.Installthepluginthecoverwhennished.
34