65
TOTAL AREA
SPEED
UNITS
OF MEASURE
APP. RATE
TOTAL VOLUME
SUB
VOLUME
DISTANCE
SUB AREA
SEL
UNITS
TEST
SPEED
BOOM
SEL
WIDTH
SPEED
CAL
FLOW
CAL
RESET
CAL
-
+
CAL HOLD
1
SPRAY PRO
MP-1250
MONITOR CALIBRATION (ENTER AND EXIT
CAL MODE):
1. Stop the machine and set the parking brake.
Zero speed is required to enter and to remain in
CAL mode. Use the Master On/OFF Foot Switch
to turn all Boom Sections Off and place the
Monitor in HOLD.
2. Press and hold the
CAL
button for three seconds
to select the calibration mode. The monitor
display will read CAL (See FIG 1), and the red
warning light will turn on.
3. Turn the rotary dial to the desired CAL position.
Then use the
+
and
-
buttons to adjust the
displayed value up or down as needed.
4. Exit CAL mode by holding the
CAL
button for
three seconds or by driving the machine. "CAL"
will disappear from the display.
To change the units of measure, Stop the
machine and set the parking brake. Press and
hold the
CAL
button until "CAL" appears on the
display. Place the rotary dial at Units of Measure
and use the
-
or
+
buttons to scroll through the
options of US, METRIC (SI) and TURF. When
desired option appears on the display, exit CAL
mode by holding the
CAL
button or driving the
machine.
CALIBRATION VALUES:
The Spray Pro
Monitor comes programmed with
values for speed, flow, and Boom Width
calibrations. However, the Flowmeter and Speed
Sensor calibrations may be fine-tuned for
optimum performance. See page 67 for
procedures
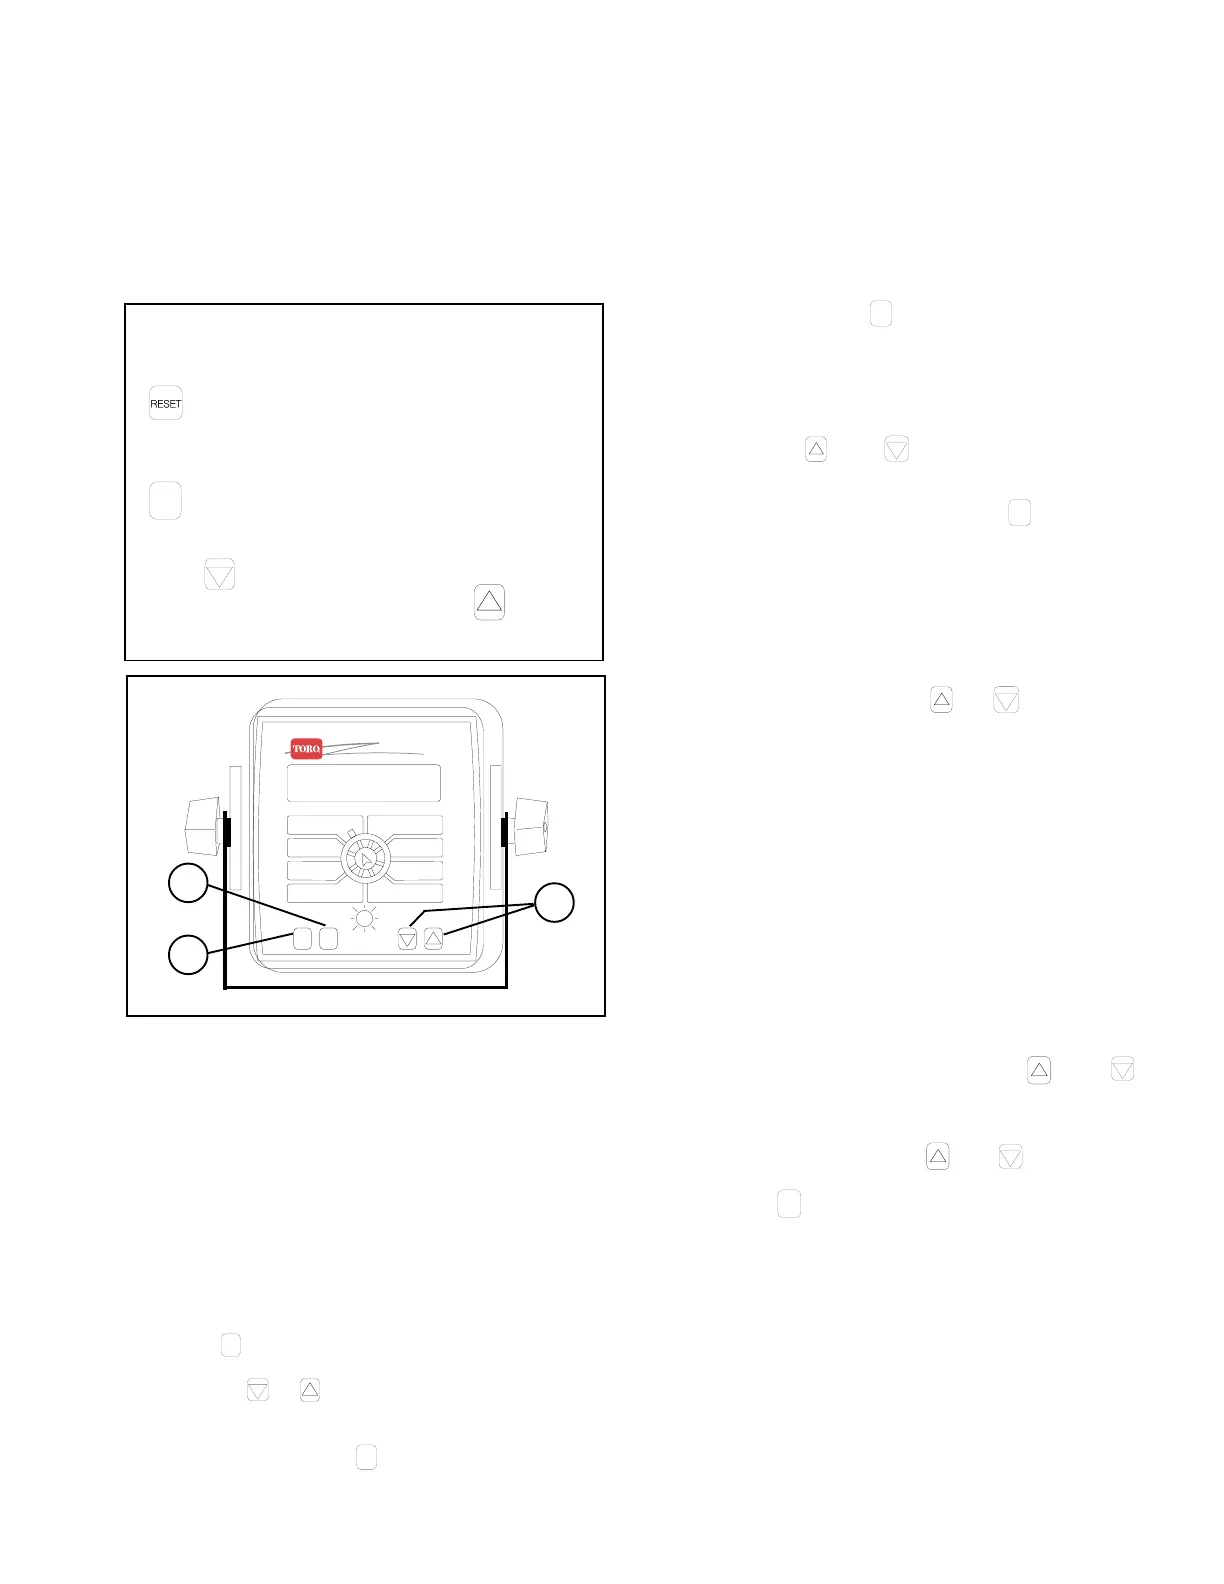
SPRAY PRO
MONITOR FUNCTION
FIG. 1
1. CAL Button 2. Reset Button
3. Increase/Decrease Buttons
1789-1250-2
1
3
RESET button is used to clear the
selected counter when held for three
seconds.
CAL
CAL button is used to enter and exit
the monitor calibration Mode.
The
-
button decreases the value
displayed in the readout while the
+
button
increases it when in CAL mode.
FUNCTION OF BUTTONS:
UNITS OF MEASURE:
Spray Pro
Monitor is capable of displaying
information in US (gallons per acre), METRIC
(liters per hectare), or TURF (gallons per 1000
sq. ft.) measurement. The initial setting is for
US measurement.
NOTE: The display will flash alternately between
distance and speed calibration when in the
DISTANCE position, or total volume and
flowmeter calibration when in the TOTAL
VOLUME position. When
+
or
-
is pressed,
the display will hold the item that was displayed
when that button was pressed. The display will
resume alternation after 64 seconds of no button
being depressed. Please refer to fine tuning
section for details.
or disabled. The Widths can be changed by
turning the Master ON/OFF Switch to OFF, enter
the calibration mode, then turn the dial to the Total
Area/Boom Sel position and use the
+
and
-
buttons to select the Boom section to adjust (1-
Left, 2- Center, 3- Right). When the correct Boom
section is selected, switch the dial to Sub Area/
Width position and use the
+
and
-
buttons to
adjust the Boom Width. Exit CAL mode by
holding the
CAL
button or driving the machine.
WIDTH:
The Boom Widths are pre-programmed to "80,"
"60," and "80" on the left, center, and right Boom
sections, respectively (4, 3, and 4 nozzles at 20"
spacings on each section). These values do not
need to be changed unless nozzles are added
2
 Loading...


