15
1627
1
2
3
4
5
Figure
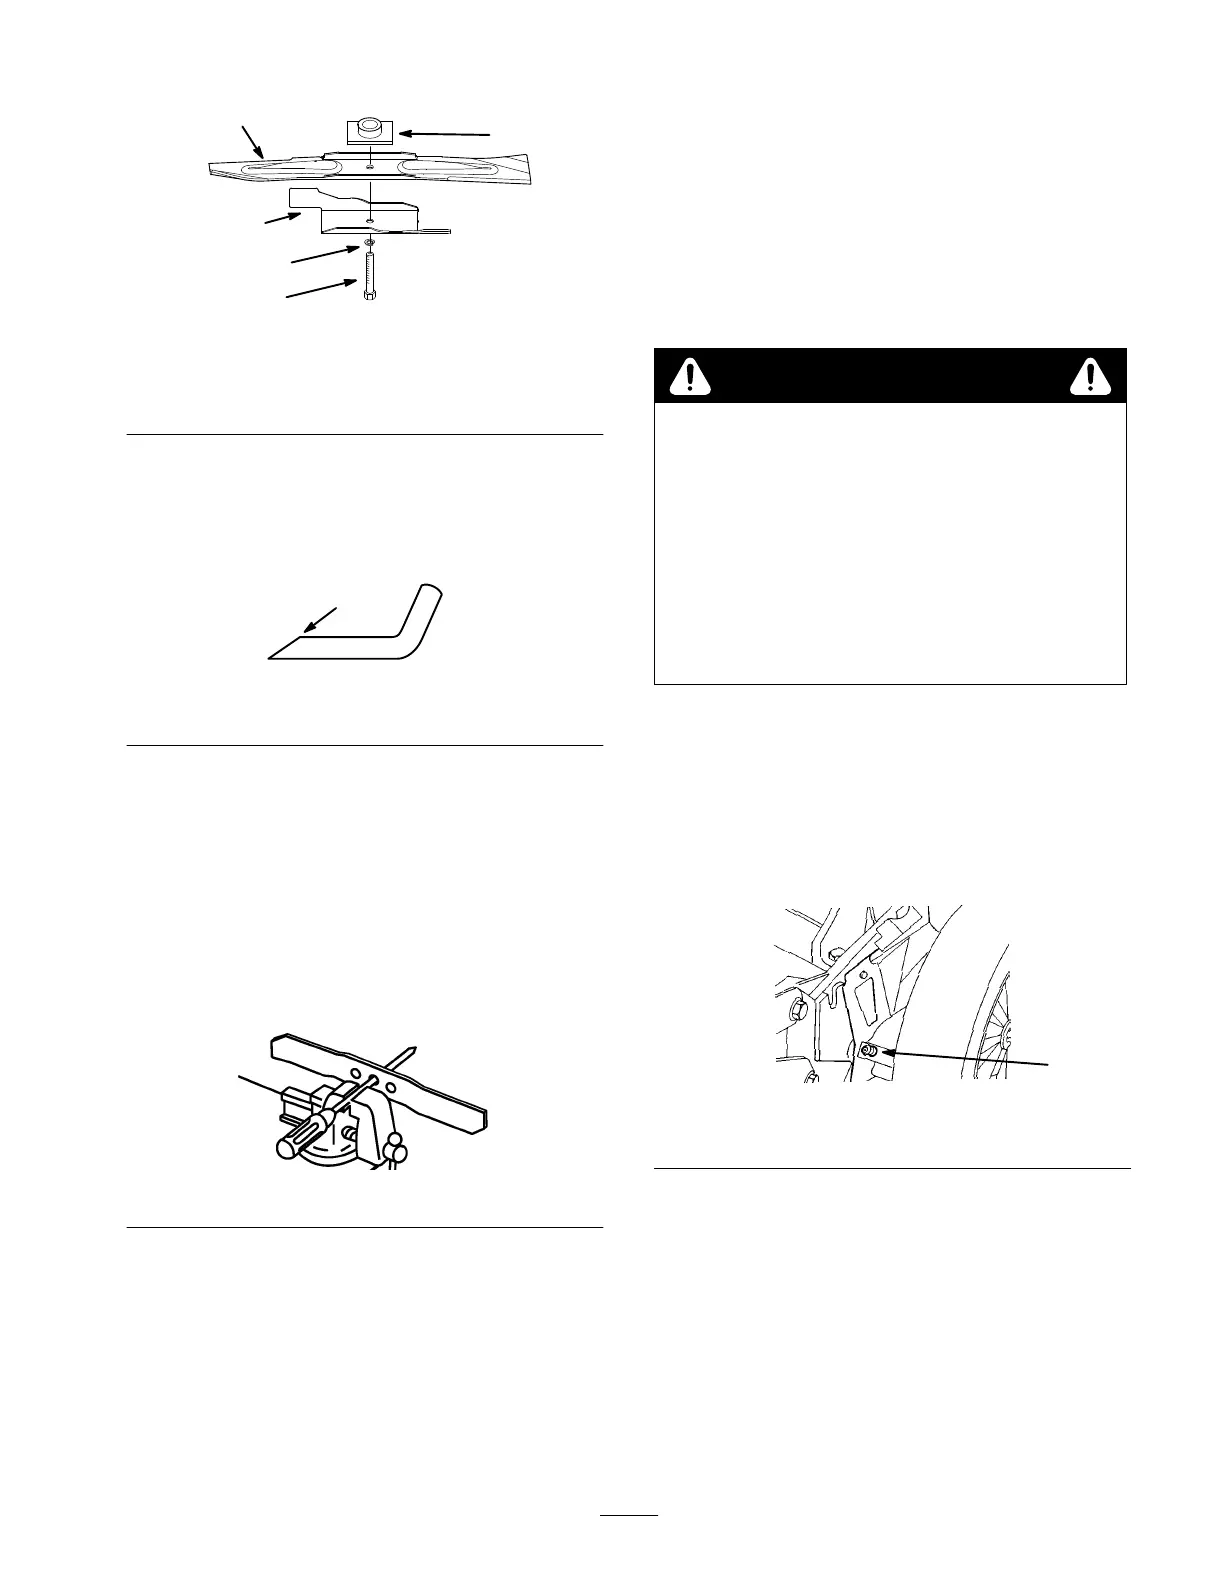
24
1. Blade
bolt
2.
Lock washer
3. Accelerator
4. Blade
5.
Blade driver
Sharpening the Blade
Using
a file, sharpen top side of the blade and maintain
the original cutting angle (Fig. 25).
153
1
Figure
25
1. Sharpen
at this angle only
Note:
The blade will remain balanced if same amount of
material is removed from both cutting edges.
Balancing the Blade
1. Check
the balance of the blade by placing the center
hole of the blade over a nail or screwdriver shank
clamped horizontally in a vise (Fig. 26).
Note:
Y
ou can also check the balance using a
commercially manufactured, blade balancer
.
1007
Figure
26
2. If
either end of the blade rotates downward, file that
end (not the cutting edge or the end near the cutting
edge). The blade is properly balanced when neither
end drops.
Installing the Blade
1. Position
the blade onto the spindle and blade driver
,
with the curved blade tips pointing toward the mower
and the blade driver nesting in the recess of the blade
(Fig. 24).
2.
Install the accelerator
, lock washer
, and blade bolt
(Fig. 24).
3. T
ighten the blade bolt to 50 ft-lb (68 N
m).
WARNING
POTENTIAL
HAZARD
• Operating
the mower without the accelerator in
place could cause the blade to flex, bend, or
break.
WHAT CAN HAPPEN
• A
br
oken blade could cause serious injury or
death to the operator or bystanders.
HOW TO AV
OID THE HAZARD
• Do
not operate the mower without the
accelerator.
Lubricating
the Self–propel
Drive
Self-propelled
Models Only
1. W
ipe the grease fittings on the rear height-of-cut
adjustors (Fig. 27) with a clean rag.
1
276
Figure
27
1. Grease
fitting
2. Install
a grease gun onto each fitting in turn and gently
apply one or two pumps of #2 multi-purpose lithium
grease to each.
IMPORTANT
: Excess gr
ease may damage seals and
pr
event pr
oper wheel clutch operation.
 Loading...