Step
1
Charging the Battery
No Parts Required
Procedure
Warning
CALIFORNIA
Pr oposition 65 W ar ning
Batter y posts, ter minals, and r elated
accessories contain lead and lead
compounds, chemicals kno wn to the State of
Calif or nia to cause cancer and r epr oducti v e
har m. W ash hands after handling .
Bulk electrolyte with 1.260 specific g ra vity m ust be
purc hased from a local batter y supply outlet.
1. Raise the seat to access the batter y . R emo v e
the batter y from the mac hine and place it on
a lev el surface; refer to the Operator’ s Manual ,
R emo ving the Batter y .
Important: Nev er fill the batter y with
electr ol yte while the batter y is installed in
the tractor . Electr ol yte could be spilled on
other par ts and cause cor r osion.
2. Clean the top of the batter y with a paper to w el.
3. R emo v e the v ent caps from the batter y
( Figure 1 ). Slo wly pour electrolyte into eac h
batter y cell until the electrolyte lev el is up to
the Upper line on the batter y case ( Figure 1 ).
Important: Do not o v erfill the batter y
because electr ol yte (sulfuric acid) can
cause sev er e cor r osion and dama ge to the
chassis.
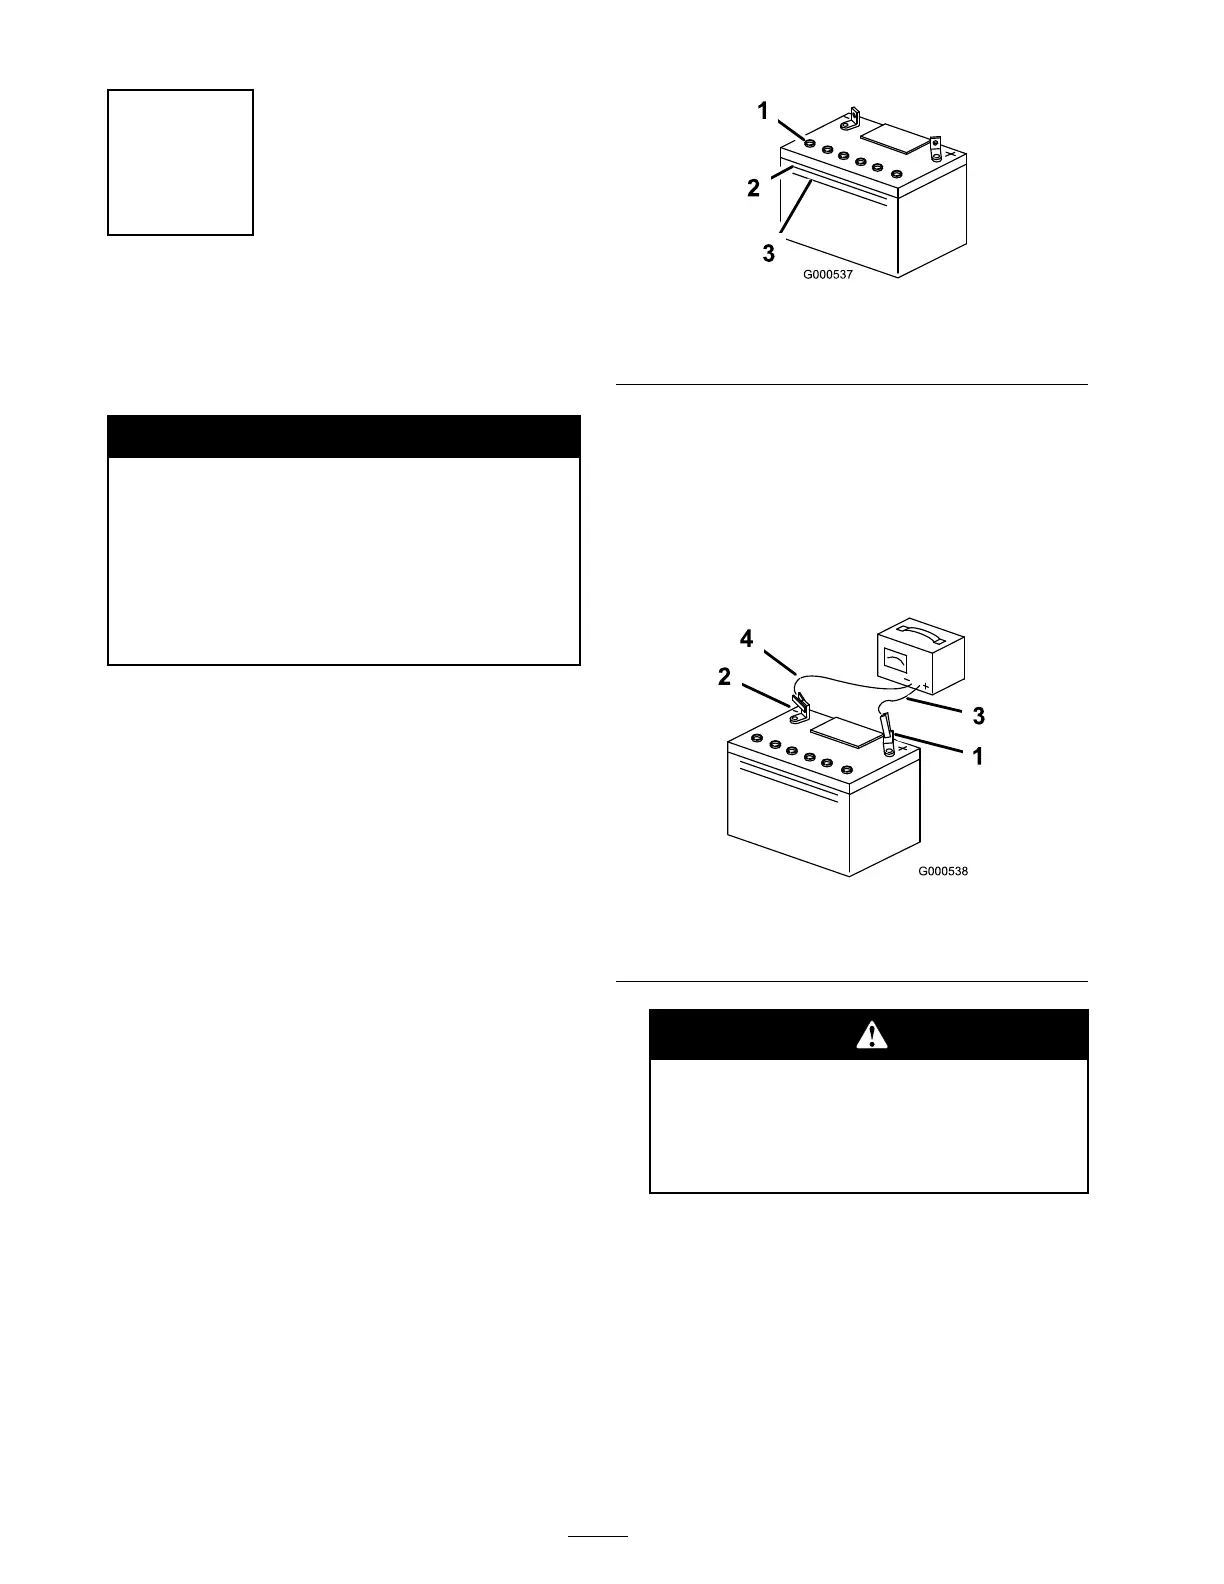
Figure 1
1. Vent caps
3. Lower line
2. Upper line
4. W ait fiv e to ten min utes after filling the
batter y cells . Add electrolyte , if necessar y , until
the electrolyte lev el is up to the Upper line
( Figure 1 ) on the batter y case .
5. Install the batter y v ent caps .
6. Connect the c harg er leads to the cor responding
batter y posts as sho wn in Figure 2 .
Figure 2
1. Positive Battery Post
3. Red (+) Charger Lead
2. Negative Battery Post
4. Black (-) Charger Lead
Charging the batter y pr oduces gasses
that can explode.
Nev er smok e near the batter y and k eep
spar ks and flames a w ay fr om batter y .
7. Charg e the batter y for 10 to 15 min utes at
25 to 30 amps or 30 min utes at 4 to 6 amps
( Figure 2 ). Do not o v erc harg e the batter y .
8. W hen finished, unplug the c harg er from the
electrical outlet, then disconnect the c harg er
leads from the batter y posts ( Figure 2 ).
Note: Do not r un the mac hine with the
batter y disconnected, electrical damag e ma y
occur .
2

 Loading...