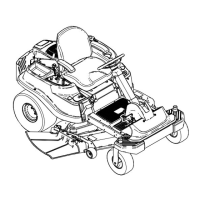
3. Secure the seat to the seat suppor t with the
spacers , flat w ashers (5/16 inc h) and knobs
( Figure 6 ).
Figure 6
1. Seat
4. Washers (5/16 inch)
2. Seat support 5. Spacer
3. Knob
Important: Mak e sur e the spacer s
ar e betw een the seat and suppor t, and
the knobs pass thr ough the w asher s,
seat suppor t, spacer s and into the seat
( Figur e 6 ).
4. Connect the seat switc h har ness to the seat
switc h in the base of the seat as sho wn in
Figure 7 .
Figure 7
1. Seat
3. Switch harness
2. Seat switch
5. Lo w er the seat and adjust it if necessar y; refer
to P ositioning the Seat in the mo w er Operator’ s
Manual .
Step
4
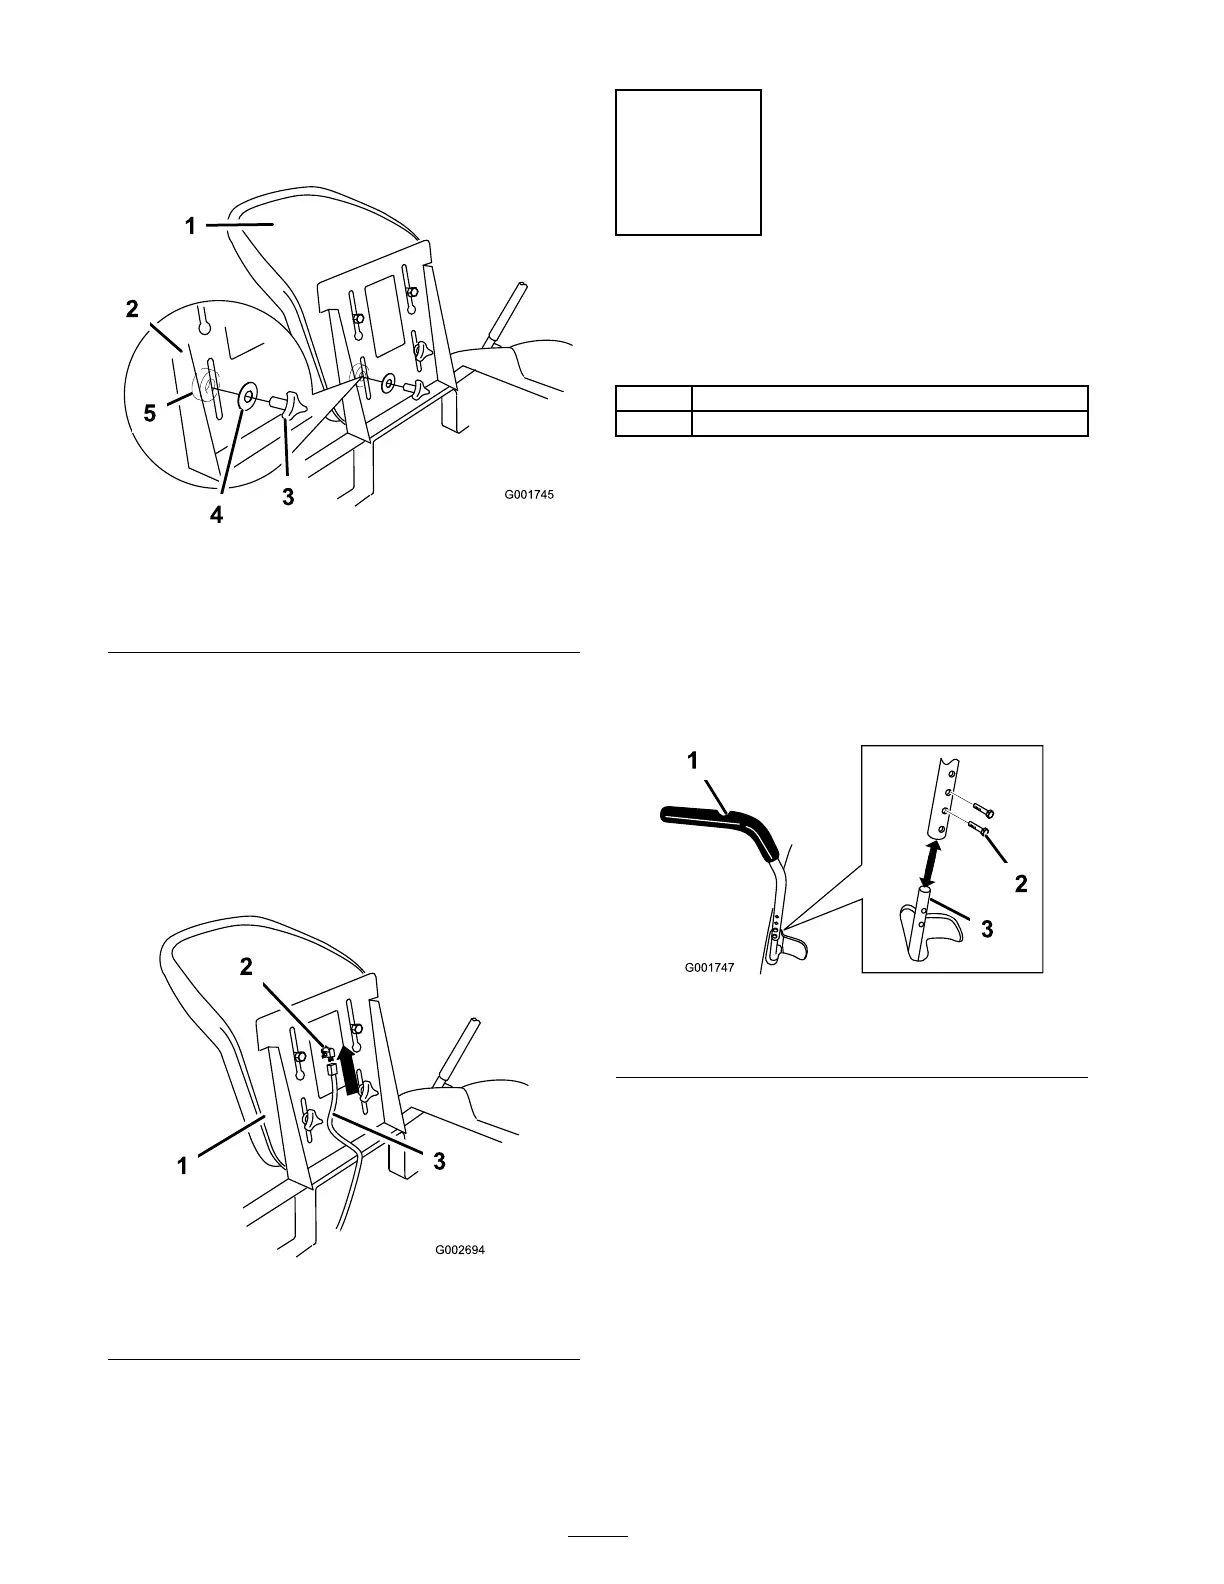
Installing the Motion
Control Levers
Parts needed for this step:
2
Control lever
4
Bolt (1/4 x 3/4 inch)
Procedure
1. R emo v e the motion control lev ers from the
mac hine .
2. P osition the control lev er to the desired height
and align with the holes in the control lev er
shaft ( Figure 8 ).
3. Install 2 bolts (1/4 x 3/4 inc h) into the control
lev er and shaft ( Figure 8 ).
Figure 8
1. Control lever
3.
2. Bolt
4. R e peat the installation for the opposite control
lev er .
5. Lo w er the seat and adjust if necessar y; refer to
P ositioning the Seat in the Operator’ s Manual .
4

 Loading...