Step
2
Connecting the Battery
Parts needed for this step:
2
Bolt (1/4 x 3/4 inch)
2
Washer
2
Nut (1/4 inch)
Procedure
1. Install the batter y in the mac hine and connect
the batter y cables using tw o bolts (1/4 x 3/4
inc h), tw o w ashers , and tw o n uts (1/4 inc h).
R oute the batter y cable from the positi v e
batter y post to the solenoid. Ensure the cable
is routed abo v e the crossbar and betw een the
seat suppor ts as sho wn in Figure 3 .
Figure 3
1. Battery cable 3. To solenoid
2. Plastic tie 4. Fuse block
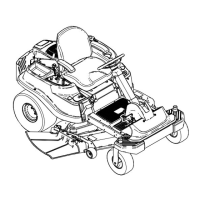
2. Connect the positi v e batter y cable to the
positi v e batter y post using the existing
fasteners .
Important: Connect the ca ble to the
positi v e post so that it extends parallel with
the top of the batter y , as sho wn in Figur e 4 ,
and v erify that it does not come in contact
with the seat pan.
Figure 4
Step
3
Installing the Seat
Parts needed for this step:
1
Seat
2 Spacers
2
Flat washers
2
Knobs
Procedure
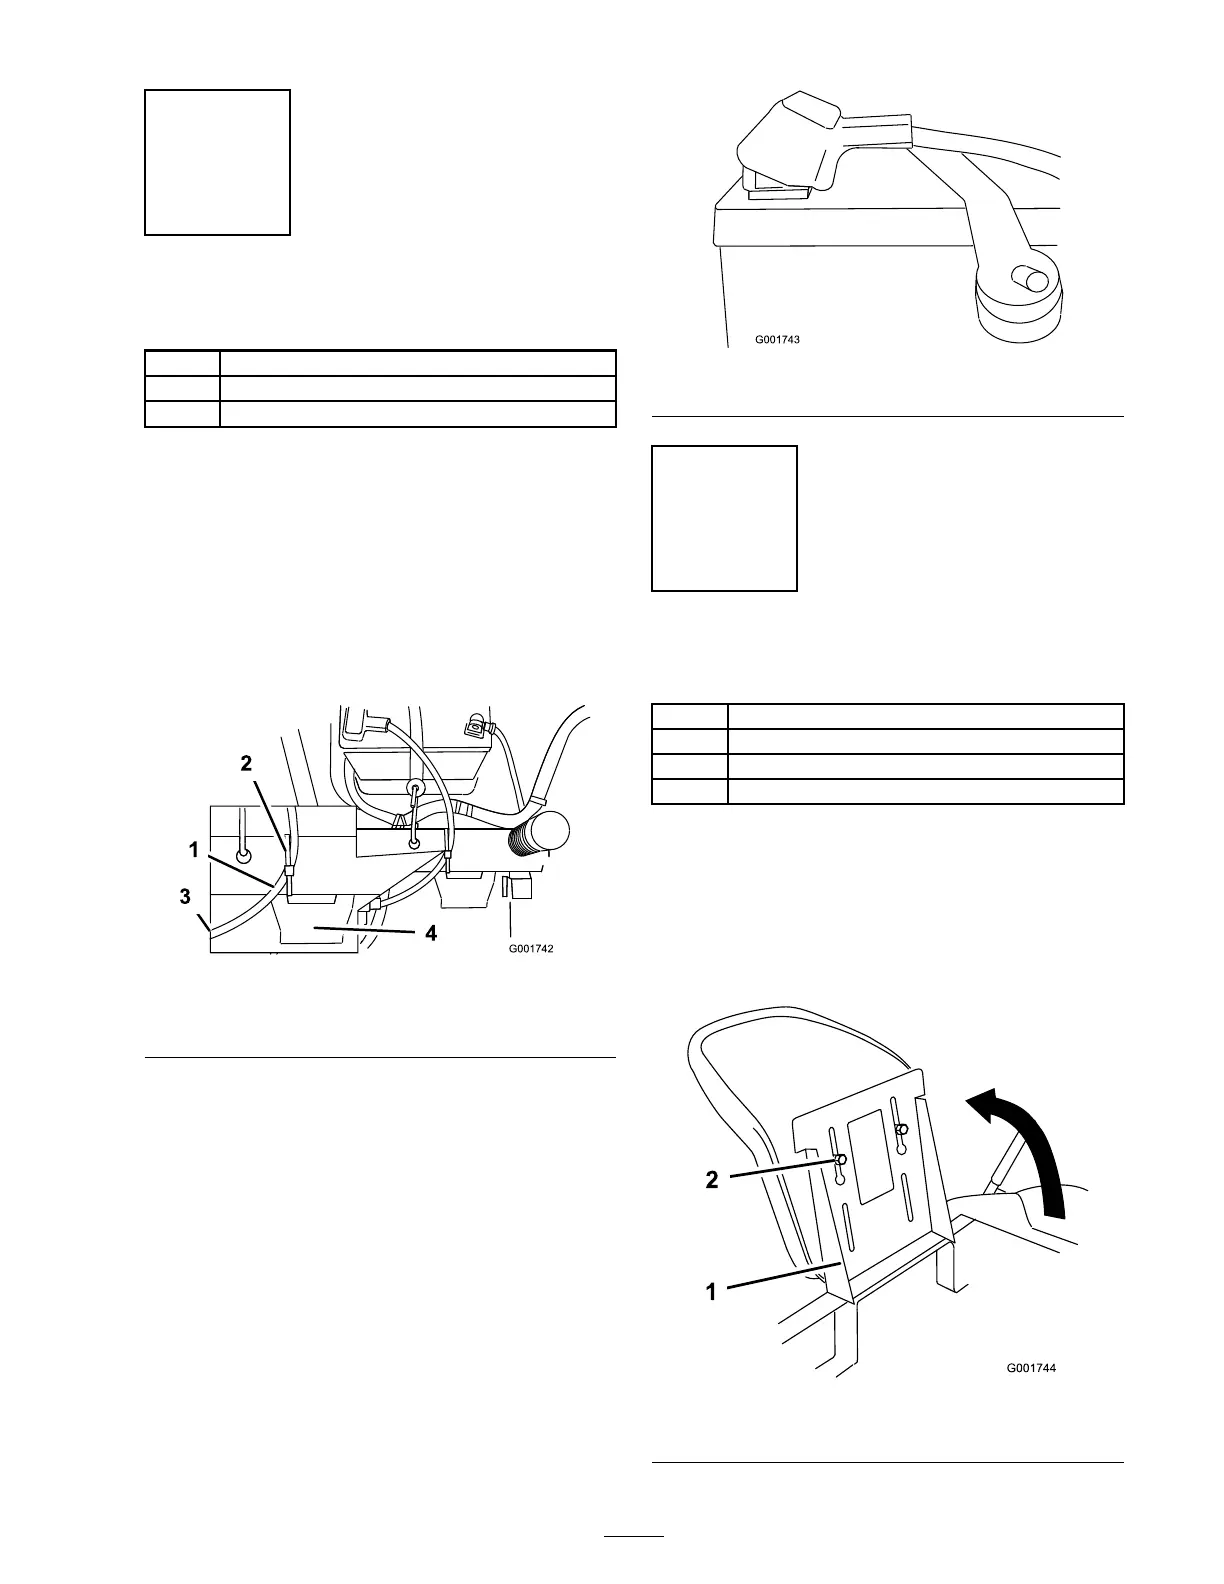
1. R emo v e the seat from the mac hine . Raise the
seat suppor t on the mac hine ( Figure 5 ).
2. Slide the shoulder bolts on the bottom of the
seat into the slots in the seat suppor t ( Figure 5 ).
Figure 5
1. Seat support
2. Shoulder bolt
3

 Loading...