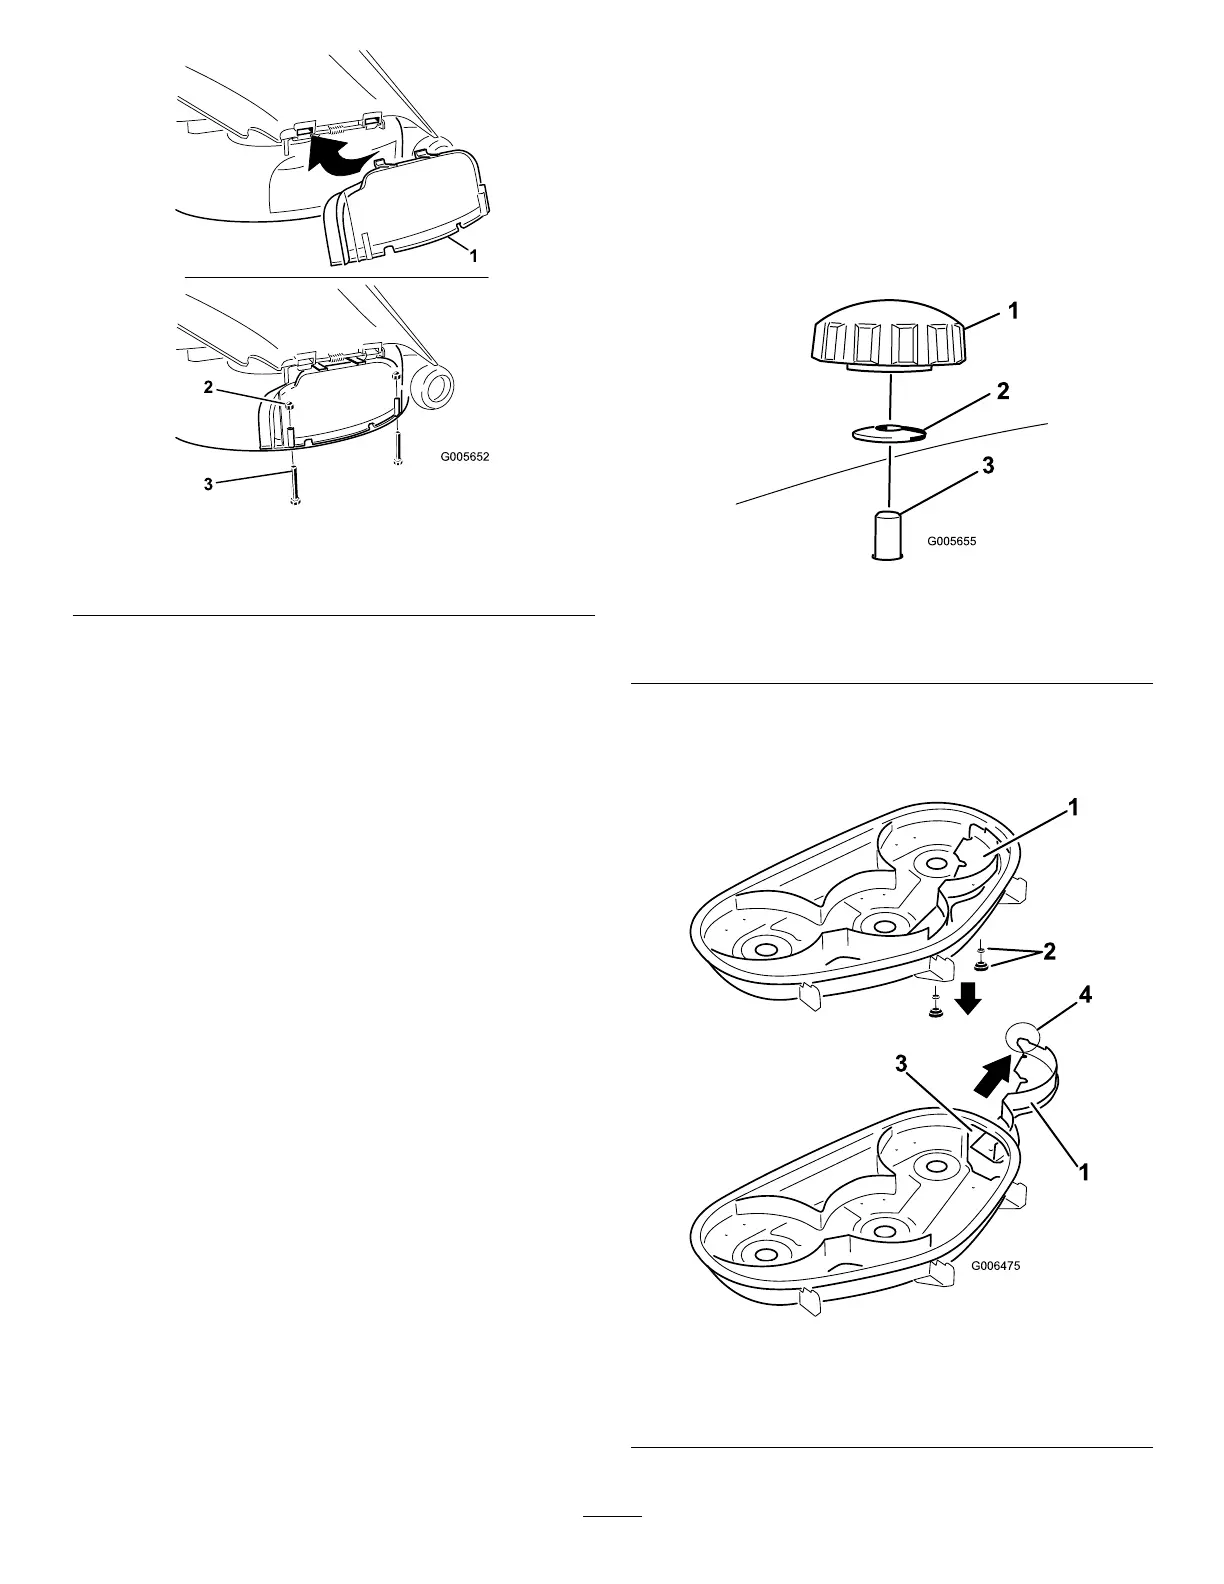
Figure23
1.Dischargecover
3.Bolt(1/4x2-1/2inches)
2.Capnut(1/4inch)
4.Securethedischargecovertothelowerlipofthe
mowerwithtwobolts(1/4x2-1/2inches)andtwo
capnuts(1/4inch)asshowninFigure23.
Note:Donotovertightenthenuts;thiscould
distortthecoverandcausebladecontact.
ConvertingtoSideDischarge
(ForModelswith50Inch
Decks)
Themowerdeckandmowerbladesshippedwith
thismachineweredesignedforoptimummulching
performance.Sidedischargeperformancecanbe
improvedbyreplacingthemulchingbladeswith
standardcuttingbladesobtainedfromyourlocal
authorizedTorodealer.Tomaintainoptimummulching
performance,alwaysinstallthemulchingbladesthatare
shippedwiththisunitwhenchangingbacktomulching
operation.
RemovingtheRightBafeforSide
Discharge
Note:Ifthebaggerattachmentisaddedtothe
machine,standardbladesmustbeinstalledforproper
baggingfunction.ContactyourlocalauthorizedToro
dealerfortheproperpartnumber.
1.Parkthemachineonalevelsurfaceanddisengage
thebladecontrolswitch.
2.Movethemotioncontrolleversoutwardtopark
position,stoptheengine,removethekey,andwait
forallmovingpartstostopbeforeleavingthe
operatingposition.
3.Removetherightmowerblade.RefertotheMower
Maintenancesection.
4.Removethe2knobsandcurvedwashersthatsecure
therightbafetothemowerasshowninFigure24.
Figure24
1.Knob
3.Bafestudcomingthrough
themower
2.Curvedwasher
5.Removetherightbafeandlowerthegrass
deectoroverthedischargeopeningasshownin
Figure25andFigure24.
Figure25
1.Rightbafe
3.Dischargeopening
2.Curvedwasherandknob4.Tab(mustremainoutside
ofthemower)
23

 Loading...