g351363
Figure86
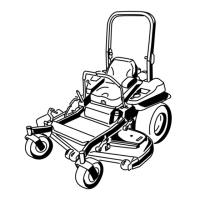
1.Upperpivotpointbushing3.Deckpinassembly
2.Lowerpivotpointbolt4.Bushing
15.ApplyathinbeadofLoctite
®
680totheentire
circumferenceoftherearedgeofthenew
bushings.
16.Insertandgentlytapthenewbushingsintothe
openingandproperlyseatthemintoplace.
17.Placeablockofwoodundertheinsideedgeof
thecenterdecktomakeiteasiertoworkonthe
lowerpivotpointbushings.
18.Removeandretainthelowerpivotpointbolts
(Figure83andFigure86).
19.Removeanddiscardtheangedbushingfrom
thefrontandrearofthewingdeckandclean
thebore.
20.ApplyathinbeadofLoctite
®
680totheentire
circumferenceoftherearedgeofthenew
bushings.
21.Insertandgentlytapthenewbushingsintothe
openingandproperlyseatthemintoplace.
22.Installthelowerdeckpinassembliesandbolts
intothelowerdeckpivotpointsandhand-tighten.
23.Toeaseinstallingthewingdecksections,
carefullyremovetheexposedendofthespring
thatappliespressuretotherearofthewing
deckcover(Figure87).
g351417
Figure87
1.Spring
24.Pushtheleftwingdeckbacktothecenterdeck.
Alignandinstalltheupperpivotdeckpinsinthe
frontandrearofthedeckandsecureitusingthe
previouslyremovedbolts(Figure85).
25.Alignthelift-cylinderarmandinstallthe
previouslyremovedpinandensurethatthe
lockingtabalignswiththeassociatedopening
inthemount.
Installthelockingcotterpintosecure.
26.Attachthespringthatwasremovedinstep23
thatappliespressuretotherearofthewing
deckcover.
27.Installthewingdeckbelts.
28.Installthewingdeckbeltshieldsandsecure
themusingthelynchpins.
29.RaisethewingdeckstotheTRANSPORTposition
andsecurethemusingtheclevispinsand
hairpincotters.
30.Installtheheight-of-cutpin.
72

 Loading...