EasyManua.ls Logo

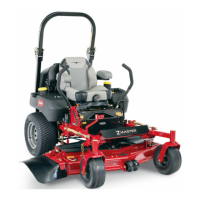
Toro Z MASTER Z100 series User Manual

Toro Z MASTER Z100 series
12 pages
To Next Page IconTo Next Page
Page #1 background imageLoading...
Page #1 background image
2003—The Toro Company
8111 Lyndale Ave., Blomington, MN 55420, USA
Printed in the USA
All Rights Reserved
Original Instructions (EN)
Register your product at www.Toro.com
Z100 Series Z Master
Mowers
Form No. 3329-965
Setup Instructions
Loose Parts
Use steps 1 trough 12 in the following chart to verify all parts have been shipped and as a guide through the
setup.
Step Description Qty. Use
1
No parts needed Raising the machine up
2
Roll bar, right section
Roll bar, left section
Roll bar, center section
Bolt, 3/8 x 1 inch
Curved washer, 3/8 inch
Flange nut, 3/8 inch
Bolt, 1/2 x 3-1/4 inches
Flange nut, 1/2 inch
Lanyard
1
1
1
8
8
8
2
2
2
Installing the roll over protection system
(ROPS)
3
Wheels 2 Installing the drive wheels
4
No parts needed Checking the tire pressure
5
Seat
Nuts (installed on the seat)
1
4
Installing the seat
6
Control lever–right
Control lever–left
Bolt, 3/8 x 1 inch
Curved washer, 3/8 inch
1
1
4
4
Installing the motion control levers
7
Bulk electrolyte with 1.265 specific gravity
(Purchase from a battery supply outlet.)
80
ounces
Activating the battery
8
Air cleaner cap
Hose clamp
1
1
Installing the air cleaner cap
9
Number 2 general purpose lithium base or
molybdenum base grease. (Purchase
separately.)
1 tube Greasing the bearings
10
No parts needed Preparing the side discharge chute
Question and Answer IconNeed help?

Do you have a question about the Toro Z MASTER Z100 series and is the answer not in the manual?

Toro Z MASTER Z100 series Specifications

General IconGeneral
BrandToro
ModelZ MASTER Z100 series
CategoryLawn Mower
LanguageEnglish

Summary

Loose Parts Setup

Raising the Machine Up

Procedure for safely raising the tractor and supporting it with jack-stands.

Installing the Roll Over Protection System (ROPS)

Instructions for assembling and securing the Roll Over Protection System (ROPS).

Installing the Drive Wheels

Procedure for mounting and tightening the rear drive wheels to the machine.

Checking the Tire Pressure

Guidance on verifying the correct air pressure for the front and rear tires.

Installing the Seat

Steps to correctly attach the seat to the tractor frame.

Installing the Motion Control Levers

Procedure for attaching and adjusting the motion control levers for operation.

Activating the Battery

Detailed instructions for safely filling and preparing the battery with electrolyte.

Installing the Air Cleaner Cap

Process for attaching the air cleaner cap and securing it with a hose clamp.

Checking the Spindles for Grease

Procedure for greasing the spindle bearings on the cutting unit.

Preparing the Side Discharge Chute

Instructions for removing the tie and positioning the side discharge chute.

Checking the Machine Before Delivery

Pre-delivery inspection checklist for ensuring machine readiness and safety.

Delivering the Machine to the Customer

Final delivery process, including customer orientation and documentation.

Related product manuals