+
CL
buttons for 4 seconds or more.
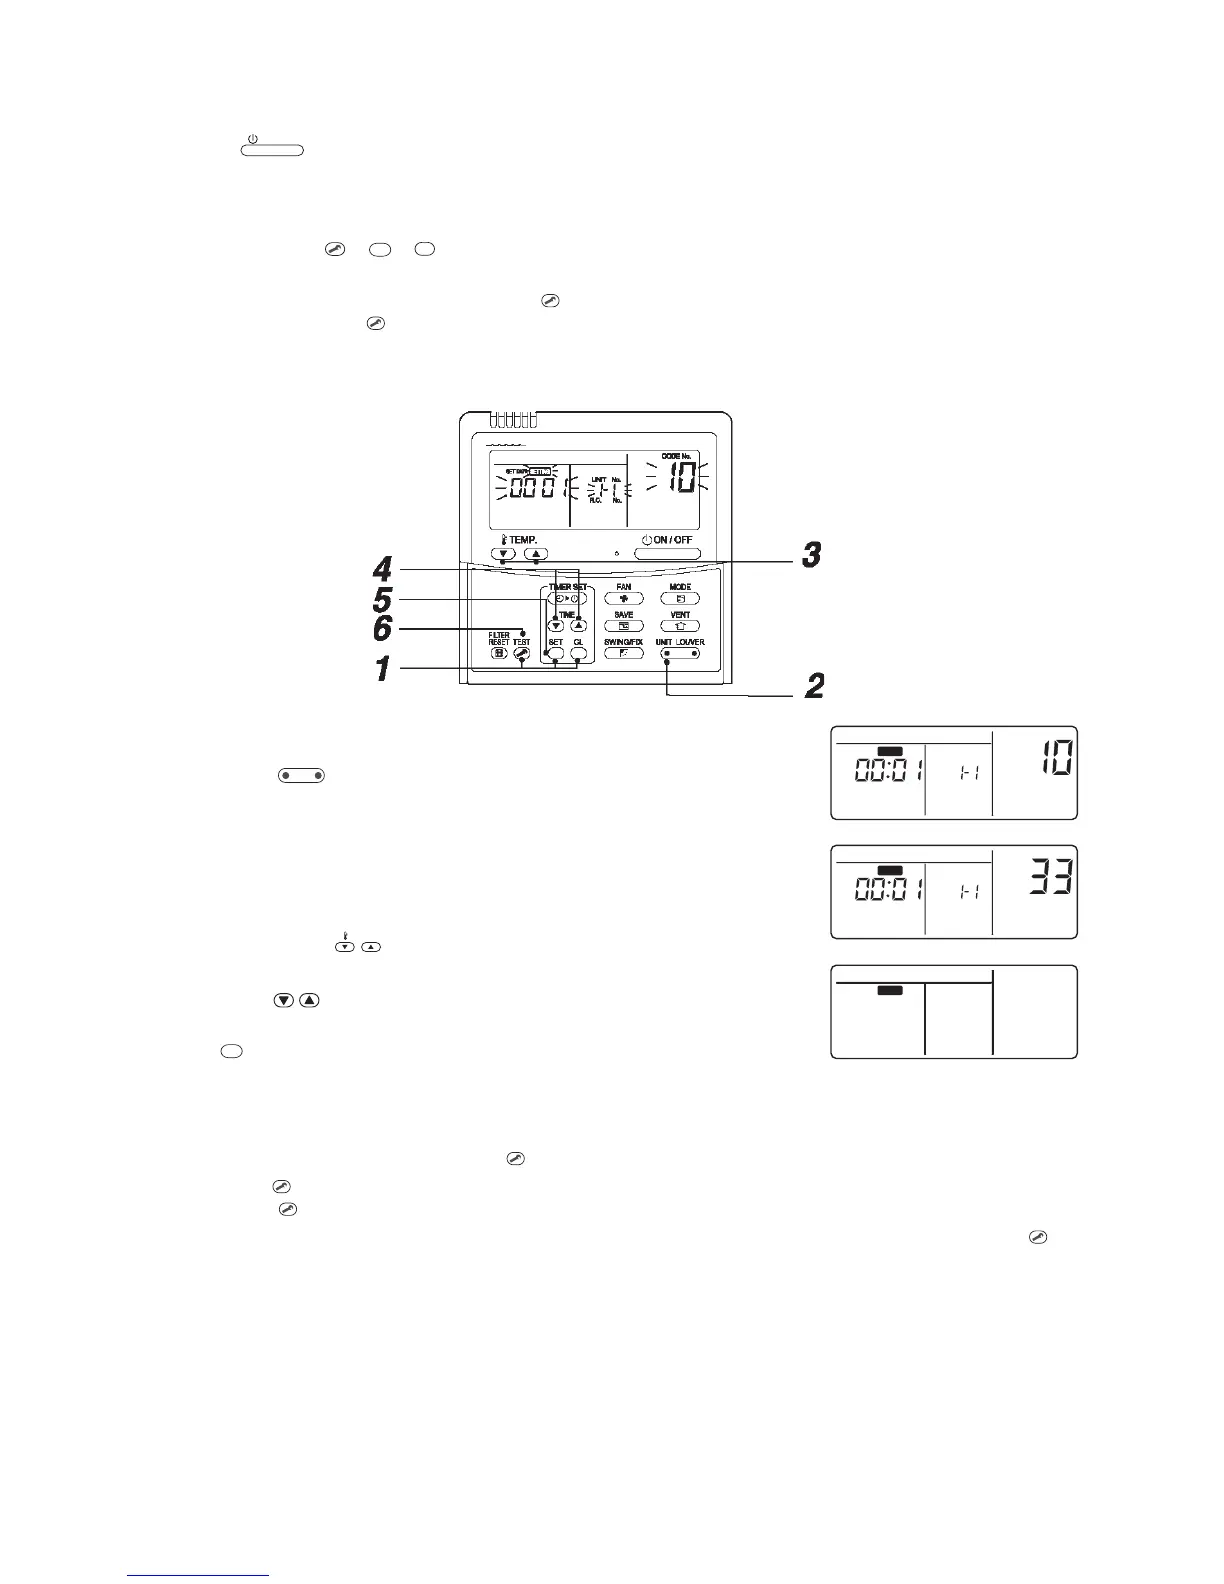
After a while, the display part flashes as shown right. Check the displayed CODE No. is [10].
• When the CODE No. is other than [10], push
TEST
button to erase the display and repeat procedure from the
first step. (After pushing
TEST
button, operation of the remote controller is not accepted for approx. 1 minute.)
(For a group control, No. of the firstly displayed indoor unit becomes the header unit.)
Procedure 2
Every pushing
UNIT LOUVER
UNIT button, the indoor unit No. in the group control
is displayed in order. Select the indoor unit of which setup is changed.
In this time, the position of the indoor unit of which setup is changed can be
confirmed because fan and louver of the selected indoor unit operate.
Procedure 3
1. Using temp. setup
TEMP.
buttons, specify CODE No. [ 33 ].
(CODE No. [ 33 ]: Fahrenheit display)
2. Using timer
TIME
buttons, change the line address from [0001 ] to
[0000 .]
3. Push
button. In this time, the setup finishes when the display
changes from flashing to lighting.
Procedure 4
After check of the changed contents, push
TEST
button. (Setup is determined.)
When pushing
TEST
button, the display disappears and the status becomes the usual stop status.
(When pushing
TEST
button the operation from the remote controller is not accepted for approx. 1 minute.)
• If the operation from the remote controller is not accepted even 1 minute or more passed after pushing
TEST
button, it is considered that the address setup is incorrect. In this case, the automatic address must be again
set up.
When changing the settings from Celsius to Fahrenheit indication, follow to the reverse order of the above
procedure.
CODE No.
UNIT
No.
R.C.
No.
SET DATA
SETTING
CODE No.
UNIT
No.
R.C.
No.
SET DATA
SETTING
SETTING
 Loading...