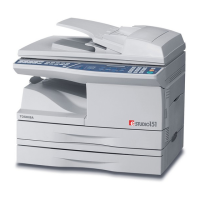
Do you have a question about the Toshiba e-studio 151 and is the answer not in the manual?
Guidelines for safe transportation and installation of the copier, including weight and handling precautions.
Safety precautions and procedures for servicing the machine, emphasizing electrical and mechanical hazards.
Highlights critical safety components like breakers, fuses, and thermistors that require proper handling.
Important notes regarding servicing and handling to prevent errors and ensure safety.
Provides fundamental technical specifications of the copier, including type, system, and weight.
Provides a step-by-step guide for safely and correctly replacing the toner cartridge.
Provides guidelines for correct copier installation, including environmental and space requirements.
Offers essential cautions for handling the copier to maintain its performance and avoid damage.
Provides a step-by-step guide for installing the developer unit into the copier.
Details the process for correctly installing the toner cartridge to ensure proper toner distribution.
Provides detailed instructions for installing the software using standard or custom methods.
Outlines the list of parts and procedure for drum replacement in the high voltage section.
Provides specific steps for disassembling the transfer charger unit.
Reverses the disassembly procedure for assembling components.
Guides on replacing the charger wire, including important precautions.
Details adjustments for copy magnification ratio in main and sub scanning directions.
Covers lead edge, image loss, and center offset adjustments for image positioning.
Explains how to adjust copy density timing and provides notes for the process.
Details procedures for adjusting main charger grid bias and checking DV bias.
Provides procedures for adjusting paper reverse position and trailing edge void in duplex mode.
Guides on automatic ADF scan position adjustment and manual adjustment.
Explains RADF sub scanning magnification ratio adjustment for ADF/RADF documents.
Explains the key sequence to enter the serviceman test command mode.
Provides a comprehensive list of test commands with their main and sub codes.
Lists and details potential trouble codes, including their causes and remedies.
Presents detailed circuit diagrams for the MCU PWB, including CPU and ASIC sections.
Provides step-by-step instructions for downloading firmware to the machine from a PC.
Guides on installing firmware using the USB integration maintenance program on Windows.

