e-STUDIO162/162D/151/151D DISASSEMBLY AND ASSEMBLY 8 - 17
7. Rear frame section
A. List
B. Disassembly procedure
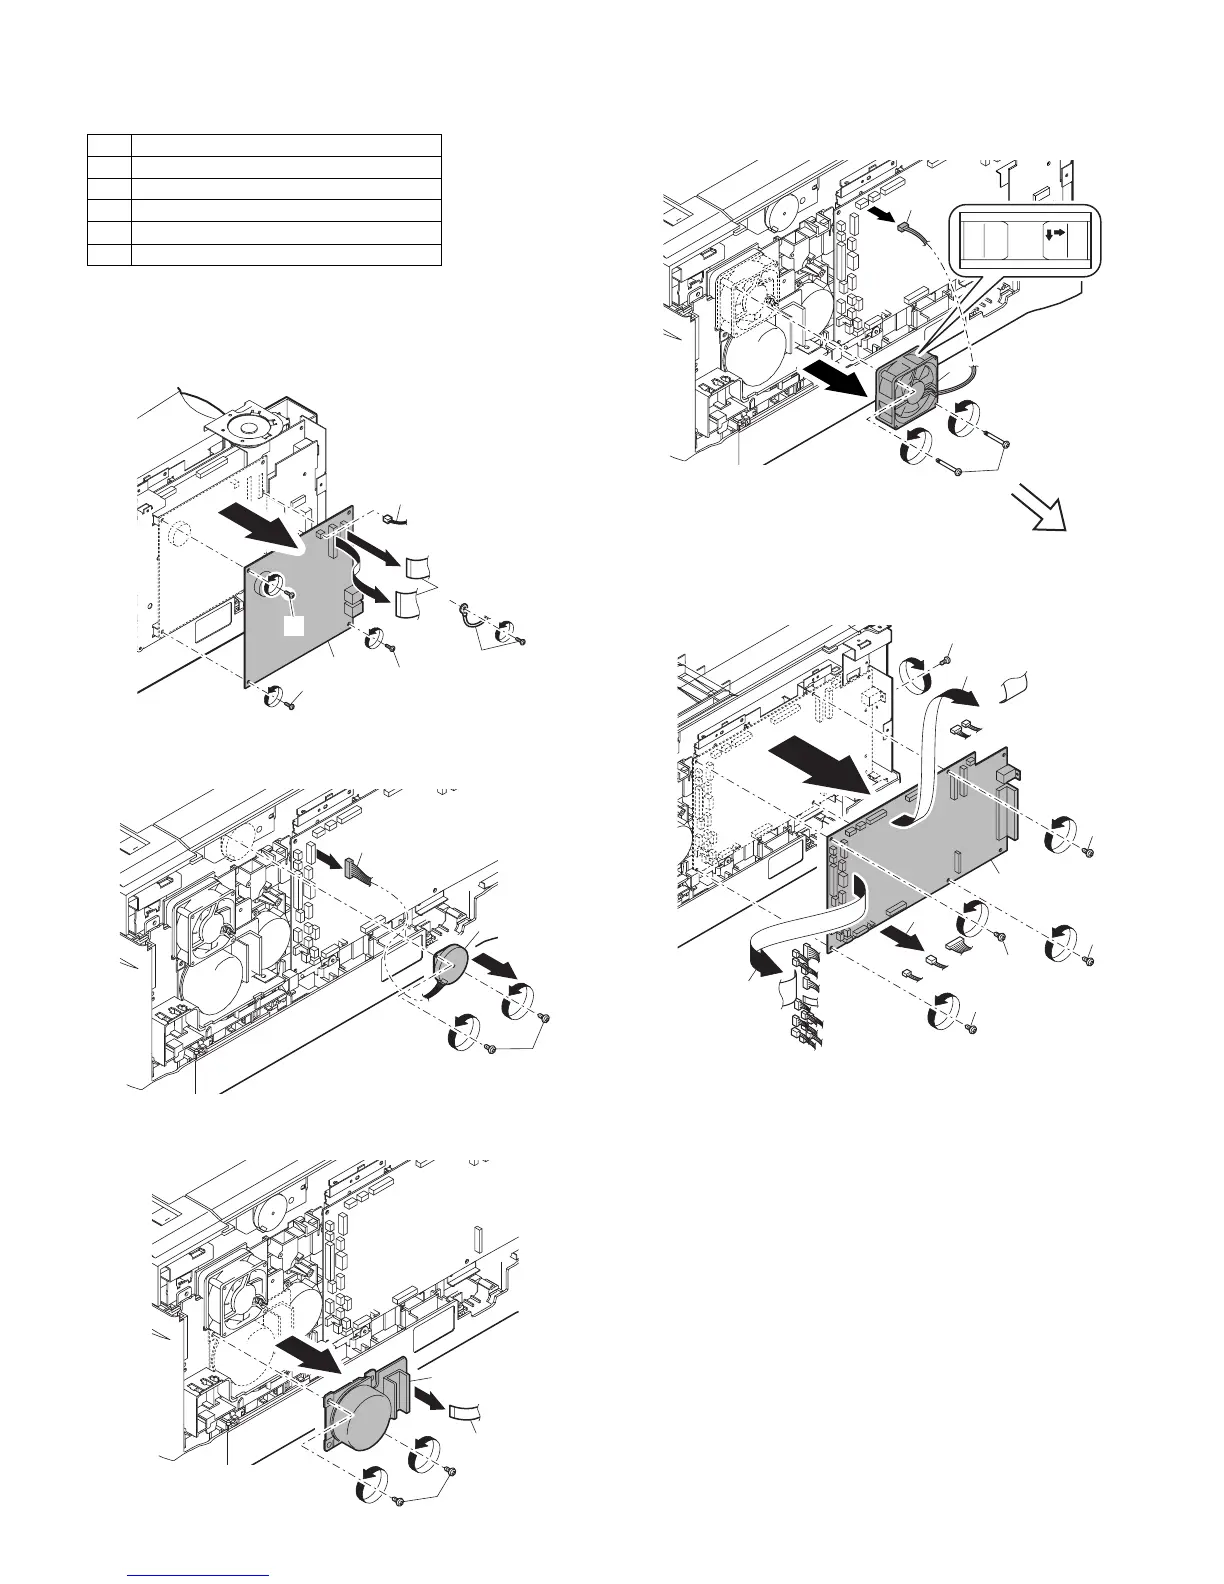
1) Remove the rear cabinet.
2) Remove the connector, the flat cable, and the grounding wire.
3) Remove three screws, and remove the FAX PWB.
4) Disconnect the connector.
5) Remove two screws, and remove the scanner motor.
6) Remove two screws and one harness, and remove the main
motor.
7) Remove two screws and one connector, and remove the exhaust
fan motor.
Note: Be careful of the installing directions of the fan.
Attach it so that the blowing direction faces outside.
8) Disconnect the connectors.
9) Remove the five screws, and remove the MCU PWB.
C. Assembly procedure
For assembly, reverse the disassembly procedure.
No. Part name Ref.
1 FAX PWB (When the GD-1190 installed)
2 Mirror motor
3 Main motor
4 Exhaust fan motor
5 Main PWB
2)
2)
1)
1)
3)
2)
2)
1)
3)
2)
1)
2)
3)
1)
2)
3)
Blowing direction
1)
1)
1)
2)
3)
2)
2)
2)
2)
e-STUDIO162_151.book 17 ページ 2004年12月2日 木曜日 午後9時37分
 Loading...