Do you have a question about the Toshiba E-Studio 2007 and is the answer not in the manual?
Indicates when the toner cartridge needs replacement for continued operation.
Guides users through resolving paper jams in various locations like the side cover, bypass tray, RADF, and PFU.
Illustrates and labels the various physical components of the digital system for identification.
Details the buttons and functions available on the equipment's control panel for operation.
Instructions for loading paper into the drawer and bypass tray, including size settings.
Steps for installing drivers and physically connecting the equipment to a computer.
Instructions for using the provided installation DVD and running the setup executable.
Explains the basic steps for using the copier function, including making copies.
Details how to print documents from a computer application to the equipment.
Instructions for using the scanning functions, including saving to USB memory and TWAIN scanning.
Provides guidance on sending faxes and managing the address book for communication.
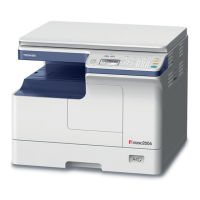
This document serves as a Quick Guide for the TOSHIBA e-STUDIO2007/2507/2507i Multifunctional Digital Systems, providing essential information on its components, basic operations, and troubleshooting. Before using the equipment, users are advised to consult the Safety Information printouts. A more comprehensive User's Guide (PDF file) is available on the bundled DVD.
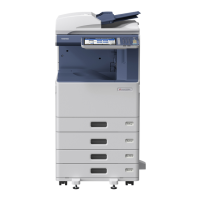
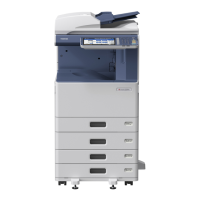
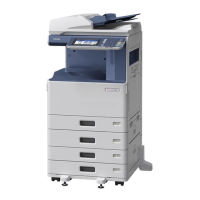
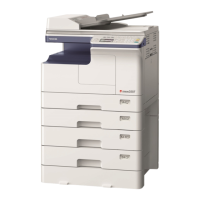
The device features a comprehensive set of components designed for various office tasks. On the top, it includes a Reversing Automatic Document Feeder (RADF) for efficient scanning of multi-page documents, a Platen sheet, and Original glass for scanning single pages or delicate items. A Platen Cover is also present, which may be optional depending on the model. The Control panel, located on the front, serves as the primary interface for operating the device.
For paper handling, the device is equipped with a Bypass tray for special media, and an Automatic Duplexing Unit for two-sided printing, which is standard for the e-STUDIO2507i model. The internal components include a Toner cartridge, accessible via the Front cover, and a Drawer for paper storage. Additional paper capacity can be added with optional units such as the Paper Feed Unit (PFU), Paper Feed Pedestal, and Drawer Module.
Connectivity options are robust, featuring a USB port, an AC-IN terminal (rear) for power, a FAX port (optional), a Network interface connector for network integration, and a USB terminal (4-pin). The device also has a Receiving tray for output, a Scanning area, and an Original scale to guide document placement.
The Control panel is a central hub for all operations. It features a variety of buttons and an LCD screen. Key functions include RESOLUTION, PAUSE, MULTI., and ADDRESS BOOK. Dedicated buttons for One Touch, COPY, SCAN, and FAX streamline common tasks. USER FUNCTIONS, JOB STATUS, SETTINGS, and TEMPLATE buttons provide access to advanced features and device configurations. For power management, an ENERGY SAVER button is available. Other essential buttons include FUNCTION CLEAR, DRAWER, DATA, Alert lamp, CANCEL, OK, Digital keys for numerical input, START to initiate operations, and CLEAR/STOP to halt current tasks or clear settings.
Drawer: To load paper into the drawer, pull it out, fan the paper, and then load it with the print side facing down. Adjust the paper guides to fit the paper size. When the drawer is reinserted, a pop-up window will appear on the LCD screen, prompting the user to set the paper size. This "POP UP" function can be enabled or disabled in the settings.
Bypass Tray: For the bypass tray, pull out the extension tray and adjust the paper guides to the width of the paper. Load the paper with the print side facing up.
Installing the necessary drivers is crucial for connecting the device to a computer. This process requires administrator authority on the computer. The installer supports Windows 7, Windows 8, Windows Server 2008 R2, and Windows Server 2012. Before installation, ensure all running applications are closed. If the installer does not start automatically from the DVD, double-click "Setup.exe."
Connecting Computer: Before installing drivers, connect the equipment to the computer using either a USB cable or a Network interface cable. For USB connection, ensure the equipment is turned off before inserting the DVD.
Using Installer: After inserting the DVD, double-click "Setup.exe" and follow the on-screen instructions to complete the installation.
Placing Originals: Originals can be placed on the Original glass for single pages or delicate items, or in the RADF for multi-page documents. For the Original glass, align the document with the guides. For the RADF, fan the documents and place them face up in the feeder.
Making Copies: After placing the original(s), press the [COPY] button on the control panel. Adjust copy settings as needed (e.g., number of copies, exposure, original mode). Use the digital keys to enter the desired number of copies, then press [START]. To stop copying, press [CLEAR/STOP]. To reset all settings and the LCD screen, press [FUNCTION CLEAR]. Shortcut keys are available for "ORIGINAL MODE" and "EXPOSURE" settings.
To print a document, select [Print] from the application's [File] menu on your computer. Choose your TOSHIBA printer from the list and click [Preferences] to adjust print options. After making the desired settings, click [OK] and then [Print] ([OK]) to send the job to the device.
Scan to USB Memory: Place the original(s) on the device. Press [SCAN] on the control panel. Connect a USB storage device to the equipment and wait a few seconds for it to be recognized. Use the navigation buttons (or A) to select "USB" and press [OK]. Adjust scan settings as required, then press [START] to scan your documents to the USB device.
TWAIN Scan: Place the original(s). Launch a TWAIN-compliant application on your computer. Select the device from the application's [File] menu and choose the scan option. Make the scan settings within the application, then click [Scan].
Connecting Cables: Connect a telephone line to the "Line" port and an external telephone to the "TEL" port on the device.
Sending a Fax: Place the original(s) on the device. Press [FAX] on the control panel. Configure transmission conditions (e.g., resolution, send time). Specify the destination using the digital keys or address book, then press [START].
Registering an Address Book: Press [USER FUNCTIONS] on the control panel. Select "ADDRESS BOOK" then "PHONE BOOK." Make settings for "SPEED DIAL," "GROUP DIAL," and "ONE TOUCH" entries, then press [OK] to save.
The Quick Guide also provides basic troubleshooting steps for common issues.
Toner Empty: When the toner is empty, the device will display a message. To resolve this, open the front cover, remove the empty toner cartridge, and insert a new one. Close the front cover securely.
Paper Misfeed: If a paper misfeed occurs, the device will indicate the location of the jam (e.g., E130, "OPEN SIDE COVER").
Always ensure that paper is loaded correctly and that paper guides are adjusted to prevent misfeeds. Follow the on-screen instructions or indicators to locate and clear paper jams safely.
| Print Speed (Black/A4) | 20 ppm |
|---|---|
| Copy Resolution | 600 x 600 dpi |
| Scan Resolution | 600 x 600 dpi |
| Max Paper Size | A3 |
| Zoom | 25-400% |
| Functions | Print, Copy, Scan |
| Fax Transmission Speed | 33.6 kbps |
| Paper Capacity | 250 sheets |
| Paper Size | A3, A4, A5, B4, B5 |
| Connectivity | USB, Ethernet |
| Operating System Compatibility | Windows |