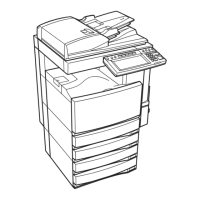
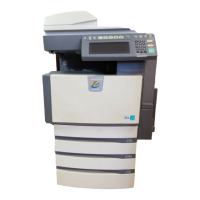
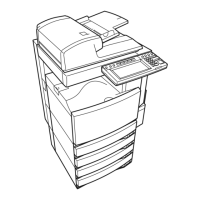
Do you have a question about the Toshiba e-studio 3540c and is the answer not in the manual?
Important notes regarding servicing procedures and default values.
Adjusts image density for darker and sharper output, correcting light and blurred images.
Adjusts developer bias to control toner amount for darker or lighter solid colored areas.
Adjusts developer bias to control toner amount for darker or lighter solid colored areas.
Adjusts transfer roller bias and fuser temperature for optimal image quality on various paper types.
Adjusts image quality control intervals to maintain consistent image quality across different conditions.
Corrects color misalignment due to paper feeding and transfer belt speed differences.
Modifies target high density control values to customize image density for desired quality.
Improves text clarity and sharpness by adjusting image processing for light or blurred originals.
Adjusts copy density and sharpness intensity for clearer text and images in black mode.
Adjusts copy density and sharpness for text and printed images in full color mode.
Adjusts color balance to match scanned image color balance with that of the original.
Prevents unwanted color blending in gray areas for achromatic color reproduction.
Adjusts copy density and background for darker, sharper pale areas and improved highlight reproduction.
Decreases background density to eliminate it and improve contrast between background and text.
Prevents faint images seen through thin paper from being copied by adjusting background density.
Adjusts image processing (sharpness) to eliminate moiré patterns in photo or gradational images.
Increases sharpness intensity to obtain a sharper copy image for light or blurred originals.
Adjusts sharpness intensity to soften visible contours or edges in photo images.
Performs automatic calibration for each paper type to maintain steady color balance on thick paper.
Performs periodic calibration to maintain steady color balance for printer engine and Fiery controller.
Checks printed test charts or images and calibration history to determine calibration necessity.
Prints mixed media types using profiles corresponding to each media for consistent color.
Uses Color Editor to adjust CMYK simulation or output profiles for desired color balance.
Applies attached image file profiles instead of default GA-1211 profiles via printer driver settings.
Adjusts tone of gray areas using K toner or adjusts black tone for text/line arts.
Changes smoothing setting in printer driver to suppress jagged edges in low-resolution images.
Changes image quality settings on printer driver to suppress moiré or jaggy edges in photographs.
Adjusts sharpness level via printer driver or adjustment mode for desired image sharpness.
Adjusts sharpness level via printer driver's "Sharpness" setting for desired image sharpness.
Adjusts threshold value to clearly store B/W images as binary data in Auto Color mode.
Selects compression rate to reduce JPEG file size for scanned images stored in e-Filing.
Selects Printed Image mode to store color photos and minimize moiré occurrence.
Changes "Image Quality Type" to match stored image color balance with original monitor display.
Selects appropriate scan resolution or sharpness to minimize moiré when printing from e-Filing.
Prints images directly from e-Filing box to maintain image quality, avoiding PC download conversion.
Stores full-color images as RGB data in e-Filing box (Scan to Box) for monitor display/editing.
Selects printing image mode for optimal image processing when printing from e-Filing (Scan to Box).
Adjusts compression rate or scan resolution to reduce noise around text and edges.
Adjusts background density to eliminate it and achieve clear contrast between background and image.
Scans B/W originals in Gray scale mode for clearer black and white scanning and printing.
Selects compression rate to reduce JPEG file size for scanned images stored in e-Filing.
Adjusts sharpness intensity to sharply scan soft and blurred originals.
Adjusts black density to darken black and match original hue for scanned full-color images.
Adjusts gamma curve balance to change gradation for scanned images in Black or Gray scale modes.
Adds adjusted original mode options as "Custom" for specific original types.
Performs periodic calibration to maintain steady color balance for printer engine and Fiery controller.
Checks printed test charts or images and calibration history to determine calibration necessity.
Outlines calibration types and their order for printer engine and Fiery Controller (GA-1211).
Creates custom profiles and assigns calibration sets for specific media types like Thick 2/3/4 paper.
Displays Measurement vs. Target graphs to confirm tone characteristics and calibration satisfaction.
Prints mixed media types using profiles corresponding to each media for consistent color.
Uses Color Editor to adjust CMYK simulation or output profiles for desired color balance.
Applies attached image file profiles instead of default GA-1211 profiles via printer driver settings.
Adjusts tone of gray areas using K toner or adjusts black tone for text/line arts.
Selects options in Expert Color Settings to print gray areas using only K toner.
Changes smoothing setting in printer driver to suppress jagged edges in low-resolution images.
Changes image quality settings on printer driver to suppress moiré or jaggy edges in photographs.
Adjusts sharpness level via printer driver or adjustment mode for desired image sharpness.
Adjusts sharpness level via printer driver's "Sharpness" setting for desired image sharpness.
| Functions | Print, Copy, Scan, Fax |
|---|---|
| Print Speed (Black) | 35 ppm |
| Print Speed (Color) | 35 ppm |
| Print Resolution | 1200 x 1200 dpi |
| Standard Paper Capacity | 550 sheets |
| Duplex Printing | Yes |
| Copy Speed | 35 cpm |
| Copy Resolution | 600 x 600 dpi |
| Scan Resolution | 600 x 600 dpi |
| Fax Speed | 33.6 kbps |
| Connectivity | USB, Ethernet |
| Display | Touchscreen |
| Paper Size | Letter, Legal |
| Network Connectivity | Ethernet |


