3 SETTING OPTIONS
Setting up the N/W-Fax Driver Options 21
Setting up the N/W-Fax Driver Options
N/W-Fax driver options are the attributes to define the way a fax job is transmitted. For example, you can specify the
recipients, resolution, and paper size.
P.21 “Setting up the [Send] tab”
P.22 “Setting up the [Cover Sheet] tab”
P.23 “Setting up the [Sender Information] tab”
P.23 “Displaying the Version Information”
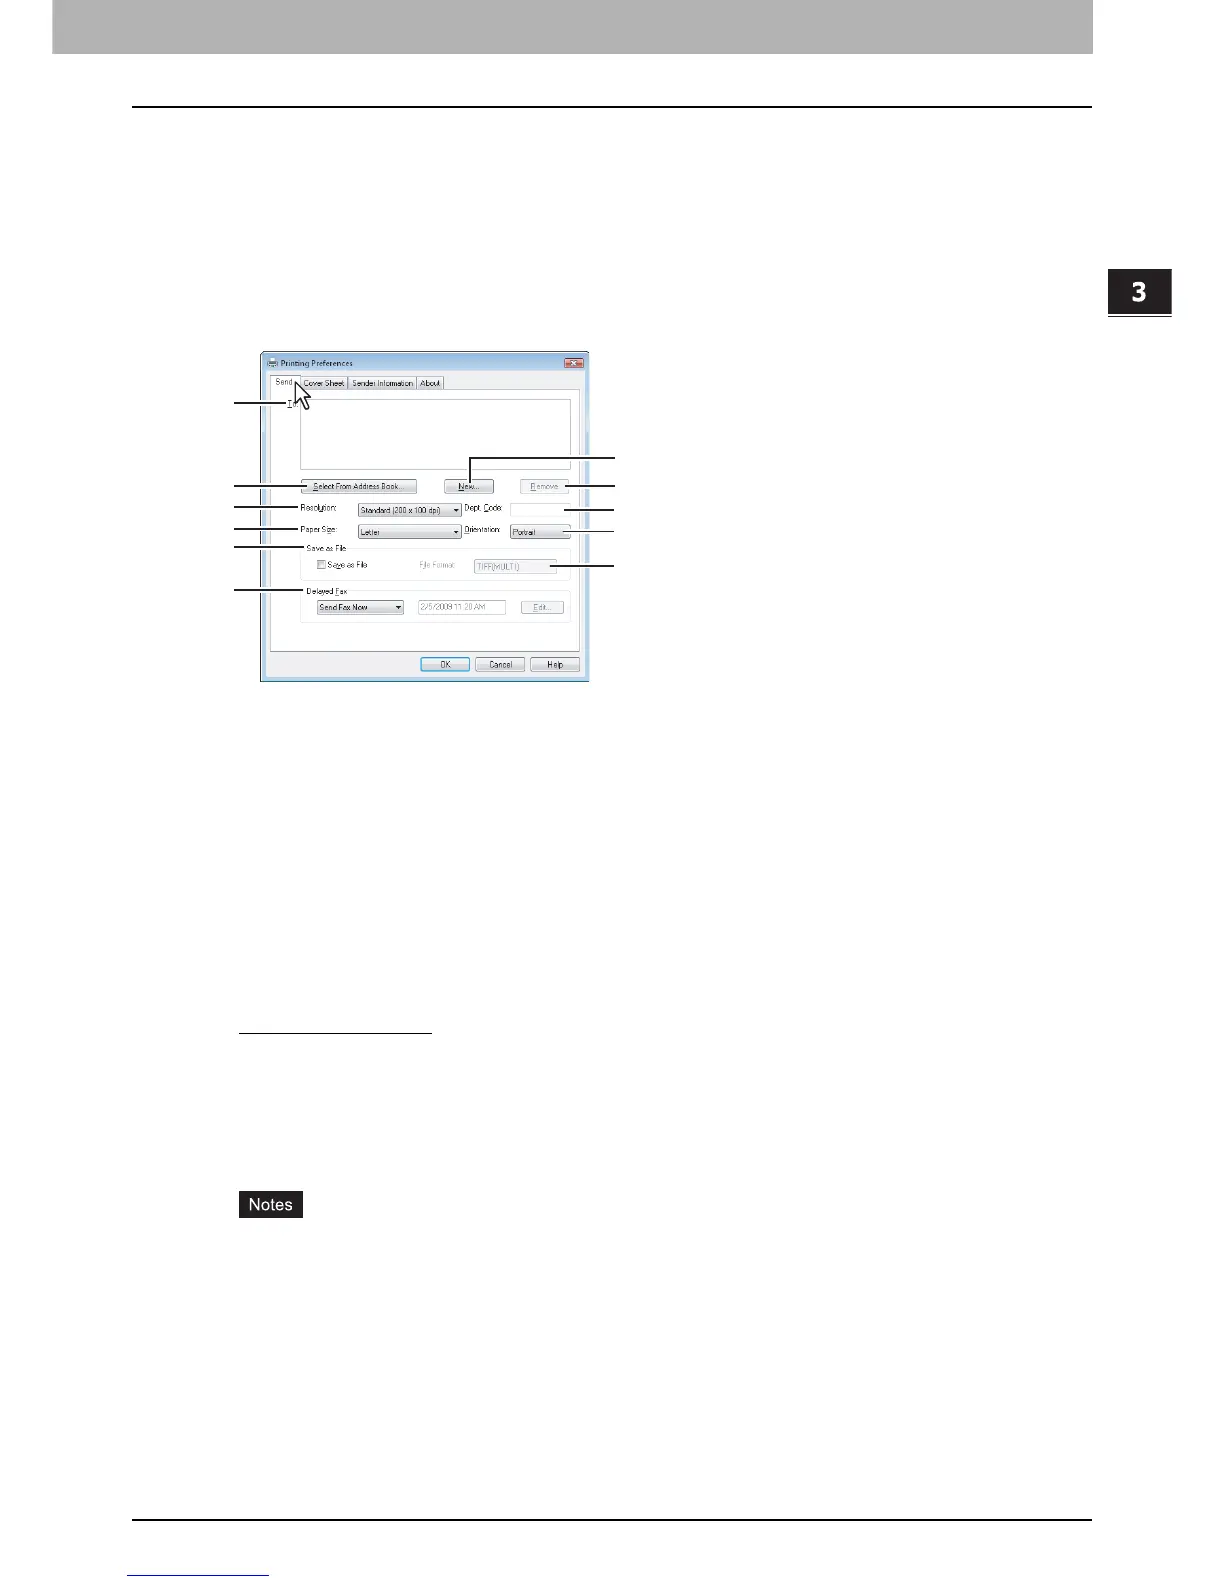
Setting up the [Send] tab
In the [Send] tab, you can specify the recipients and how the fax will be sent.
1) To
This displays the specified recipients list.
P.10 “Specifying Recipients”
2) [Select From Address Book]
Click to launch the AddressBook Viewer. You can select recipients from the address book.
P.11 “Selecting recipients from the address book”
3) [New]
Click to add new recipient by entering manually. The [Direct Dial] dialog box appears.
P.10 “Entering recipients from the keyboard”
4) [Remove]
Select a recipient in the [To] list and click this to remove the recipient from the list.
P.17 “Removing recipients”
5) Resolution
Select the resolution for the fax.
- Standard (200 x 100 dpi)
— Select this to send a document in Standard mode (200 x 100 dpi).
- Fine (200 x 200 dpi) — Select this to send a document in Fine mode (200 x 200 dpi).
- Super Fine (200 x 400 dpi) — Select this to send a document in Super Fine mode (200 x 400 dpi).
- Ultra Fine (400 x 400 dpi) — Select this to send a document in Ultra Fine mode (400 x 400 dpi).
6) Dept. Code
Enter 5-digit department code if required. When the department code is enabled on this equipment, you must enter the
department code to send a fax.
y If you do not enter the department code when the department code is enabled on the equipment and the
Department Code Enforcement is set to ON in TopAccess, the job will be stored in the Invalid job list without
transmitting the job. You can release or delete the job that is stored in the Invalid job list from the [JOB STATUS]
button on the touch panel. For instructions on how to release or delete the job in the Invalid job list, refer to
Printing Guide.
y If you do not enter the department code when the department code is enabled on the equipment and the
Department Code Enforcement is set to PRINT in TopAccess, the job will be sent.
y If you do not enter the department code when the department code is enabled on the equipment and the
Department Code Enforcement is set to DELETE in TopAccess, the job will be deleted automatically.
7) Paper Size
Select the paper size of your document.
3
4
6
8
10
1
2
5
7
9
11