2 SETTING ITEMS (ADMIN)
154 Setting Network Functions
3
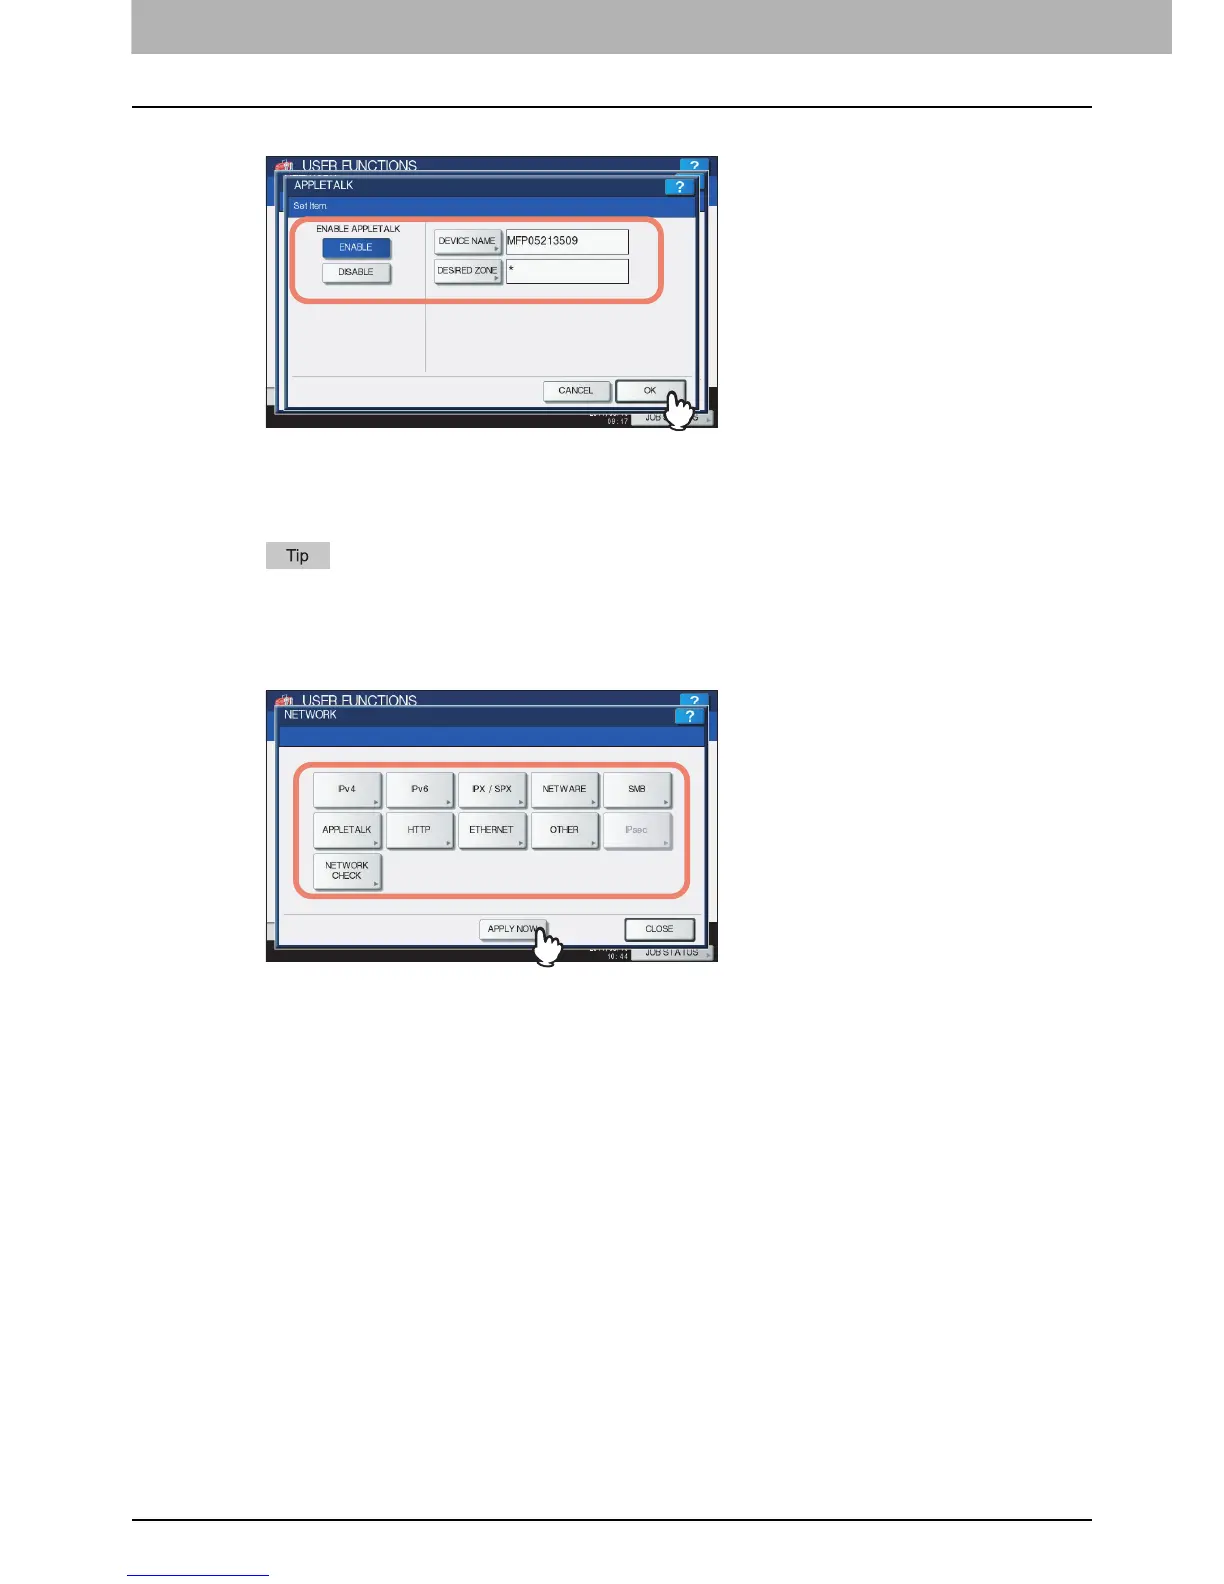
Specify the following items as required and press [OK].
ENABLE APPLETALK — Press [ENABLE] to enable AppleTalk, or [DISABLE] to disable AppleTalk.
[DEVICE NAME] — Press this button to enter the AppleTalk name of this equipment.
[DESIRED ZONE] — Press this button to enter the AppleTalk zone name this equipment has joined. If your
AppleTalk network has not been configured with a zone, you do not have to enter the zone name.
When you press [DEVICE NAME] and [DESIRED ZONE], the on-screen keyboard is displayed. Enter the value
using the on-screen keyboard and press [OK] to set the entry. You can also use the digital keys on the control
panel to enter numerals.
4
Continue to another network setting if required, then press [APPLY NOW].
“NETWORK INITIALIZING” is displayed at the lower left of the screen and this equipment starts initializing the
network interface card to apply the changes. This message disappears after it is finished.

 Loading...


