– 83 –
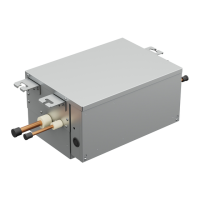
Heat exchanger
assembly
No. Part to be replaced Work procedure Remarks
6
1. Detachment
1) Close the water supply source valve and the valve of
water pipe connected to the unit, carry out the
refrigerant recovery and then remove the refrigerant
and water pipes.
2) Carry out the detachment of item
3
(Electrical control
box) and item
5
(pipe cover plate).
3) Remove the screws for the heat exchanger assembly
fixing plate as shown below.(4x10, 7pcs.)
For the unit for 056 type:4x10, 8pcs.
4) Remove the heat exchanger assembly from the unit as
shown below.
5) Remove sensors, 2way valve coil and flow switch
attached the heat exchanger assembly.
6) Carry out installation by following the detachment
procedure in reverse.
CAUTION
• Be careful in the insertion direction of attaching the
sensor, as shown below.
• Be careful to attach the flow switch, as shown
item
5
(flow switch).
200mm
or more
Heat exchanger assembly fixing plate
056typeonly
When removing these two screws,
use a screwdriver as shown on the right
Heat exchanger assembly fixing plate
056 type only
When removing these two screws,
use a screwdriver as shown on the right.
2way valve
coil drection
TCJ
TWI (TA)
TCJ2 (TF)
2way valve
coil drection
For TWO (TC2) and TC1
Insertion drection : →
For TWO (TC2) and TC1
Insertion drection : →
TC1
TWO (TC2)
For TWI (TA), TCJ and TCJ2 (TF)
Insertion drection : ←
For TWI (TA), TCJ and TCJ2 (TF)
Insertion drection : ←
Heat exchanger assembly edge
Heat exchanger assembly edge
Enboss
2. Attachment
1) Carry out installation by following the detachment
procedure in reverse.
NOTE:
• To attach the heat exchanger assembly on the proper
position, replace the heat exchanger assembly edge on
the enboss, as shown below.
 Loading...