– 11 –
Indoor
unit
Hanging bolt
(locally procured)
Ceiling surface
Hanging metal
Washer (Accessory)
Double nut
(locally procured)
Nut
(locally procured)
Indoor
unit
Hanging bolt
(locally procured)
Ceiling surface
Hanging metal
Washer (Accessory)
Double nut
(locally procured)
Indoor
unit
Hanging bolt
(locally procured)
Washer
(locally procured)
Washer (Accessory)
Double nut
(locally procured)
Ceiling surface
20 to 30
Washer
(Accessory)
Double nut
(locally procured)
Hanging bolt
■
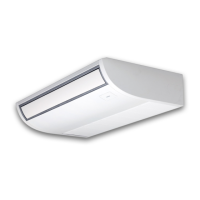
Installation of indoor unit
◆ Preparation before holding down
main unit
* Confirm the presence of the ceiling material
beforehand because the fixing method of hanging
metal when the ceiling material is set differs from that
when the ceiling material is not set.
<There is ceiling material>
• Fix the hanging bracket as shown below if the ceiling
is bent upwards when you fasten lower nuts to the
hanging bracket.
<There is no ceiling material>
◆ Holding down of main unit
<Hanging the indoor unit directly from the
ceiling>
1
Attach washer and nuts to the hanging bolt.
2
Hang the unit to the hanging bolt as shown the
figure below.
3
As shown in the figure below, fix the ceiling
material securely with the double nuts.
Screw Hanging bracket
Bolts for fastening the hanging
bracket (Loosen these bolts.)
Use bolts to fasten the
hanging bracket.
Indoor Unit
7 to 12 mm
Adjust the length of the bolts for
fastening the hanging bracket.
Front
(Unit : mm)
N
(inside dimension)
Ceiling surface
◆ Attaching the hanging bracket
first
Hanging bolt
(locally procured) Hanging bracket fixing board
Bolts for fastening the hanging bracket
(Fasten the bolts tight.)
Model N
HM40, HM56 867 to 872
HM80 1184 to 1189
HM90, HM110,
HM140, HM160
1501 to 1506
1
Remove the screws fastening hanging bracket
onto the indoor unit.
2
Loosen the bolts fastening hanging bracket
onto the indoor unit and remove the hanging
bracket.
3
Adjust the length of the two bolts for fastening
the hanging bracket, as shown below.
4
Fasten the hanging bracket with the hanging
bolts and ensure that the bracket is level from
front to back and from side to side.
5
Attach the indoor unit onto the hanging
bracket and fasten it tight with the bolts and
screws.
Double nut
(locally procured)
Washer
(Accessory)
CAUTION
• The ceiling is not always level. Use the level gauge
to measure the level of the ceiling in the width and
depth directions. Adjust the bolts for the hanging
brackets so that the level error will be within 5 mm.
• Do not lower the air discharge side and the side
opposite to the selected drain pipe withdraw.
 Loading...