1
PREPARATION BEFORE USE1
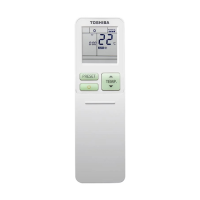
REMOTE CONTROL2
Hi POWER OPERATION
4
ECO OPERATION5
TIMER OPERATION6
AUTOMATIC / COOLING (DRY) /
HEATING / FAN ONLY OPERATION
3
Preparing Filters
1. Open the air inlet grille and
remove the air filters.
2. Attach the attachment filters
(see detail in the accessory
sheet).
Loading Batteries
1. Remove the battery cover.
2. Insert 2 new alkaline batteries
(AAA type) following the (+)
and (–) positions.
Removing the batteries
1. Remove the cover, and take out the batteries.
2. Reattach the cover.
• Please dispose of the batteries according to
the local regulation.
Clock Setup
1. Push
by tip of the pencil.
If timer indication is flashing, go to
the next step 2.
2. Press
or : adjust the time.
3. Press
: Set the time.
Remote Control Reset
1. Remove the batteries.
2. Press .
3. Insert the batteries.
Remote Control Caring
1. Clean the remote control with a wet cloth when needed.
2. No benzine, thinner, polishing powder or chemically-
treated duster.
1. Press
: Select Auto A, Cool , Dry , Heat ,
or Fan only .
2. Press : Set the desired temperature.
Min. 17°C, Max. 30°C.
3. Press
: Select AUTO, LOW , LOW+ ,
MED
, MED+ , HIGH and QUIET .
w AUTOMATIC OPERATION : Choose cooling or heating
operation automatically.
w In DRY OPERATION mode, it can not select air volume.
w In FAN ONLY OPERATION mode, it does not show
setting temperature.
To automatically control room temperature and airflow for
faster Auto, cooling or heating operation (except in DRY
mode).
Press
: Start and stop the operation.
To automatically control room temperature to save energy
(except in DRY mode).
Press : Start and stop the operation.
Note: Cooling operation; the internal set temperature will
increase automatically 1 degree by 2 hours (maximum
2 degrees increase). For heating operation the internal
set temperature will decrease.
Set the timer when the air conditioner is operating.
Setting the ON Timer Setting the OFF Timer
1
Press : Set the
desired
ON timer.
Press : Set the
desired
OFF timer.
2
Press : Set the
timer.
Press
: Set the
timer.
3
Press : Cancel
the timer.
Press : Cancel
the timer.
Setting the ON-OFF Timer
1
Press : Set the ON
timer.
3
Press .
2
Press : Set the
OFF timer.
4
Press :
Cancel the timer.
Note:
• Keep the remote control in accessible transmission to the
indoor unit; otherwise, the time lag of up to 15 minutes
will occur.
• The setting will be saved for the next same operation.
Note:
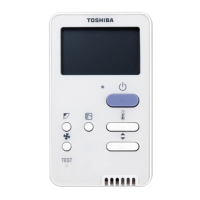
• The provided Remote Controller is a wireless type, which
also can be used as a wire. Please see “How to Connect
The Remote Controller for Wired Operation”, located in
installation instruction, in case of wired control is required.
• In wire operation, remote controller will return to initial
condition (PRESET, TIMER and CLOCK will return to initial
condition) when user shutdown power supply of
Air conditioner.
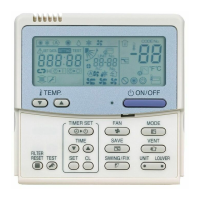
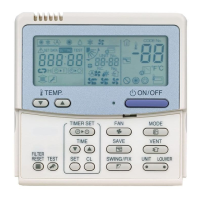
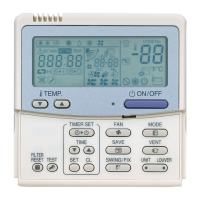
1
Infrared signal emitter
2
Memory and Preset button (PRESET)
3
Start/Stop button
4
Mode select button (MODE)
5
Air flow/HADA CARE FLOW button
6
Fireplace/8°C button
7
ECO button
8
Comfort sleep button (COMFORT SLEEP)
9
Weekly timer (ON/OFF)
!
Temp for Weekly timer
"
On timer button (ON)
#
Set clock button (CLOCK)
$
Check button (CHECK)
%
Filter reset button (FILTER)
&
Temperature button (TEMP)
(
Swing louver button (SWING)
)
Fan speed button (FAN)
~
Set louver button (FIX)
+
High power button (Hi POWER)
,
Power selection/Silent button (P-SEL/SILENT)
-
Program P1 - P4
.
Day/Edit button
/
Setup button (SET)
:
Off timer button (OFF)
;
Clear button (CLR)
<
Reset button (RESET)
Insert direction of
(+) and (-) correctly
Pull the cover
away firmly.
1
-
2
3
4
6
5
(
%
&
"
7
!
9
<
8
#
)
$
/
,
~
+
:
;
.
 Loading...