22 Information and Control Network TC-net 100 Optical Shared Hub Unit UTNH23A/B User’s Manual
Chapter 4 Installation and Wiring
4
4.1 Installation
4.1.1 Installing
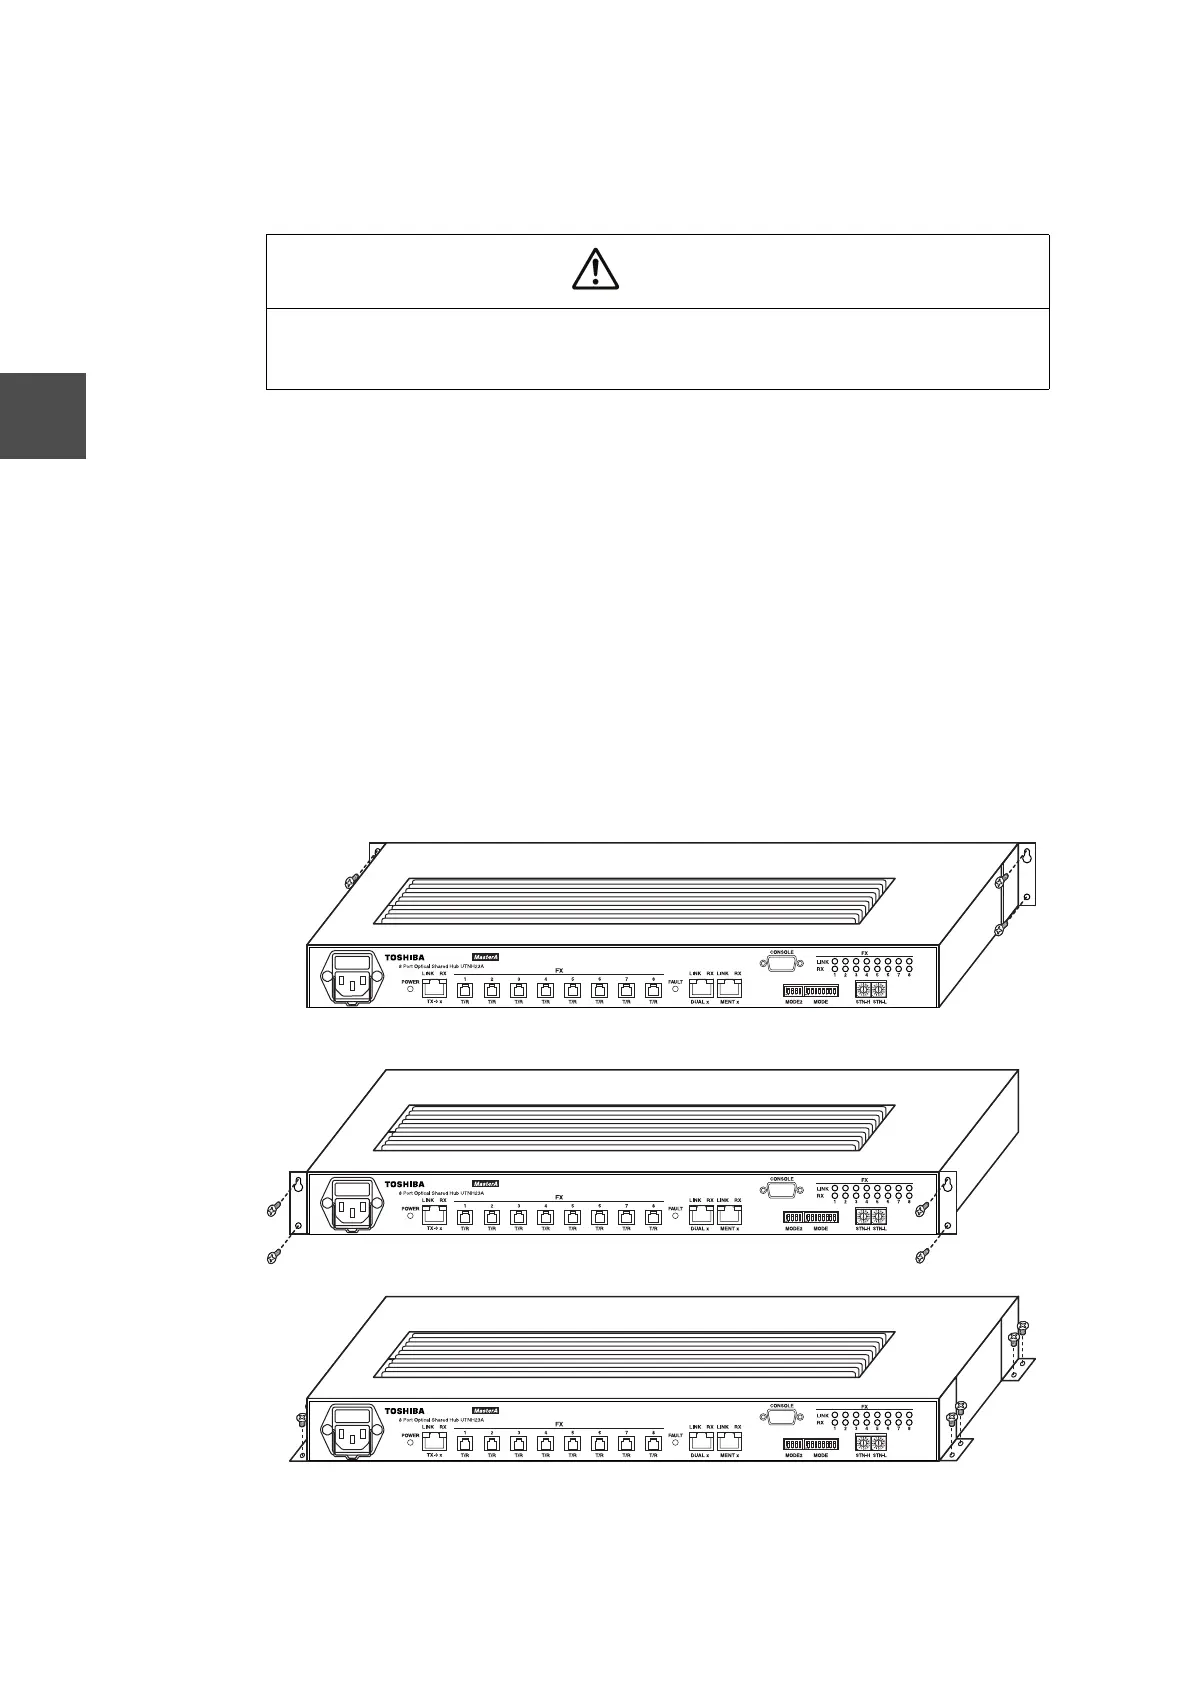
There are three ways of fastening the optical shared hub unit as shown in figure 4-1.
(1) Back mounting
Fasten two panel mounting L-brackets to the back of the optical shared hub unit with
eight M3x6 screws on both sides, and fasten the unit to a rear support panel with four
M4x6 screws.
(2) Front mounting
Fasten two panel mounting L-brackets to the front of the optical shared hub unit with
eight M3x6 screws on both sides, and fasten the unit to a front support panel with
four M4x6 screws.
(3) Bottom mounting
Fasten four panel mounting L-brackets to the front and back of the optical shared hub
unit with 16 M3x6 screws on both sides, and fasten the unit to a bottom support panel
with right M4x6 screws.
Figure 4-1 Fastening Optical Shared Hub Unit
Caution
• The working temperature range is as follows:
• 0 to 55
o
C
 Loading...