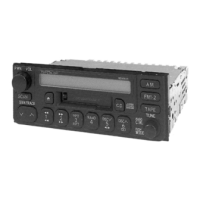
Corolla (E12-A + E12-D) TOYOTA GENUINE AUDIO
Corolla (RHD) - 24
05-04
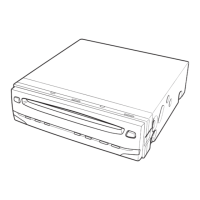
14. Attach the base bracket on the floor
under the driver’s seat.
15. Fit the side brackets (2x) to the
changer-unit using screws .
: Flat head screw (M5x8) (4x)
Fig. 44
CAUTION
Loosen the screws before moving
them. Screw up after the position is
changed.
CAUTION
Before installing the changer unit,
change the two ‘V-H’ screws into the
‘H’ (horizontal) position when it is
installed horizontally.
NOTE
16.
a) Connect the changer wire to the
changer unit .
b) Fit the changer unit to the base
bracket using screws .
: Screw (M5x10)(2x)