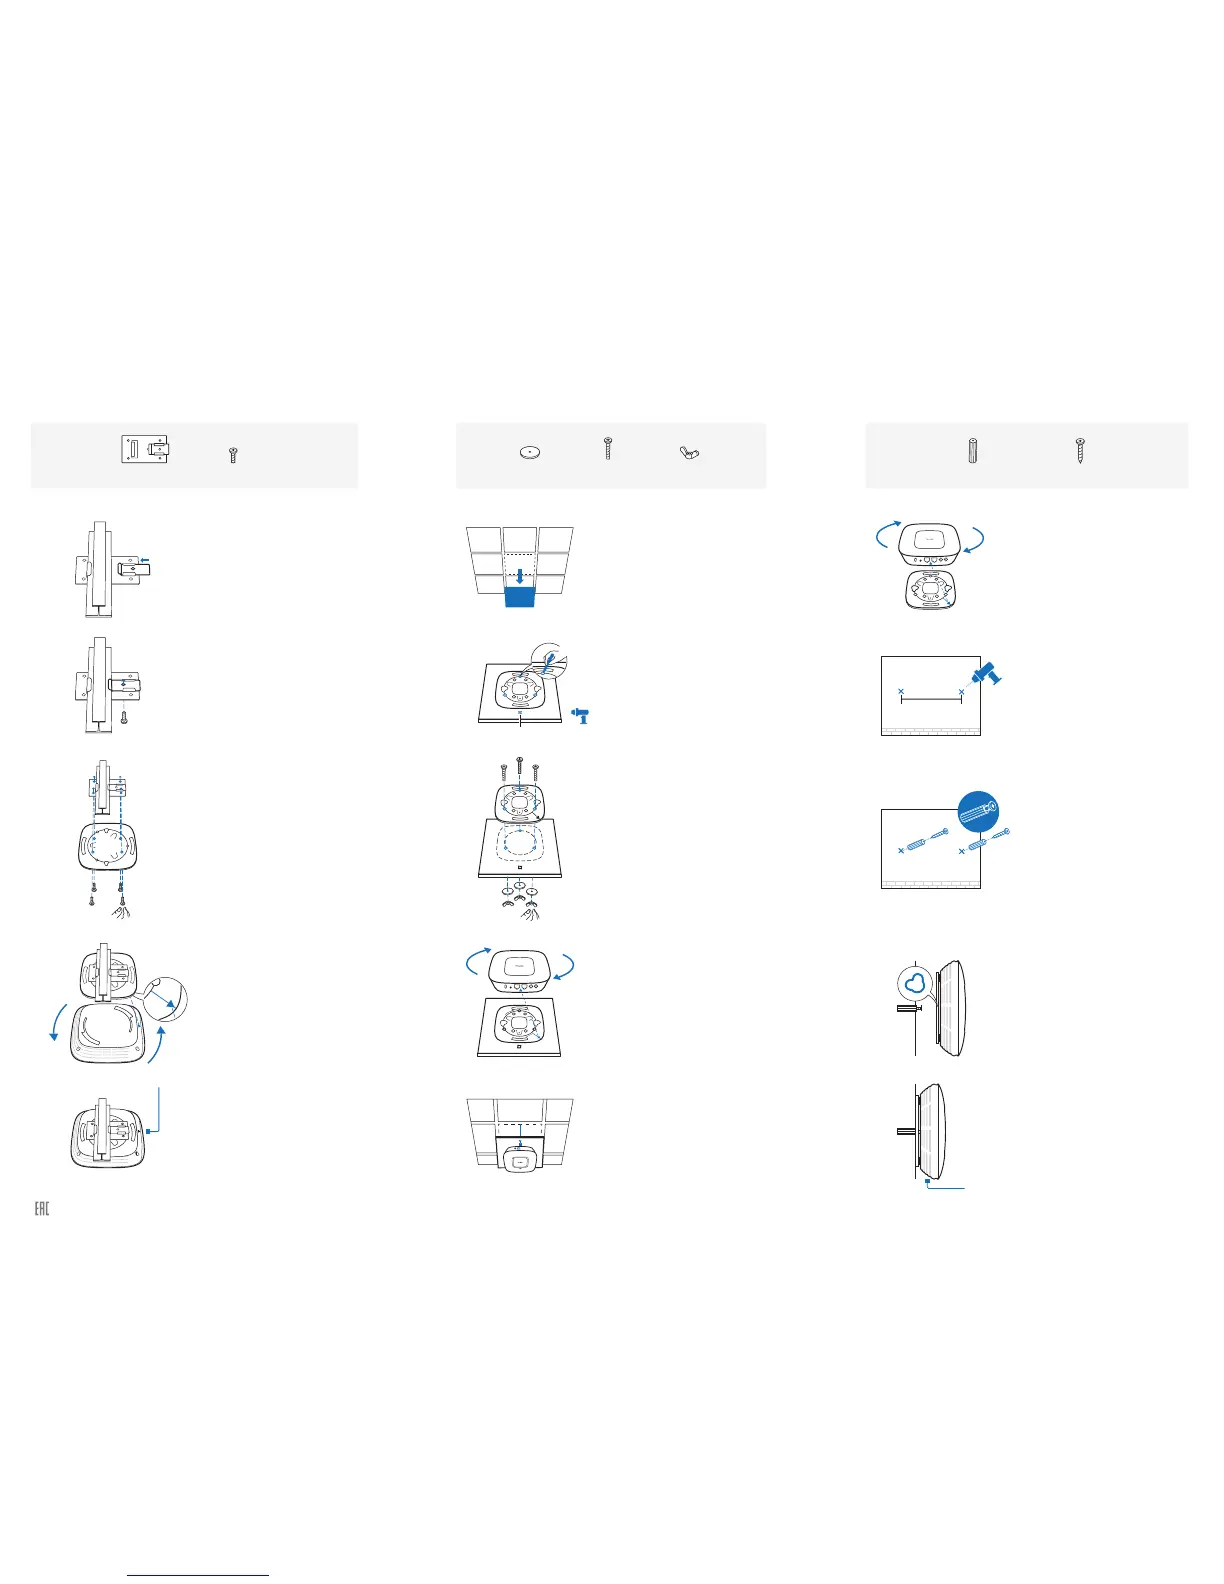
Option 1: Ceiling Rail Mounting
Option 3: Wall Mounting
Option 2: Ceiling Mounting
M3×20 Self-tapping Screws
(Qty.3)
M3×28 Plastic Wall Anchors
(Qty.3)
5
Connect the Ethernet cable to the ETHERNET port on
the EAP.
5
Feed the Ethernet cable through the hole and set the
ceiling tile back into place. Connect the Ethernet
cable to the ETHERNET port.
5
Connect the Ethernet cable to the ETHERNET port.
2
Make two small pencil marks on the wall. Make sure
the two marks are level and should be 98.6mm apart.
Drill two 6mm holes through the center of your marks.
2
Place the mounting bracket in the center of the ceiling
tile. Mark the three positions of the screw holes and a
10mm hole for the Ethernet cable to feed through.
Drill three 4mm holes and a 10mm hole for the Ethernet
cable.
2
Use an M3×6 pan-head screw to secure the T-rail Clip
onto the ceiling rail.
1
Position the Ceiling T-rail Clip and push the movable
part toward the rail base.
1
Remove the ceiling tile.
1
Attach the EAP to the mounting bracket by aligning
ARROW 1 (on the EAP) with ARROW 2 (on the
mounting bracket), then rotate the EAP clockwise until
it locks into place.
3
Insert the plastic wall anchors into the 6mm holes and
drive the self-tapping screws into the anchors. Do not
drive the screws all the way in and leave enough
clearance to hang the EAP.
3
Secure the mounting bracket to the ceiling tile using
three M3x30 pan-head screws, washers and wing
nuts, as shown on the left.
3
Attach the mounting bracket to the Ceiling T-rail Clip
using four M3x6 pan-head screws.
4
Hang the EAP on the screws. Make sure the EAP is
firmly seated against the wall.
4
Attach the EAP to the mounting bracket by aligning
ARROW 1 (on the EAP) with ARROW 2 (on the
mounting bracket), then rotate the EAP clockwise until
it locks into place.
4
Attach the EAP to the mounting bracket by aligning
ARROW 1 (on the EAP) with ARROW 2 (on the
mounting bracket), then rotate the EAP clockwise until
it locks into place.
Ceiling T-rail Clip M3×6 Pan-head Screws
(Qty.5)
Hole for Ethernet cable
X3
98.6mm
Wing Nuts
(Qty.3)
Washers
(Qty.3)
M3×30 Pan-head Screws
(Qty.3)
Website: http://www.tp-link.com Tel: +86 755 26504400 E-mail: support@tp-link.com
Copyright © 2015 TP-LINK