Option TWO: Quick Setup Using the WPS Button
WPS is an easier way to extend your host network. You are recommended to use this method if your
host router has a WPS button.
The button might look like one of these: . Otherwise, please refer to Option ONE.
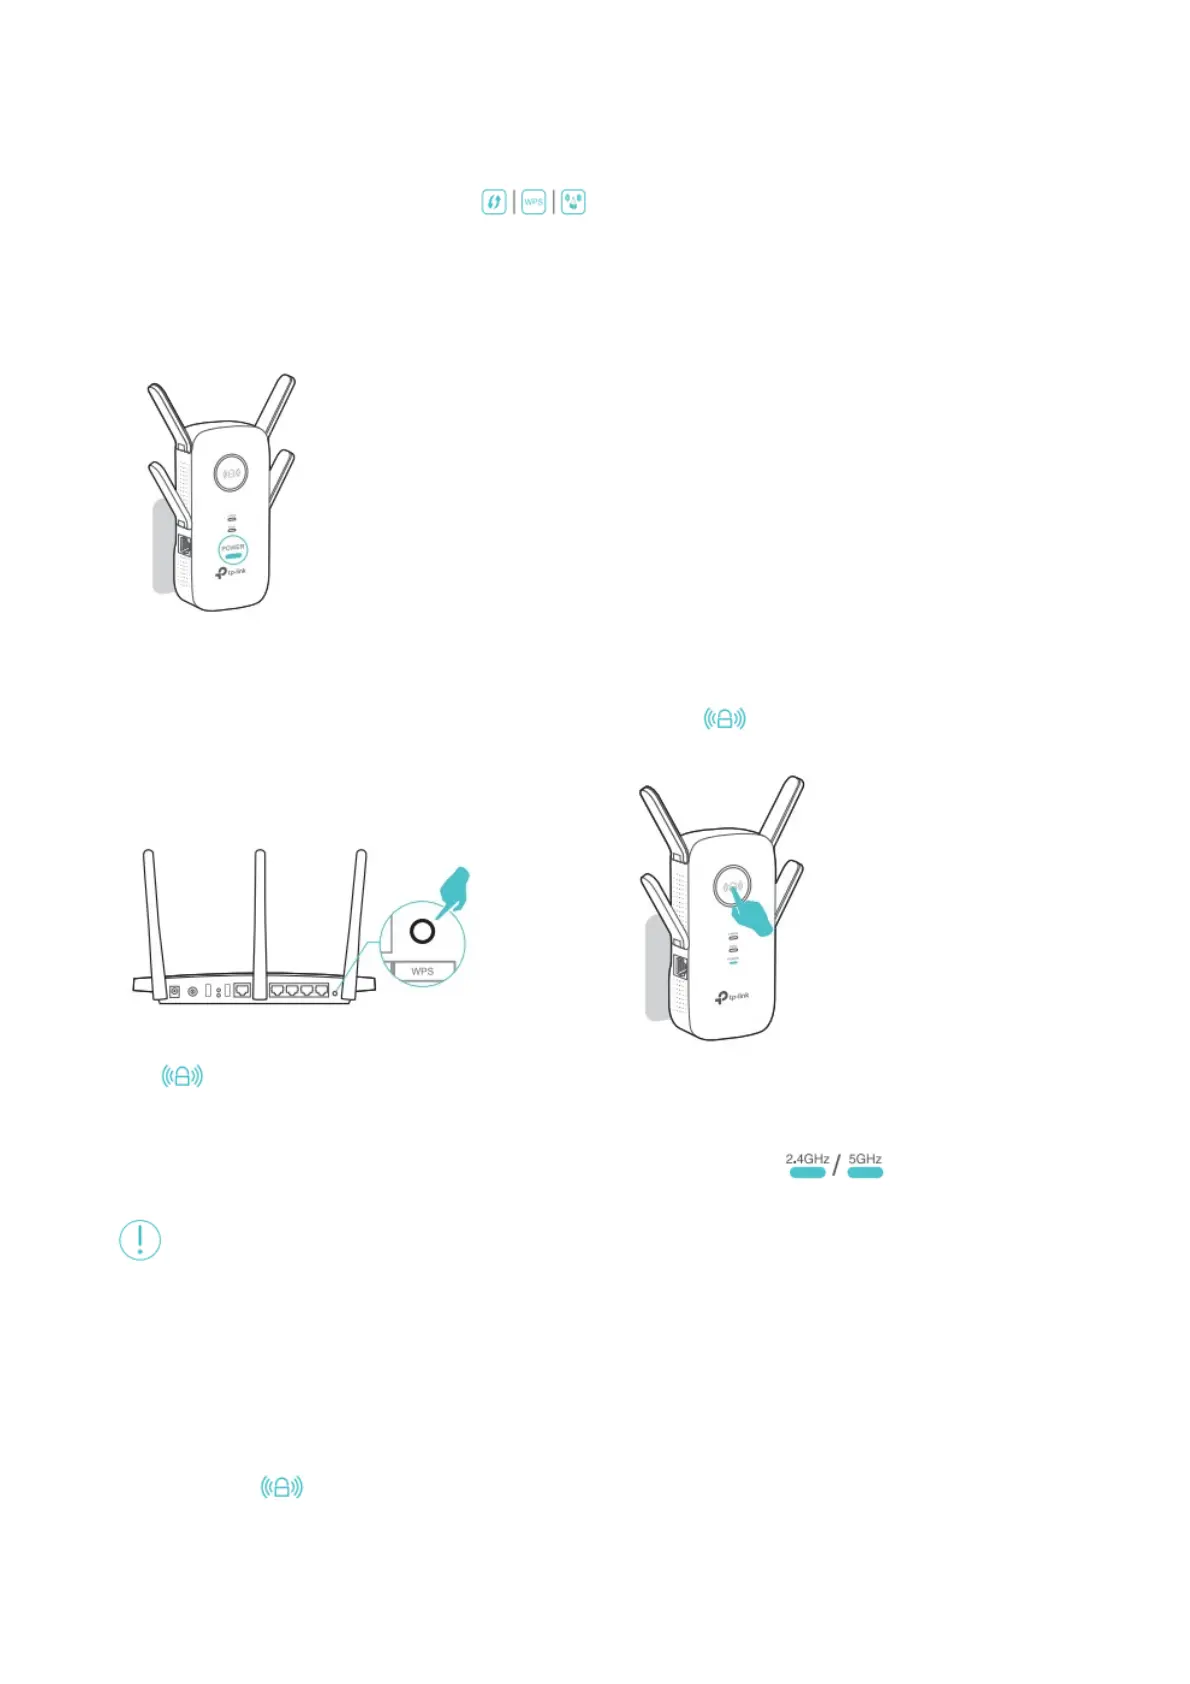
1. Power On
Plug the extender into an electrical outlet near your router, and wait until the POWER LED is lit and
solid blue.
2. Connect
1. Press the WPS button on your router, and then press the button on the extender within 2
minutes.
The LED should change from blinking to a solid state, indicating a successful WPS
connection.
If not, please use Option ONE.
2. If you are connecting the extender to a dual-band router but only LED is on, repeat
Step 1 to connect the other band.
1. For more information about using WPS on your router, please refer to the router
manufacturer’s user guide.
2. Some ISP gateways disable the WPS function by default. If the WPS method fails, please refer to
Option ONE.
3. Relocate
1. Plug the extender into an electrical outlet about halfway between your router and the Wi-Fi dead
zone. The location you choose must be within the range of your host network.
2. Wait until the LED is lit and solid blue. If not, relocate it closer to the router to achieve better
signal quality.
 Loading...