EasyManua.ls Logo

TP-Link TL-SG605E - User Manual

TP-Link TL-SG605E
2 pages
Print Icon
To Next Page IconTo Next Page
Loading...
Installation Guide
© 2023 TP-Link 7106510136 REV1.1.0
1000 Mbps (Green)
On: Running at 1000 Mbps
Flashing: Transmitting/receiving data
10/100 Mbps (Yellow)
On: Running at 10/100 Mbps
Flashing: Transmitting/receiving data
LED Explanation
Power
On: Power on
O: Power o
Link/Act
Connection
Ethernet Ports (1-8)
TL-SG608E
PC PC
Router
LAN PortWAN Port
Internet
Conguration
The switch is plug and play. To congure the switch, you can use the
Web-based GUI or the conguration utility.
The utility is only supported on Windows now.
Using the Conguration Utility
1. Go to https://www.tp-link.com/support and search the model number of
your switch. Download the Easy Smart Conguration Utility from the
product Support web page on your PC.
Using the Web-based GUI
Note: If the switch gets a new IP address from the DHCP server, your
connection to the switch will be lost. Enter the new IP address in your
browser to access the switch again.
1. Find out the IP address of the switch.
By default, the switch receives an IP addess from a DHCP server (or a
router that functions as a DHCP server) in your network. You can nd
out this IP address on the DHCP server.
If the switch cannot receive an IP address from a DHCP server, it uses
the static IP address of 192.168.0.1, with a subnet mask of
255.255.255.0.
2. Congure IP address on your PC to make sure the switch and PC are in
the same subnet.
If the switch uses an IP address assigned by a DHCP server, set your PC
to obtain an IP address automatically from the DHCP server.
If the switch uses 192.168.0.1 as the IP address, congure your PC’s IP
address as 192.168.0.x (”x” ranges from 2 to 254), and subnet mask as
255.255.255.0.
Launch a web browser on your PC, enter the IP address of the switch in
the address bar and press Enter. Log in with admin as both user name
and password.
3.
Now you can congure the switch using the Web-based GUI. For further
information, refer to the User Guide.
Go to https://www.tp-link.com/support, search the model number of your
switch, and you can nd this guide on the product Support web page.
Now you can congure the switch using the conguration utility. For further
information, refer to the Easy Smart Conguration Utility User Guide.
Go to https://www.tp-link.com/support, search the model number of your
switch, and you can nd this guide on the product Support web page.
Double click the icon on the desktop, and the
utility Home page will display a list of TP-Link
switches on the local network.
3.
2. Decompress the downloaded le, run the
installation wizard and follow the prompts to
install the Easy Smart Conguration Utility.
4.
If the switch uses an IP address assigned by
a DHCP server, set your PC to obtain an IP
address automatically from the DHCP
server.
If the switch uses 192.168.0.1 as the IP
address, congure your PC’s IP address as
192.168.0.x (”x” ranges from 2 to 254), and
subnet mask as 255.255.255.0.
Click to nd out IP parameters of the switch.
Double click the switch that you want to congure. Log in with admin as
both user name and password.
5.
5/8-Port Gigabit Easy Smart Switch
Note: For simplicity, we will take TL-SG608E for example throughout this Guide.
Question and Answer IconNeed help?

Do you have a question about the TP-Link TL-SG605E and is the answer not in the manual?

Overview

This document describes the TP-Link Easy Smart Switch, a network device designed for efficient data transfer and network management. The guide primarily uses the TL-SG608E model as an example, but the information applies to other models in the series, such as the TL-SG605E.

Function Description

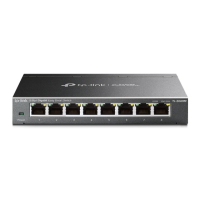
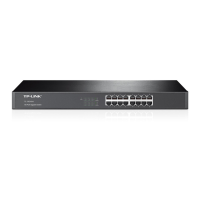
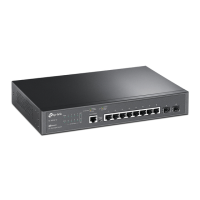
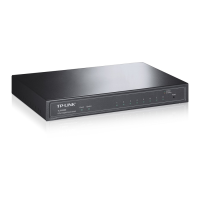
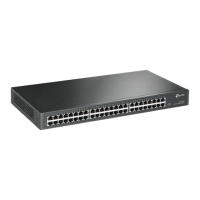
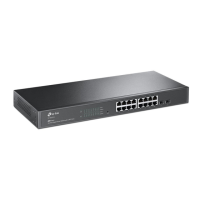
The TP-Link Easy Smart Switch is a plug-and-play device that facilitates network connectivity and intelligent data transfer. It functions as a central hub for connecting various network devices, such as computers, routers, and other switches, enabling them to communicate and share data within a local area network (LAN). The "Easy Smart" designation indicates that while it offers basic plug-and-play functionality, it also provides advanced configuration options through a web-based Graphical User Interface (GUI) or a dedicated configuration utility, allowing for more granular control over network settings.

The switch supports multiple Ethernet standards, including 10Base-T, 100Base-TX, and 1000Base-T (Gigabit Ethernet), enabling it to handle various network speeds. It automatically negotiates the speed and duplex mode with connected devices, optimizing performance. The device employs a "Store-and-Forward" transfer method, which means it receives an entire data frame, checks it for errors, and then forwards it to the appropriate destination port. This method ensures data integrity and reduces network errors.

Key protocols supported include IEEE802.3i, IEEE802.3u, IEEE802.3ab (for Gigabit Ethernet), IEEE802.3x (for Flow Control), IEEE802.1p (for Quality of Service), and IEEE802.1q (for VLANs), indicating its capability for advanced network management features like traffic prioritization and network segmentation.

Important Technical Specifications

General Specifications:

  • Standard: IEEE802.3i, IEEE802.3u, IEEE802.3ab, IEEE802.3x, IEEE802.1p, IEEE802.1q
  • Protocol: CSMA/CD
  • Data Transfer Rate:
    • Ethernet: 10 Mbps (Half Duplex), 20 Mbps (Full Duplex)
    • Fast Ethernet: 100 Mbps (Half Duplex), 200 Mbps (Full Duplex)
    • Gigabit Ethernet: 2000 Mbps (Full Duplex)
  • Network Media (Cable):
    • 10Base-T: UTP category 3, 4, 5 cable (max 100 m), EIA/TIA-568 100 Ω STP (max 100 m)
    • 100Base-TX: UTP category 5, 5e cable (max 100 m), EIA/TIA-568 100 Ω STP (max 100 m)
    • 1000Base-T: UTP category 5e cable (max 100 m), EIA/TIA-568 100 Ω STP (max 100 m)
  • Interface: 5/8 10/100/1000 Mbps Auto-Negotiation RJ45 Ports (depending on model, e.g., TL-SG605E has 5 ports, TL-SG608E has 8 ports)
  • LED Indicators: Power, 10/100 Mbps LED, 1000 Mbps LED
  • Transfer Method: Store-and-Forward
  • MAC Address Learning: Automatically learning, automatically aging
  • Frame Forward Rate:
    • 10Base-T: 14881 pps/Port
    • 100Base-TX: 148810 pps/Port
    • 1000Base-T: 1488095 pps/Port
  • Wall Mountable: Yes
  • Distance Between Mounting Holes: TL-SG605E: 52 mm, TL-SG608E: 110 mm

Environmental and Physical Specifications:

  • Operating Temperature: 0°C to 40°C (32°F to 104°F)
  • Storage Temperature: -40°C to 70°C (-40°F to 158°F)
  • Operating Humidity: 10% RH to 90% RH non-condensing
  • Storage Humidity: 5% RH to 90% RH non-condensing

LED Explanation:

  • Power LED: On (Power on), Off (Power off)
  • Link/Act LED (1000 Mbps - Green): On (Running at 1000 Mbps), Flashing (Transmitting/receiving data)
  • Link/Act LED (10/100 Mbps - Yellow): On (Running at 10/100 Mbps), Flashing (Transmitting/receiving data)

Usage Features

The TP-Link Easy Smart Switch offers flexible usage options, catering to both basic plug-and-play needs and more advanced network configurations.

Plug-and-Play Operation: For basic network connectivity, the switch is plug-and-play. Users can simply connect their devices to the switch's Ethernet ports, and it will automatically establish connections and facilitate data transfer without requiring any manual configuration.

Web-based GUI Configuration: For advanced settings, the switch can be configured via a web-based GUI.

  1. IP Address Discovery: The switch typically obtains an IP address from a DHCP server on the network. If no DHCP server is present, it defaults to a static IP address of 192.168.0.1 with a subnet mask of 255.255.255.0. Users need to identify this IP address to access the GUI.
  2. PC IP Configuration: The user's PC must be on the same subnet as the switch. If the switch uses a DHCP-assigned IP, the PC should be set to obtain an IP automatically. If the switch uses the default 192.168.0.1, the PC's IP should be configured to 192.168.0.x (where 'x' is 2-254) with the same subnet mask.
  3. Accessing the GUI: Users launch a web browser, enter the switch's IP address, and log in using "admin" for both username and password. This method allows for comprehensive management of the switch's features, as detailed in the User Guide available on the TP-Link support website.

Configuration Utility (Windows Only): Alternatively, Windows users can utilize the Easy Smart Configuration Utility.

  1. Download and Installation: The utility can be downloaded from the TP-Link support website and installed on a PC.
  2. Device Discovery: Upon launching, the utility displays a list of TP-Link switches on the local network.
  3. IP Parameter Check: Users can click an icon within the utility to view the switch's IP parameters and ensure their PC is configured to be on the same subnet (either via DHCP or by setting a static IP like 192.168.0.x if the switch defaults to 192.168.0.1).
  4. Configuration Access: Double-clicking the desired switch in the utility allows users to log in with "admin" as username and password to configure the device. This utility provides a user-friendly interface for managing the switch, with further details available in the Easy Smart Configuration Utility User Guide.

LED Indicators: The front panel LEDs provide visual feedback on the switch's status:

  • Power LED: Indicates if the device is powered on or off.
  • Link/Act LEDs (Green for 1000 Mbps, Yellow for 10/100 Mbps): Show the connection speed and activity for each port. A solid light indicates a stable link at the corresponding speed, while a flashing light signifies data transmission or reception.

Maintenance Features

The TP-Link Easy Smart Switch is designed for ease of maintenance and troubleshooting, with clear indicators and accessible support resources.

Troubleshooting LEDs: The LED indicators are crucial for quick troubleshooting:

  • Power LED not lit: If the Power LED is off, users should check the power adapter connection, ensure the power supply voltage meets requirements, verify the power source is ON, and check the LED On/Off configuration page (if accessible) to ensure the LED status is enabled.
  • Link/Act LED not lit: If a Link/Act LED is off for a connected device, users should ensure cable connectors are firmly plugged in, confirm the connected device is turned on and working, verify the Ethernet cable length is within 100 meters (328 feet), and check the LED On/Off configuration page to ensure the LED status is enabled.

User Guides and Support: Comprehensive user guides for both the web-based GUI and the configuration utility are available on the TP-Link support website (https://www.tp-link.com/support). Users can search for their specific switch model number to find detailed instructions and troubleshooting tips.

Community and Technical Support: TP-Link provides a community forum (https://community.tp-link.com) where users can ask questions, find answers, and interact with other users and engineers. For direct technical support and additional information, users can visit https://www.tp-link.com/support or scan the provided QR code.

Safety Information: To ensure longevity and safe operation, users are advised to:

  • Keep the device away from water, fire, humidity, or hot environments.
  • Avoid disassembling, repairing, or modifying the device; contact support for service.
  • Do not use damaged chargers or USB cables.
  • Use only recommended chargers.
  • Install the power adapter near the equipment for easy accessibility.

Regulatory Compliance: The device complies with relevant EU and UK directives and regulations, including those for electromagnetic compatibility and electrical equipment safety. Declarations of conformity are available on the TP-Link support website.

TP-Link TL-SG605E Specifications

General IconGeneral
BrandTP-Link
ModelTL-SG605E
CategorySwitch
LanguageEnglish

Related product manuals