Do you have a question about the TP-Link VIGI C330 and is the answer not in the manual?
Important safety guidelines for camera installation and power supply.
Steps for installing the camera on walls or ceilings using the template.
Instructions for mounting the camera onto a pole using cable ties.
Detailed steps for correctly fitting waterproof cable attachments for outdoor use.
Connecting cameras to the network and powering them on for NVR setup.
Procedure for integrating cameras into the NVR system.
Steps for using TP-Link cameras with non-TP-Link NVRs.
Managing cameras via the desktop application for Windows users.
Remote management and alerts using the mobile application.
Accessing camera settings and live view through a web browser.
Solutions for issues where cameras are not detected by the NVR or software.
Methods to verify if the camera is receiving power using its LEDs.
This document provides a comprehensive guide for the installation, setup, and management of a VIGI network camera, designed for surveillance and security applications. The camera is engineered for both indoor and outdoor use, with features that ensure robust performance and ease of integration into existing security systems.
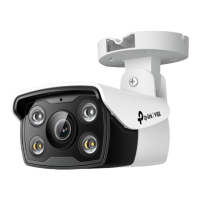
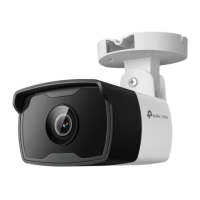
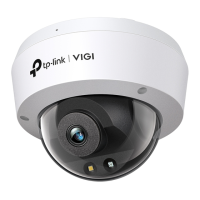
The VIGI network camera serves as a crucial component in a surveillance system, capturing high-quality video footage for monitoring and security purposes. It is capable of operating independently or as part of a larger network video recorder (NVR) system, offering flexibility in deployment. The camera is equipped with various components to facilitate its primary function: a lens for image capture, IR LEDs for night vision capabilities, and a white light for enhanced visibility in low-light conditions or for deterrence. A built-in microphone allows for audio recording, complementing the visual data. Connectivity is managed through an RJ45 Ethernet port, which supports Power over Ethernet (PoE), simplifying installation by allowing both power and data transmission over a single cable. Alternatively, a 12V DC power supply interface is available for traditional power connections. The camera is designed to integrate seamlessly with VIGI NVRs for centralized management and recording, but also supports integration with other NVR brands, making it a versatile choice for various security setups. Its primary function is to provide continuous, reliable surveillance, enhancing the safety and security of monitored areas.
The VIGI network camera offers a range of usage features designed to provide flexibility and ease of operation for various surveillance needs.
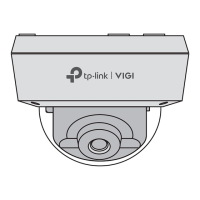
The camera supports multiple mounting options, including wall/ceiling mounting and pole mounting. For wall/ceiling mounting, a provided template assists in drilling screw holes, and anchors and screws are used to secure the camera's bracket. For pole mounting, two cable ties are threaded through slits on the back of the bracket and then around the pole, ensuring a firm attachment. This adaptability allows the camera to be deployed in diverse environments, from indoor spaces to outdoor perimeters.
For outdoor installations, the camera comes with waterproof cable attachments for the network interface. These attachments include a fix nut, waterproof ring, waterproof jacket, and O-ring, all designed to create a secure, watertight seal around the network cable connection. This feature ensures the camera's durability and reliable operation in various weather conditions, protecting internal components from moisture ingress.
The camera supports both Power over Ethernet (PoE) (802.3af/at) and a 12V DC power supply. PoE simplifies installation by allowing both power and data to be transmitted over a single Ethernet cable, reducing the need for separate power outlets and cabling. This is particularly useful for installations in locations where power sources are not readily available.
The camera is primarily designed to work with VIGI NVRs for streamlined batch access and management. The process involves connecting the camera to the same network as the NVR, powering it on (via PoE or external supply), and then adding it through the NVR's interface. The NVR's "Add Camera" function allows users to select and add cameras, with options for password creation or using preset passwords. This integration provides a centralized platform for viewing live video, recording, and managing multiple cameras.
For users with existing NVR systems from other brands, the VIGI camera can still be integrated. After powering on and connecting to the network, the camera can be activated by setting a password using the VIGI Security Manager software or the TP-Link VIGI app. Users then refer to their NVR's manual to add the activated camera. This broad compatibility ensures that the camera can be incorporated into various existing surveillance infrastructures.
The camera offers several methods for management and live video viewing:
Before full functionality, cameras need to be activated by setting a password. This security measure protects access to the camera's settings and video streams, ensuring only authorized users can manage the device.
The document includes a Frequently Asked Questions (FAQ) section addressing common issues such as cameras not being discovered and verifying if the camera is powered on. This provides immediate assistance for users encountering setup difficulties.
The VIGI network camera is designed with several considerations that contribute to its ease of maintenance and long-term reliability. While explicit "maintenance features" in the traditional sense (like self-cleaning or diagnostic tools) are not detailed, the design and setup guidelines inherently support simplified upkeep.
The waterproof cable attachments are a key maintenance-reducing feature for outdoor installations. By creating a secure, watertight seal around the network interface, these components prevent water ingress, which is a common cause of failure for outdoor electronic devices. This proactive protection minimizes the need for repairs or replacements due to environmental damage, thus reducing maintenance efforts. Ensuring that "each part is securely attached and the waterproof rings are flush to keep out water" during installation is crucial for this long-term protection.
The support for Power over Ethernet (PoE) significantly simplifies cabling, as both power and data are transmitted over a single Ethernet cable. This reduces the number of cables to manage and potential points of failure, making troubleshooting and maintenance of the physical infrastructure much easier. Fewer cables mean less clutter and a reduced likelihood of accidental disconnections or damage.
The ability to manage multiple cameras through a VIGI NVR, the VIGI Security Manager software, or the TP-Link VIGI app centralizes control and monitoring. This means that firmware updates, configuration changes, and status checks can often be performed remotely from a single interface, rather than requiring physical access to each camera. This remote management capability is a significant maintenance advantage, especially for large deployments.
The document mentions that the IR LED will turn on for 20 seconds once the camera is powered on, serving as a visual indicator of power status. This simple diagnostic tool allows users to quickly verify if the camera is receiving power, aiding in initial setup troubleshooting and ongoing maintenance checks without requiring specialized equipment. If the IR LED is off, covering the lens to check if it turns on can further confirm power status. Additionally, checking the LED status of the network device the camera is connected to provides another layer of diagnostic information.
The provision of a dedicated support website (https://www.tp-link.com/support) and a QR code for quick access to technical support, replacement services, and user guides is a crucial maintenance feature. This ensures that users have readily available resources for troubleshooting, obtaining assistance, or finding detailed information about their device, which can significantly streamline any maintenance tasks or issues that arise. The FAQ section within the manual also addresses common problems, empowering users to resolve minor issues independently.
The "Safety First" section emphasizes important considerations like matching power supply, ensuring wall strength, and consulting qualified electricians if uncertain about installation. Adhering to these guidelines during installation is a preventative maintenance measure, as it helps avoid potential damage to the camera or property, thereby reducing the need for future repairs or interventions. Compliance with power source standards (Power Source Class 2 (PS2) or Limited Power Source (LPS) of IEC 62368-1) also ensures the camera operates within safe electrical parameters, contributing to its longevity.
In summary, while the VIGI camera doesn't feature complex self-maintenance routines, its design incorporates robust environmental protection, simplified connectivity, centralized remote management capabilities, and clear diagnostic indicators, all of which contribute to a reduced need for hands-on maintenance and easier troubleshooting when issues do arise.
| Night Vision | Up to 30m |
|---|---|
| Audio | Built-in Microphone |
| Weather Resistance | IP67 |
| Image Sensor | 1/2.7" CMOS |
| Lens | 4 mm |
| Video Compression | H.264 |
| Network | 10/100M Ethernet |
| Storage | MicroSD card slot (up to 256GB) |
| Power Supply | 12V DC, PoE (802.3af) |
| Operating Temperature | -30°C to 60°C |