EasyManua.ls Logo

TP-Link VIGI C440 - User Manual

TP-Link VIGI C440
2 pages
Print Icon
To Next Page IconTo Next Page
Loading...
3. Secure the Camera
Route the cable through the side outlet. Insert anchors into the holes,
use screws to ax the camera base, and attach the camera to it.
Appearance
Camera Base
Speaker
7
IR LED
6
White LED
5
Built-in Microphone
1
2
Reset
3
Micro SD Card Slot
Insert a micro SD card for local
storage. Initialize the SD card via
VIGI app before recording videos.
Power Supply Interface
(12V DC) *
9
RJ45 Network Interface
(supports PoE) *
8
4
1
3
2
6
5
4
8
9
3. Secure the Camera
Route the cable through the wall/ceiling. Insert anchors into the holes,
use screws to ax the camera base, and attach the camera to it.
Stick the mounting template to the desired mounting place. Drill
3 screw holes and 1 cable hole according to the template.
1. Drill Holes
2. Open the Camera Case
Align the notch of the camera body with any score on the camera
base, and use a screwdriver to gently pry open the camera case.
Quick Start Guide
Option 1: Cable through the wall/ceiling
Stick the mounting template to the desired mounting place. Drill
3 screw holes according to the template.
1. Drill Holes
2. Open the Camera Case
Align the notch of the camera body with any score on the camera
base, and use a screwdriver to gently pry open the camera case.
Option 2: Cable through the side outlet
1
Wall/Ceiling Mounting
4. Adjust the Surveillance Angle
Adjust the surveillance angle as needed. Make sure the lens is
positioned above the IR LED for normal viewing.
4. Adjust the Surveillance Angle
Adjust the surveillance angle as needed. Make sure the lens is
positioned above the IR LED for normal viewing.
Cable Hole
(For the cable through wall/ceiling)
Score of
camera base
Notch of
camera body
Score of
bottom case
Notch of
the shell
Score of
camera base
Notch of
camera body
Score of
bottom case
Notch of
the shell
Side Outlet
*Images may dier from actual products.
Tilt: 0° to 85°
Pan: 0° to 360°
Rotate: 0° to 360°
Mounting TemplateAnchors & Screws
Network Camera
Quick Start Guide
Quick
Start
Guide
Press for 5 seconds to reset the
camera to factory settings.
7
*
The camera’s standard power supply is 12V DC or PoE (802.3af/at). The power
source should comply with Power Source Class 2 ( PS2) or Limited Power
Source(LPS) of IEC 62368-1
.
©2023 TP-Link 7106510128 REV1.0.0
Tilt: 0° to 85°
Pan: 0° to 360°
Rotate: 0° to 360°
Question and Answer IconNeed help?

Do you have a question about the TP-Link VIGI C440 and is the answer not in the manual?

Overview

This document provides a comprehensive guide for setting up and managing a TP-Link VIGI network camera, designed for surveillance purposes. The camera is primarily intended for use with a Network Video Recorder (NVR) for streamlined batch access and management, though it can also be accessed and managed through other methods.

Function Description

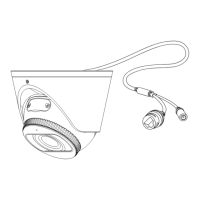
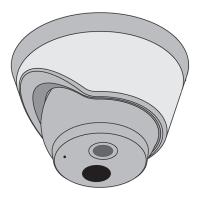
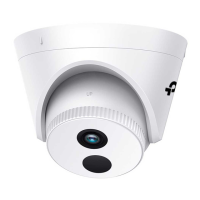
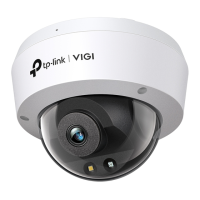
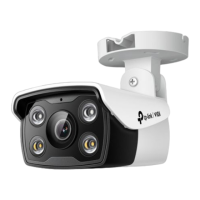
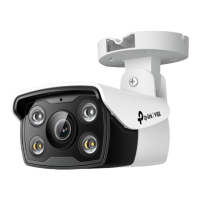
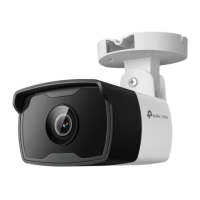
The TP-Link VIGI network camera is a surveillance device equipped with various features to capture and record video, monitor environments, and provide security. Its core function is to capture visual data, which can then be stored locally on a Micro SD card or managed through an NVR system. The camera includes a built-in microphone for audio capture and a speaker for two-way audio communication or alerts. Illumination for night vision is provided by both White LEDs and IR LEDs, ensuring clear visibility in various lighting conditions. Connectivity is established via an RJ45 Network Interface, which supports Power over Ethernet (PoE), simplifying installation by allowing both power and data transmission through a single cable. An alternative power supply is available via a 12V DC interface. The camera's design allows for flexible mounting on walls or ceilings, with adjustable surveillance angles to cover desired areas effectively.

Usage Features

The camera offers multiple ways to be used and managed, catering to different user preferences and system setups.

Installation and Mounting:

The manual details two primary mounting options:

  1. Cable through the wall/ceiling: This method involves drilling three screw holes and one cable hole to route the cable discreetly. The camera base is then secured, and the camera body is attached.
  2. Cable through the side outlet: Similar to the first option, this involves drilling three screw holes, but the cable is routed through a side outlet on the camera base. Anchors and screws are used to affix the camera base, and the camera body is then attached. In both cases, the camera case needs to be gently pried open using a screwdriver to access the mounting points and internal components. Once mounted, the surveillance angle can be adjusted, allowing for pan (0° to 360°), tilt (0° to 85°), and rotate (0° to 360°) movements to achieve the desired field of view. It is crucial to ensure the lens is positioned above the IR LED for optimal viewing.

Integration with NVR Systems:

The camera is designed for seamless integration with NVRs, particularly TP-Link VIGI NVRs. The process involves:

  1. Hardware Connection: Connecting the cameras to the same network as the NVR, typically via a network device like a switch or router.
  2. Power On: Powering on the cameras using either PoE (802.3af/at) or an external 12V DC power supply.
  3. Adding Cameras to NVR: On the NVR's Live View screen, users can select and add cameras directly. If Plug and Play is disabled on the NVR, a password may need to be created or a preset password used to activate the camera. For other NVR brands, cameras must first be activated using the VIGI Security Manager or TP-Link VIGI app before being added to the NVR.

Alternative Management Methods:

Beyond NVR integration, the camera can be managed through:

  1. VIGI Security Manager (Windows only): This software allows users to view live video and modify camera settings on a Windows computer. After downloading and installing the manager, cameras on the same network are automatically discovered. Users can then add and activate them by setting passwords.
  2. TP-Link VIGI App: This mobile application provides remote viewing of live video, camera management, and instant alerts. Users download and install the app, log in with their TP-Link ID (or sign up if new), and then use the app to activate and add cameras.
  3. Web Browser: For direct access, users can find the camera's IP address on their router's client page, then enter https://camera's IP address into a web browser. After selecting the Country/Region and Time Zone, a password is set to activate the camera, allowing access to live video and settings modification.

Maintenance Features

The camera is designed with certain maintenance and troubleshooting features to ensure its longevity and optimal performance.

Reset Functionality:

A physical reset button is included, allowing users to restore the camera to its factory settings by pressing it for 5 seconds. This is useful for troubleshooting or reconfiguring the device.

Micro SD Card Slot:

The camera includes a Micro SD card slot for local storage. Users can insert a Micro SD card for recording videos, but it must be initialized via the VIGI app before use. This provides a backup or standalone recording option, reducing reliance on continuous NVR connectivity for basic recording needs.

Power On Indication:

To help users verify if the camera is powered on, the IR LED will turn on for approximately 20 seconds upon startup. If unsure, users can cover the lens for a few seconds to check if the IR LED activates. Additionally, checking the Ethernet port LED status on the connected network device can confirm power and network connectivity.

Troubleshooting Support:

The manual includes a Frequently Asked Questions (FAQ) section to address common issues:

  • Cameras Not Discovered: Solutions include refreshing the discovery, ensuring the camera is powered on, verifying that the camera and NVR/computer are on the same subnet, trying manual addition, and ensuring activation for non-TP-Link NVRs.
  • Power On Confirmation: Guidance on checking the IR LED and Ethernet port LED status.

For more extensive support, users are directed to the TP-Link support website, which offers technical support, replacement services, and user guides. This comprehensive support system ensures that users can maintain their devices effectively and resolve any issues that may arise.

The camera's robust design, flexible installation options, multiple management interfaces, and built-in troubleshooting features make it a versatile and user-friendly solution for various surveillance needs.

TP-Link VIGI C440 Specifications

General IconGeneral
Camera TypeDome
Resolution4MP
Max Resolution2560 × 1440
ApertureF2.0
Night VisionUp to 30 m
Video CompressionH.265/H.264
Ethernet10/100 Mbps
Wireless SecurityWPA/WPA2-PSK
Weather ResistanceIP67
Image Sensor1/2.7" CMOS
Lens4 mm
Frame Rate20fps
Audio CompressionG.711
Wireless Standards802.11b/g/n
ProtocolsTCP/IP, UDP, ICMP, HTTP, HTTPS, DHCP, DNS, RTSP, NTP, UPnP, IGMP
Operating Temperature-30°C to 60°C
Power Supply12V DC
Onboard StorageMicroSD card slot

Related product manuals