Do you have a question about the TP-Link VIGI C540 and is the answer not in the manual?
Attaching the camera bracket to a wall or ceiling using screws and anchors.
Securing the camera bracket to a pole using provided cable ties.
Connecting cameras to the same network as the NVR.
Powering the cameras using PoE or an external power supply.
Adding activated cameras to the VIGI NVR system for management.
Managing cameras using the VIGI Security Manager software on Windows.
Remotely managing cameras and receiving alerts via the TP-Link VIGI mobile app.
Accessing and managing camera settings and live video through a web browser.
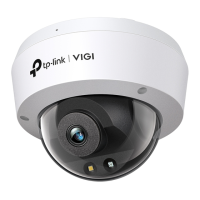
The TP-Link VIGI camera is a versatile surveillance device designed for both indoor and outdoor use, offering robust monitoring capabilities and flexible management options. This camera is engineered to provide clear video footage, reliable connectivity, and user-friendly operation, making it suitable for a variety of security applications.
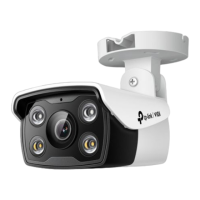
The primary function of the VIGI camera is to capture and record video surveillance footage. It features an RJ45 Network Interface that supports Power over Ethernet (PoE), allowing for both data and power transmission over a single cable, simplifying installation. Alternatively, it can be powered via a 12V DC power supply. The camera is equipped with an Infrared LED for night vision, ensuring clear images even in low-light conditions. A Status LED provides visual feedback on the camera's operational state, indicating whether it is starting up, disconnected from the internet, working normally, connecting to the internet, upgrading, or resetting. For enhanced visibility in certain scenarios, a White LED is also integrated. Audio capabilities are provided by a built-in microphone and a speaker, enabling two-way audio communication and sound recording.
For local storage of video footage, the camera includes a Micro SD Card Slot, supporting cards for continuous recording. A Reset Button is also present, allowing users to restore the camera to its factory settings by a long press. The camera is designed to integrate seamlessly with Network Video Recorders (NVRs), particularly VIGI NVRs, for batch access and management, allowing users to view live video, manage camera settings, and store recordings centrally. It can also be used with other NVR brands, requiring activation via the VIGI Security Manager or TP-Link VIGI app before integration.
The VIGI camera offers multiple methods for installation and management, catering to different user preferences and deployment scenarios.
The camera is designed to work efficiently with NVRs. After connecting the camera to the same network as the NVR and powering it on, users can add cameras through the NVR's interface. If the Plug and Play feature is disabled on the NVR, a password can be set for the camera during activation.
The manual provides guidance on common issues such as cameras not being discovered (suggesting refreshing, checking power, subnet, manual addition, or activation via VIGI Security Manager/app), resetting the camera (by long-pressing the reset button after removing the cover), forgetting the camera password (retrievable via NVR or VIGI Security Manager, or by resetting the camera via the VIGI app), and issues with the SD card (recommending checking card type, re-inserting, using Class 10 micro SD cards from 8 GB to 256 GB, and initializing the card via the VIGI app).
The VIGI camera is designed for ease of maintenance, with features that facilitate troubleshooting and ensure long-term reliability.
Overall, the TP-Link VIGI camera is a comprehensive surveillance solution that combines robust functionality with user-friendly installation and management, making it a reliable choice for various monitoring needs.
| Weatherproof Rating | IP66 |
|---|---|
| Digital Zoom | 16x |
| Wireless Standards | IEEE 802.11b/g/n |
| Wireless Security | WPA/WPA2-PSK |
| Night Vision | Up to 30 m (98 ft) |
| Audio | Built-in microphone |
| Connectivity | Wi-Fi, Ethernet |
| Frame Rate | 20fps |
| Video Compression | H.265/H.264 |
| Audio Compression | G.711/G.726/AAC |
| Ethernet | 10/100Mbps |
| Local Storage | MicroSD card slot |
| Operating Temperature | -30°C to 60°C (-22°F to 140°F) |
| Power Supply | 12V DC |