Do you have a question about the TP-Link VIGI C230 and is the answer not in the manual?
The TP-Link VIGI Dome Network Camera is a surveillance device designed for monitoring and security, offering various features for both indoor and outdoor use. It is primarily intended to be used in conjunction with a Network Video Recorder (NVR) for comprehensive batch access and management, though it also supports standalone operation and integration with other NVR brands.
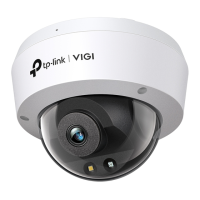
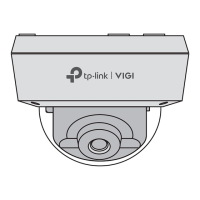
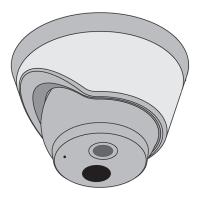
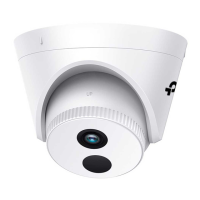
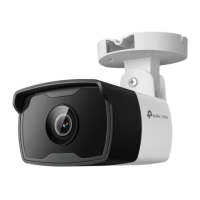
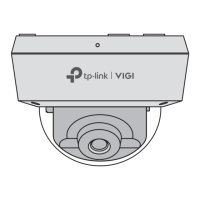
The VIGI Dome Network Camera captures video footage, providing visual surveillance of a designated area. It is equipped with an RJ45 Ethernet port that supports Power over Ethernet (PoE), allowing both power and data transmission over a single cable. Alternatively, it can be powered via a 12V DC power supply. The camera features a microphone for audio capture, an IR LED for night vision, and a white LED, likely for supplemental lighting or deterrent purposes. Some models may include an SD card slot for local storage and a reset button to restore factory settings. The camera's dome design allows for discreet placement and protection of the lens.
The camera offers flexible installation options, supporting both ceiling and wall mounting. The mounting process involves securing a template, drilling holes, and then attaching the camera, paying attention to cable routing. The lens base and dome can be rotated to adjust the viewing angle, providing flexibility in coverage. For outdoor installations, waterproof cable attachments are provided for the network interface to ensure durability and protection against the elements. These attachments involve a series of components—fix nut, waterproof ring, and waterproof jacket—that are assembled to create a secure, watertight seal around the network cable connection.
Integration with an NVR is a core usage feature. Users can connect the camera to the same network as their NVR, power it on, and then add it through the NVR's interface. For TP-Link VIGI NVRs, this involves right-clicking on the Live View screen, selecting "Add Camera," and then choosing the camera to add, potentially requiring a password for activation. For other NVR brands, the camera first needs to be activated using the VIGI Security Manager software or the TP-Link VIGI app before being added to the NVR.
Beyond NVR integration, the camera offers several management methods. The VIGI Security Manager, a Windows-only application, allows users to view live video, modify camera settings, and activate discovered cameras on the same network. The TP-Link VIGI app, available on both the App Store and Google Play, provides remote viewing, camera management, and instant alerts, requiring a TP-Link ID for login. Finally, the camera can be managed via a web browser by accessing its IP address. This method allows users to view live video, select country/region and time zone, set a password for activation, and adjust various settings.
The camera's design incorporates elements that facilitate maintenance and troubleshooting. The top cover is secured by side screws, which can be loosened to remove the cover, providing access to internal components such as the SD card slot and reset button (if present). This access is crucial for tasks like inserting or replacing an SD card, or performing a factory reset.
Troubleshooting guidance is provided for common issues. If cameras are not discovered, users are advised to refresh the discovery process, ensure the camera is powered on, verify that the camera and NVR/computer are on the same subnet, and try manual addition. For other NVR brands, activating the camera with a password via the VIGI Security Manager or TP-Link VIGI app is recommended. To check if the camera is powered on, users can observe the IR LED, which should turn on for about 10 seconds upon power-up. If it's off, covering the lens for a few seconds should trigger it to turn on. Additionally, checking the LED status of the connected network device can provide further diagnostic information.
The waterproof cable attachments are designed for long-term outdoor use, but proper installation is key to their effectiveness. Users are instructed to ensure each part is securely attached and that the waterproof rings are flush to prevent water ingress, which is a critical maintenance consideration for outdoor deployments. The manual emphasizes that once the waterproof interface is correctly installed, it will remain waterproof.
| Audio | Built-in Microphone |
|---|---|
| Weather Resistance | IP67 |
| Aperture | F2.0 |
| Image Sensor | 1/2.7" CMOS |
| Lens | 2.8 mm |
| Night Vision | Up to 30m (98ft) with IR LEDs |
| Connectivity | RJ45 10/100M Ethernet Port |
| Storage | MicroSD card slot (up to 256GB) |
| Power Supply | 12V DC |
| Frame Rate | 30 fps |
| Video Compression | H.265, H.264 |
| Operating Temperature | -30°C to 60°C |