This document provides an installation guide for the TP-Link VIGI Network Video Recorder (NVR), covering its appearance, installation procedures, hardware connections, and configuration. The NVR is designed to manage and record video from network cameras, offering a comprehensive surveillance solution.
Function Description
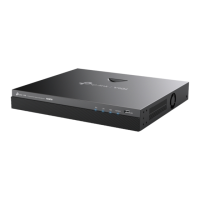
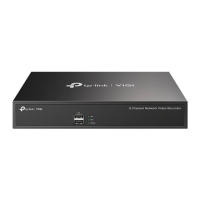
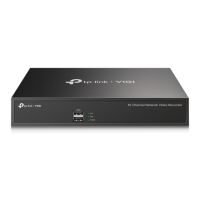
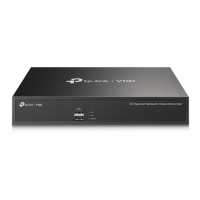
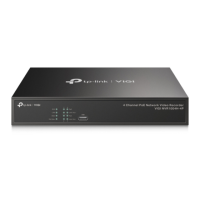
The TP-Link VIGI NVR serves as a central hub for a surveillance system, allowing users to connect, manage, and record video streams from multiple network cameras. It supports both standard NVR models (VIGI NVR2016H) and Power over Ethernet (PoE) NVR models (VIGI NVR2016H-16P/VIGI NVR2016H-16MP), with the latter capable of providing power to PoE Internet Protocol Cameras (IPCs) directly through Ethernet cables.
The NVR features various LED indicators on its front panel to provide quick status updates:
- SYS LED: Indicates the system's operational status. A solid "On" light means the system is running normally, while "Off" signifies an abnormal state.
- LAN LED: Shows the network connection status. "On" indicates the network is working properly, "Flashing" means data is being transmitted or received, and "Off" suggests a network malfunction.
- HDD LED: Reflects the status of the Hard Disk Drive (HDD). "On" indicates the HDD is normal, while "Off" means there is no HDD or it is malfunctioning.
- PoE Max LED (on PoE models): Alerts users about the total PoE power consumption. "On" means the total PoE power has reached a warning threshold. "Flashing" indicates that the warning threshold has been reached for more than 2 minutes. "Off" means the total PoE power does not reach the warning threshold.
The rear panel of the NVR includes several ports for connectivity and expansion:
- Power Socket: For connecting the NVR to an AC power outlet.
- USB Ports: For connecting peripheral devices such as a USB mouse, USB storage device, or USB keyboard.
- eSATA Port: For connecting an external hard drive, expanding storage capacity.
- HDMI Port: An output port for high-definition audio and video signals, allowing connection to a monitor using an HDMI cable.
- VGA Port: An output port for analog video signals, enabling connection to a monitor using a VGA cable.
- Audio Input/Output: Connectors for audio input and output, supporting comprehensive audio-visual surveillance.
- LAN Port: For connecting the NVR to an Ethernet device, such as a router or switch, to integrate it into the network.
- PoE Ports (on PoE models): Designed to connect to devices with 100/10 Mbps bandwidth and provide power to PoE PDs, such as PoE cameras. These ports have Link LEDs and PoE LEDs to indicate their status.
- Link LED: "On" means a device is linked but inactive. "Flashing" indicates data transmission or reception. "Off" means no device is linked.
- PoE LED: "On" means power is supplied normally. "Flashing" indicates overload or short circuit. "Off" means no PoE power is provided.
- Kensington Security Slot: A security slot to prevent theft by securing the device with a lock (not provided).
- Grounding Terminal: Provides lightning protection for the device.
Usage Features
The NVR is designed for straightforward installation and configuration, supporting both desktop and rack-mount setups.
- Hard Drive Installation: The NVR supports both 3.5-inch and 2.5-inch HDDs, with the capacity to mount up to two HDDs at a time. The installation process involves removing the cover, matching screws, and connecting power and data cables. It is recommended to use surveillance or enterprise-level HDDs.
- Hardware Connection: The NVR connects to a monitor via HDMI or VGA, a network device via its LAN port, and a USB mouse for control. PoE NVRs can directly power PoE IPCs.
- Quick Setup: After hardware connection, the NVR guides users through a quick setup process. This includes creating a login password for the NVR and a preset password for unset cameras. The "Auto Initialize" feature automatically discovers and adds cameras on the network, or users can choose "Manually Initialize" for a guided setup.
- Camera Management: The NVR allows for batch management of cameras. After initial setup, additional cameras can be added via the "Add Camera" option on the Live View screen.
- Remote Access and Management: The NVR can be bound to a TP-Link ID for remote access and management through the TP-Link VIGI App or a web browser.
- TP-Link VIGI App: Provides remote live video viewing, NVR management, and instant alerts. Users download the app, log in with their TP-Link ID, and add the NVR.
- Web Browser: Allows viewing live video and modifying NVR settings by accessing the NVR's IP address (default: https://192.168.0.240) on a local computer.
- VIGI Security Manager (Windows only): A dedicated software for Windows computers to view live video and modify NVR settings. It automatically discovers NVRs on the same network.
- Password Reset: If the login password is forgotten, it can be reset via the "Forgot Password" option on the login page or by pressing and holding the Reset button inside the NVR for over 3 seconds to restore factory settings.
- Troubleshooting: The guide includes a FAQ section for common issues such as cameras not being found or NVR failing to connect to the internet, providing steps like refreshing camera discovery, checking power and network connections, or configuring IP settings.
Maintenance Features
The manual emphasizes several safety precautions and site requirements to ensure the longevity and proper functioning of the NVR:
- Power Management: Always keep the power off during installation and use only the provided power cord. Ensure the supply voltage matches the device specifications.
- Environmental Control: Install the device in a well-ventilated environment, ensuring ventilation holes are not blocked. Maintain appropriate temperature and humidity levels to prevent insulation issues, electrical leakage, and corrosion. High temperatures can shorten the device's service life.
- Cleanliness: Regularly dust the device and keep the indoor air clean to prevent static electricity buildup, which can damage electronic components. Ensure the device is well-grounded to dissipate static electricity.
- Electromagnetic Interference (EMI) Protection: To minimize interference, use a power supply that filters power grid interference, keep the device away from high-frequency and strong-current devices, and use electromagnetic shielding if necessary.
- Lightning Protection: Ensure the rack and device are well-earthed, the power socket has good ground contact, maintain a reasonable cabling system to avoid induced lightning, and use a signal Surge Protective Device (SPD) for outdoor wiring.
- Physical Handling: Place the device with its bottom surface downward on a flat, stable, and sturdy surface capable of supporting its weight (at least 5.5 kg). Do not open or remove the cover of the device.
- Cleaning: Before cleaning, cut off the power supply. Do not use a wet cloth or any liquid cleaning methods.
- Security: Utilize the Kensington Security Slot to prevent theft.
- Power Adapter: Always use the provided power adapter, ensuring its operating temperature is within 0-40°C.
- Battery Safety: Avoid replacing the battery with an incorrect type, disposing of it in fire or a hot oven, or mechanically crushing/cutting it, as these actions can lead to an explosion. Do not expose the battery to extremely high temperatures or low air pressure, which could cause leakage or explosion.