EasyManua.ls Logo

TP-Link W8968 - User Manual

TP-Link W8968
2 pages
To Next Page IconTo Next Page
Loading...
Sharedband Bonded Broadband
TP-Link W8968 Flashing Guide
Introduction
This document is to instruct you how to install the Sharedband firmware on a TP-Link W8968
Note: This guide assumes that the TP-Link has stock firmware Installed.
Preparation
Make sure you have the current Sharedband Firmware (Available from the NOC or the Support
Team).
The Procedure
Step 1: Throw the TP-Link CD in the Bin as this is no longer needed, and remove the “Run CD
First” Label from the LAN Ports
Step 2: Ensure that your PC/Laptop has a static IP of 192.168.1.10
Step 3: Ensure the power button is OFF and plug the router in to the mains.
Step 4: Using a pin, depress the reset button. Keeping the reset button depressed, turn on the
power. Ensure that the reset button is depressed for a minimum of 10 seconds.
Step 5: Plug your PC/Laptop into one of the LAN ports on the router.
Question and Answer IconNeed help?

Do you have a question about the TP-Link W8968 and is the answer not in the manual?

TP-Link W8968 Specifications

General IconGeneral
Wireless StandardIEEE 802.11b/g/n
Frequency2.4GHz
USB Port1 x USB 2.0
Data RateUp to 300Mbps
TypeADSL2+ Modem Router
ADSL2+ Download SpeedUp to 24Mbps
ADSL2+ Upload SpeedUp to 3.5Mbps
Dimensions7.7 x 5.1 x 1.4 in. (195 x 130 x 36 mm)
Ethernet Ports4 x 10/100Mbps LAN Ports, 1 x 10/100Mbps WAN Port
Antenna2 x External
StandardsIEEE 802.3, 802.3u
Wireless SecurityWPA/WPA2, WEP
SecuritySPI Firewall

Summary

Introduction to Sharedband Flashing

Document Overview

Instructions for installing Sharedband firmware on a TP-Link W8968, assuming stock firmware is installed.

Preparation Steps

Ensure current Sharedband firmware is available from the NOC or Support Team prior to proceeding.

Router Preparation and Connection

Prepare router by setting static IP, connecting power, and performing a reset while powering on.

PC and Router Connectivity

Connect PC/Laptop to router's LAN port after initial setup.

Firmware Update Procedure

Access Router Interface

Log in to the router's web interface using the IP address 192.168.1.1.

Upload New Firmware

Browse to and select the firmware file, then click 'Update Software'.

Monitor Software Installation

Wait approximately 3 minutes for the 'New software is being programmed' message.

Verify Firmware Installation

Reset PC/Laptop IP settings and log in to the new address to confirm success.
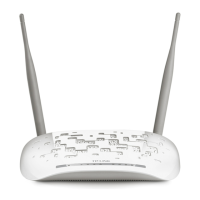
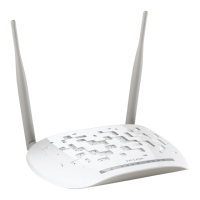
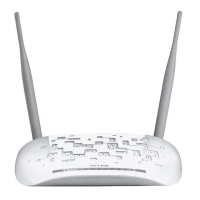
Related product manuals