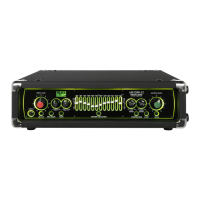
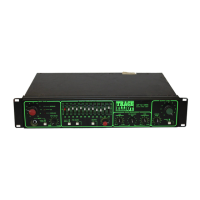
BASIC COMPARISON OF REATURES:
7 Band 12 Band
LED level indication Yes Yes
HI / LO sensitivity switch Yes Yes
TUNER OUT Yes Yes
PRE SHAPE circuit Yes Yes
DI OUTPUT on front Yes No
VALVE DRIVE circuit No Yes
7 BAND GRAPHIC EQUALIZER Yes No
12 BAND GRAPHIC EQUALIZER No Yes
COMPRESSOR Yes No
DUAL BAND COMPRESSOR No Yes
SERIES EFFECTS LOOP Yes No
MULTI OPTION EFFECTS LOOP No Yes
DI OUTPUTS on rear No Yes
MUTE switch Yes Yes
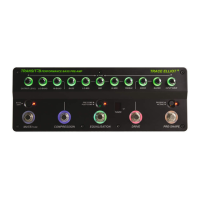
4 function footcontroller Yes No
6 function footcontroller No Yes
Brightness Control for front panel Yes Yes
QUICK START:
This section is for people who are either too excited or too impatient to read the whole manual before using
their new Trace Elliot. Please at least read this rst section thoroughly and return to the rest of the manual
later, lest you don’t get the full potential out of your new amplier.
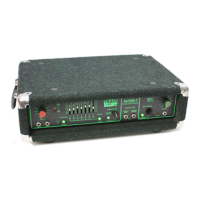
(1) Once you unpack your Trace Elliot, plug the power cord into the socket on the rear panel and connect to a
mains socket supplying the proper AC line voltage for your unit. This is located on the rear of the unit, near
the mains inlet and power switch.
(2) If your unit is an amplier head (e.g. AH600-7, AH1200-12, etc.) then connect the speaker output to your
speaker cabinet(s). (More information on this is provided in the Owner’s Guide for the cabinet).
(3) Turn the OUTPUT LEVEL control to the “0” position.
(4) Connect the footcontroller (included) to the EXTERNAL CONTROL socket on the rear panel using the
eight-pin DIN cable (included).
(5) Plug your instrument into the INPUT on the front panel using a high quality shielded instrument cable and
turn the INPUT GAIN control to the “0” position.
(6) Flip the power switch on the rear to the “ON” position to turn the unit on.
(7) Set your instrument to your normal settings and while striking a string hard turn up the INPUT GAIN
gradually. While doing this observe the level indication LEDs above the control. When the red LED starts to
be lit, turn the INPUT GAIN control back one or two clicks so that it only lights up very occasionally.