25
TRAEGER.COM
3. OUTSIDE STORAGE:
w CAUTION
If the grill is stored outside, care should be
taken to ensure that water does not get into the pellet hopper.
Wood pellets expand greatly when wet and will jam your auger.
Always cover your grill when not in use with a Traeger® Grill Cover.
This custom-fit cover can be purchased at traeger.com.
4. CLEANING THE ASH FROM INSIDE AND AROUND THE FIREPOT
(AFTER APPROXIMATELY 20 HOURS OF COOKING):
w WARNING
Make sure that the grill is COLD and ashes are
extinguished and COLD before cleaning the ash.
w WARNING
Disposal of ashes should be done only
according to the following instructions.
Excess ash in the firepot will hamper ignition and may cause your
fire to go out. The firepot should be inspected occasionally and
cleaned to remove the ash buildup. Again, cleaning the ash from in
and around the firepot should be done only when the grill is COLD.
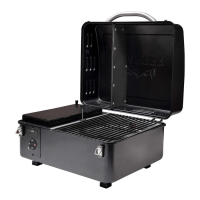
Remove the grill grate and
grease drip tray to provide
access to the firepot and the
interior of the grill. Much of
the ash outside of the firepot
can be removed from the grill
with a small metal fireplace
shovel or other similar tool.
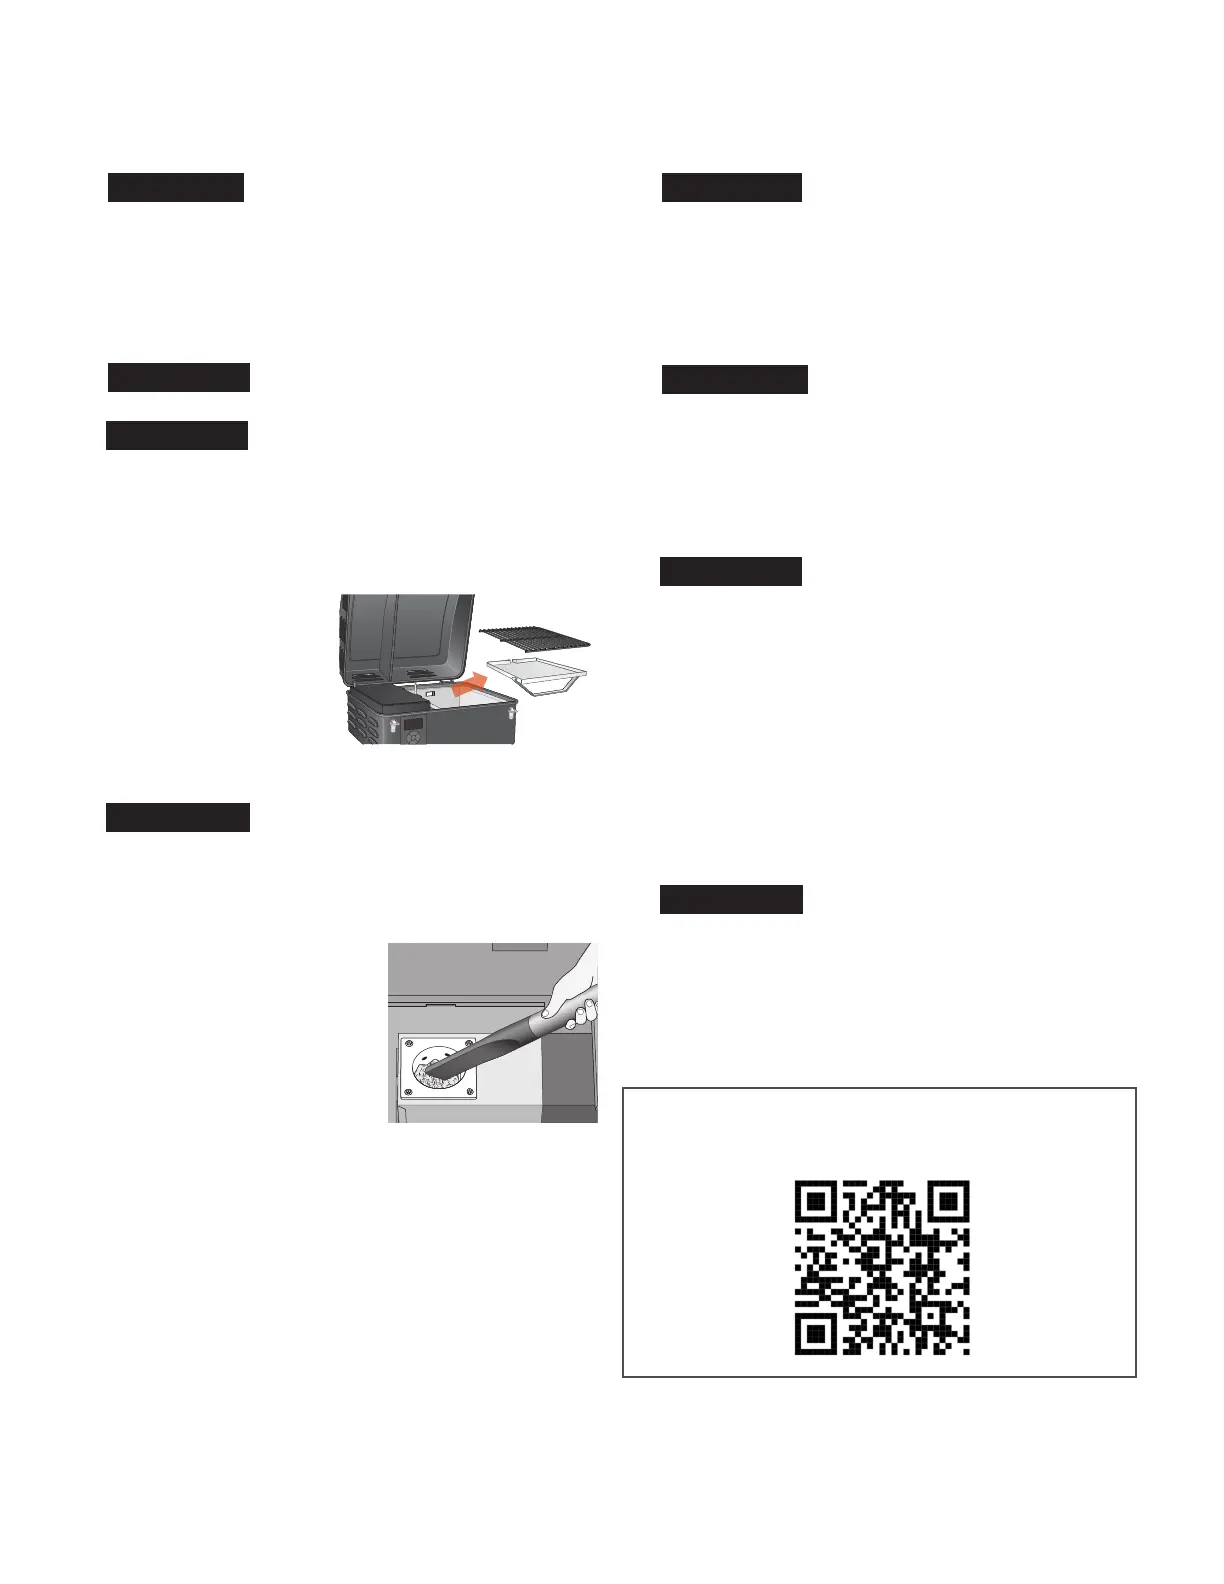
w WARNING
A vacuum cleaner dedicated to grill cleaning
only is the best way to remove ashes from the firepot, but this
must be done with extreme care to avoid the risk of fire. Again,
cleaning the ash from in and around the firepot should be done
only when the grill is COLD.
A utility-type vacuum cleaner having
a metal collection canister without
a bag would be best for this task.
However, almost any vacuum cleaner
will work safely if this procedure is
properly followed.
Afer ensuring that the ash in the
firepot is COLD, vacuum the ash
from the inside of the firepot.
a. If your vacuum cleaner is a bagless model, empty any
previously accumulated debris from the collection chamber.
Then vacuum the ash from the inside of the firepot. Once the
firepot is clean, empty the collection chamber into the metal
container handled in the manner described below under
Disposal of Ashes without delay. Make sure that there is no
remaining ash residue lef in the collection chamber.
b. If your vacuum cleaner is a model that uses a disposable bag,
install an unused bag in the machine. Then vacuum the ash from
the inside of the firepot. Once the firepot is clean, remove the
bag from the vacuum cleaner and place it in a metal container
handled in the manner described under Disposal of Ashes below.
5. DISPOSAL OF ASHES:
w WARNING
Ashes should always be completely cool
before handling. Ashes should be placed in a metal container with
a tight-fitting lid. The closed container of ashes should be placed
on a noncombustible floor or on the ground, well away from all
combustible materials, pending final disposal. Ashes should be
retained in the closed container until they are disposed.
6. CLEANING THE GRILL GRATE:
w WARNING
Cleaning the grill grate works best while
it is still warm. Be careful not to burn yourself. Heat-protective
gloves are recommended. We recommend keeping a long-handled
cleaning brush near the grill. Afer removing your food, give the
grill grate a quick brushing. It takes only a minute and it will be
ready the next time you want to use the grill.
7. CLEANING OUTSIDE SURFACES:
w WARNING
Turn the main power switch OFF (O) and
disconnect the power cord before initiating cleaning.
Use a disposable rag or cloth dampened with Traeger® All Natural
Cleaner or warm, soapy water to wipe the grease from the outside
of the grill. DO NOT use oven cleaner, abrasive cleansers, or
abrasive cleaning pads on the outside grill surfaces.
8. TESTING THE GRILL AFTER CLEANING:
Before replacing the grease drip tray and the grill grate, plug the
power cord into an appropriate grounded/earthed electrical outlet
and turn the switch ON (I). Afer you set the temperature and press
IGNITE, pellets should fall into the firepot and the hot rod should
begin to heat (it will start to turn red).
w WARNING
Do not touch the hot rod.
When flames start to come out of the firepot, run the shutdown
cycle. Let the grill cool down. Now you’re ready to place the grease
drip tray, grill grate, and food back onto the grill.
9. POWER CORD
If the power supply cord is damaged, it must be replaced by a
special cord assembly available from Traeger.
FREQUENTLY ASKED QUESTIONS
Scan this QR code to take you to Frequently Asked Questions.
 Loading...