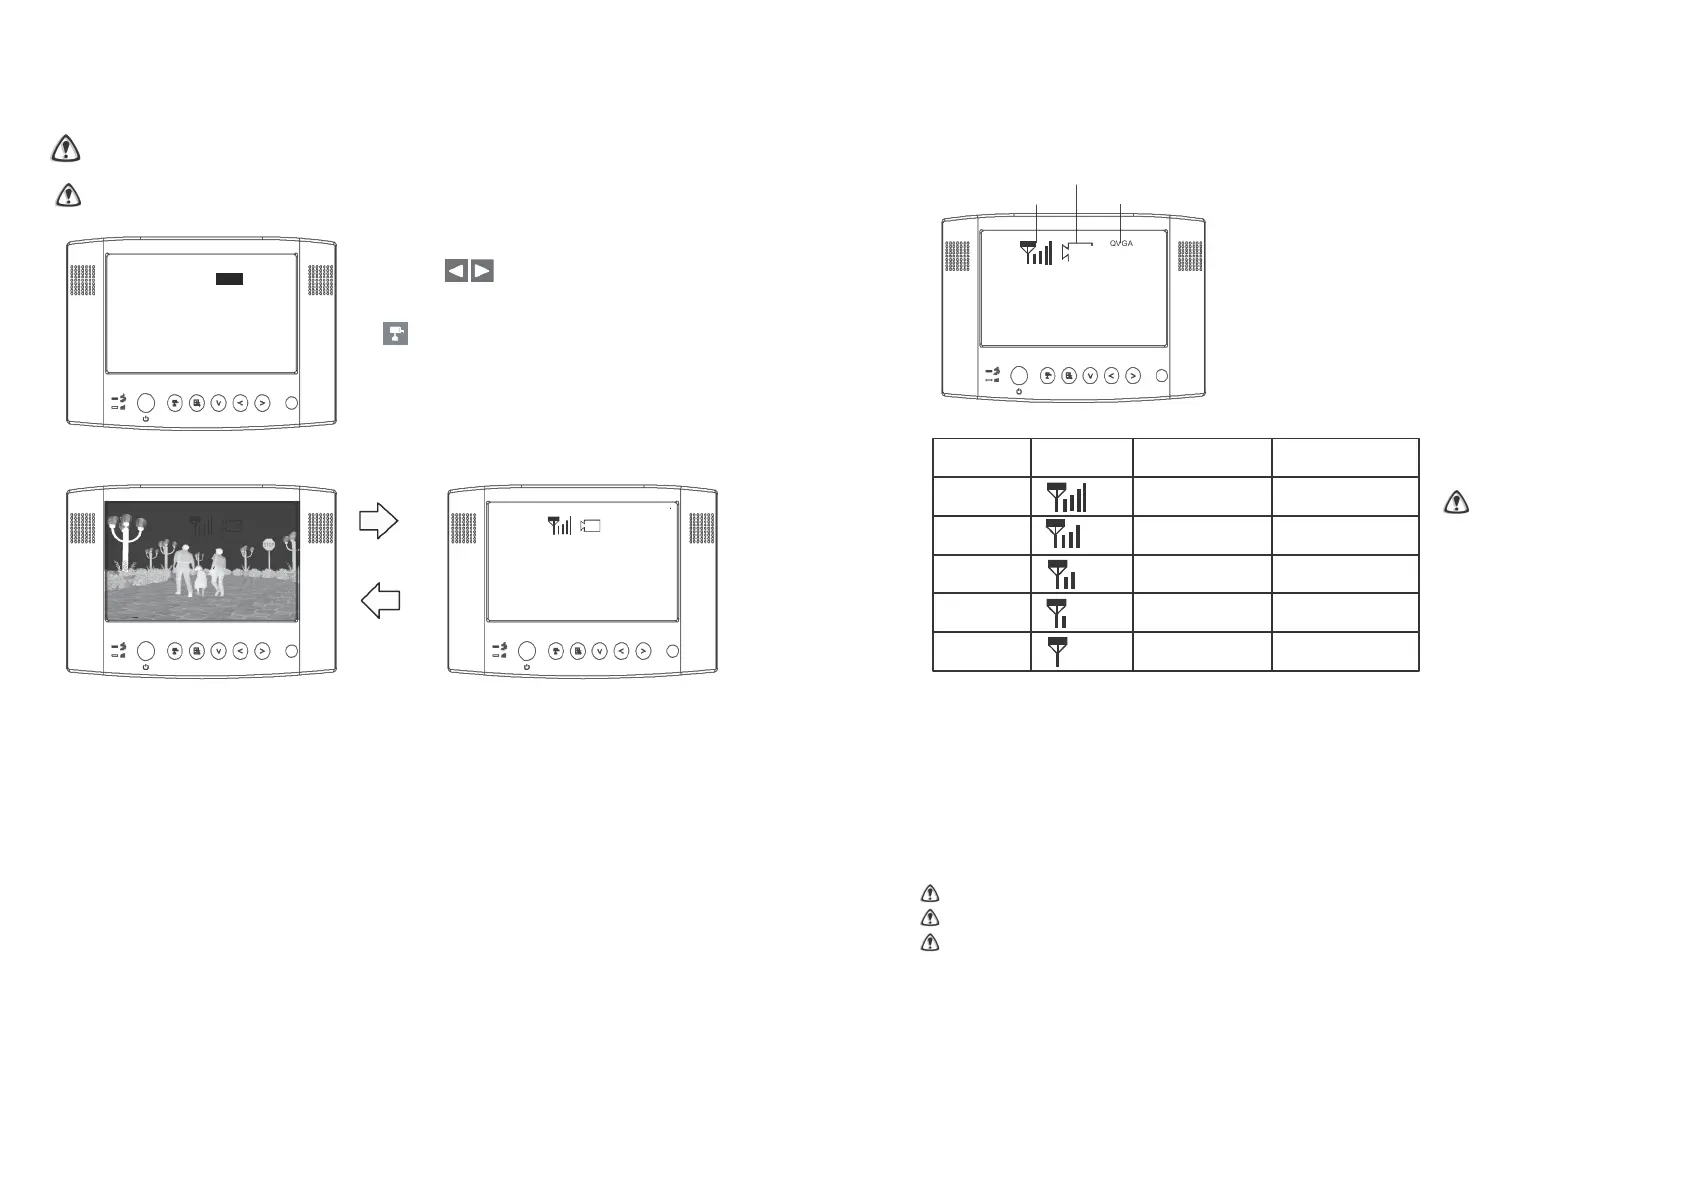
Skip Certain Camera(s) During Manual Scan
Before setting Scan and Skip, make sure all cameras are paired to assigned
channels, see
next pages for
detail.
View Mode
Channel Indicator
Make sure the channel assigned to the reversing camera is turned ON.
Signal Indicator
Resolution Indicator
Resolution QVGA
QUAD
ON
C A M 1 O N
C A M 2 O F F
C A M 3 O N
C A M 4 O F F
Pair CAM 1 2 3 4
System Setup
Factory Reset
A. Simply set the skip camera(s) OFF by
pressing (Left / Right).
B. To skip Camera 2 and 4 by pressing
(Cam), settings as shown:
Display as shown:
1 3
A. Signal Indicator shows signal strength, more bars indicate a stronger signal.
Signal Level Indicator VGA Frame Rate QVGA Frame Rate
Perfect 5~10Fps 15~30Fps
Good
3~5Fps 12~20Fps
Fair 2~4Fps 8~15Fps
Low 0~1Fps 0~4Fps
Zero 0Fps 0Fps
It’s recommended
that QVGA
resolution is utilised
to ensure that a
smooth image is
displayed. To do so,
simply select
[Resolution]
to switch to QVGA as
shown on the
[Resolution Indicator].
B. Reversing Camera Operation Steps:
1. Press [Power] button to power ON.
2. Switch to QVGA mode if necessary.
3. Select Reverse Gear (if the camera is powered by the reversing light).
4. Reverse image will be displayed.
5. If the/a camera is used to view the interior of a vehicle/horsebox, then it
should be powered from an ignition controlled circuit, or a lighting circuit could
be used.
STOP REVERSING when [NO Signal] shows on the monitor.
Press [Cam] button to locate the reversing camera channel if necessary.
This is a driving aid, safe driving, good observation and use of the rear-view/wing
mirror are still necessary.