of the bolts in the proper order.
24
9
9
9
20
20
2
2
23
2
3
3
3
4
4
22
6
6
6
7
7
7
8
8
10
10
10
19
19
18
18
17
17
21
16
16
16
15
15
15
14
14
14
13
13
13
12
12
11
11
16 bolt flange 20 bolt flange 24 bolt flange
Flanges with More than 24 Bolts
Sequentially tighten the first 12 bolts to a snug tight-
ness. Tighten the next 12 consecutively numbered bolts
in sequence, to the final torque. Then, apply final torque
to the first 12 bolts and the bolts not yet tightened (i.e.,
unnumbered bolts in the figure at right sure to start with
bolt “1” and move progressively around the flange in a
clockwise direction.
24
9
20
23
3
4
22
8
10
19
18
17
21
16
15
14
13
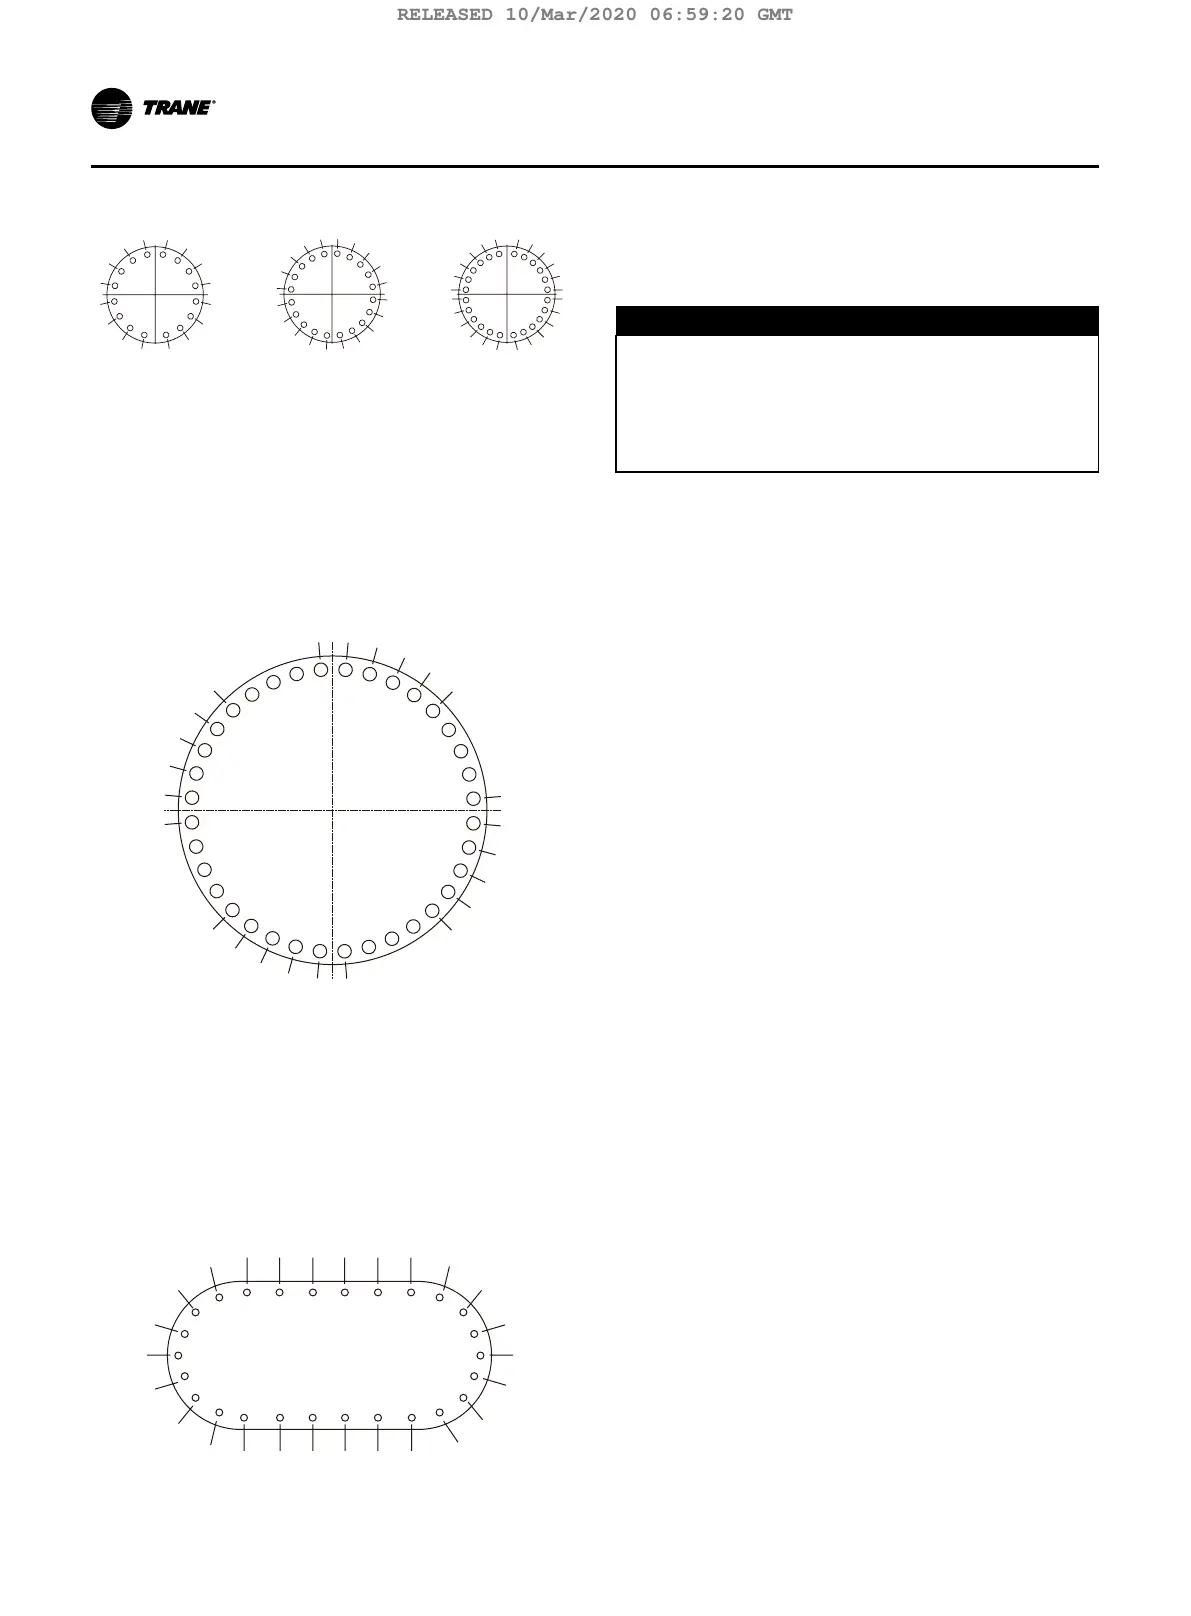
Evaporator Water Box Covers
Ensure that the water box head rests tightly against the
tube sheet; then snugly tighten the 26 bolts in sequential
order. If excessive tube sheet crown prevents the head
from contacting the tube sheet, tighten the bolts located
where the greatest gaps occur. Be sure to use an equal
number of bolt turns from side to side. Then, apply final
torque to each bolt in sequential order.
24
5
20
2
23
4
6
7
8
18
26
25
17
16
15
12
Pressure Testing Waterside Piping
Water side design pressure is either 150 or 300 psig refer
to unit nameplate or to submittal documentation.
D
NOTICE
Equipment Damage!
Do not over pressurize the system or exceed design
pressure. Always perform as a hydro pressure test
with water present in piping and water boxes. Fail-
ure to follow these recommendations could result in
equipment damage.
24 TCVHE-SVX04D-EN
Installation Water Piping
RELEASED 10/Mar/2020 06:59:20 GMT