18-HH36D1-1A-EN
5
Installation Instructions
NNoottee:: For all installations, make sure the surface is
clean and clear of debris to make sure proper
adhesion.
FFooaamm IInnssttaallllaattiioonn oonnttoo tthhee CCoonnttrrooll BBooxx CCoovveerr
1. Disconnect the main power supply to the outdoor
unit and wait for 2 minutes before installation.
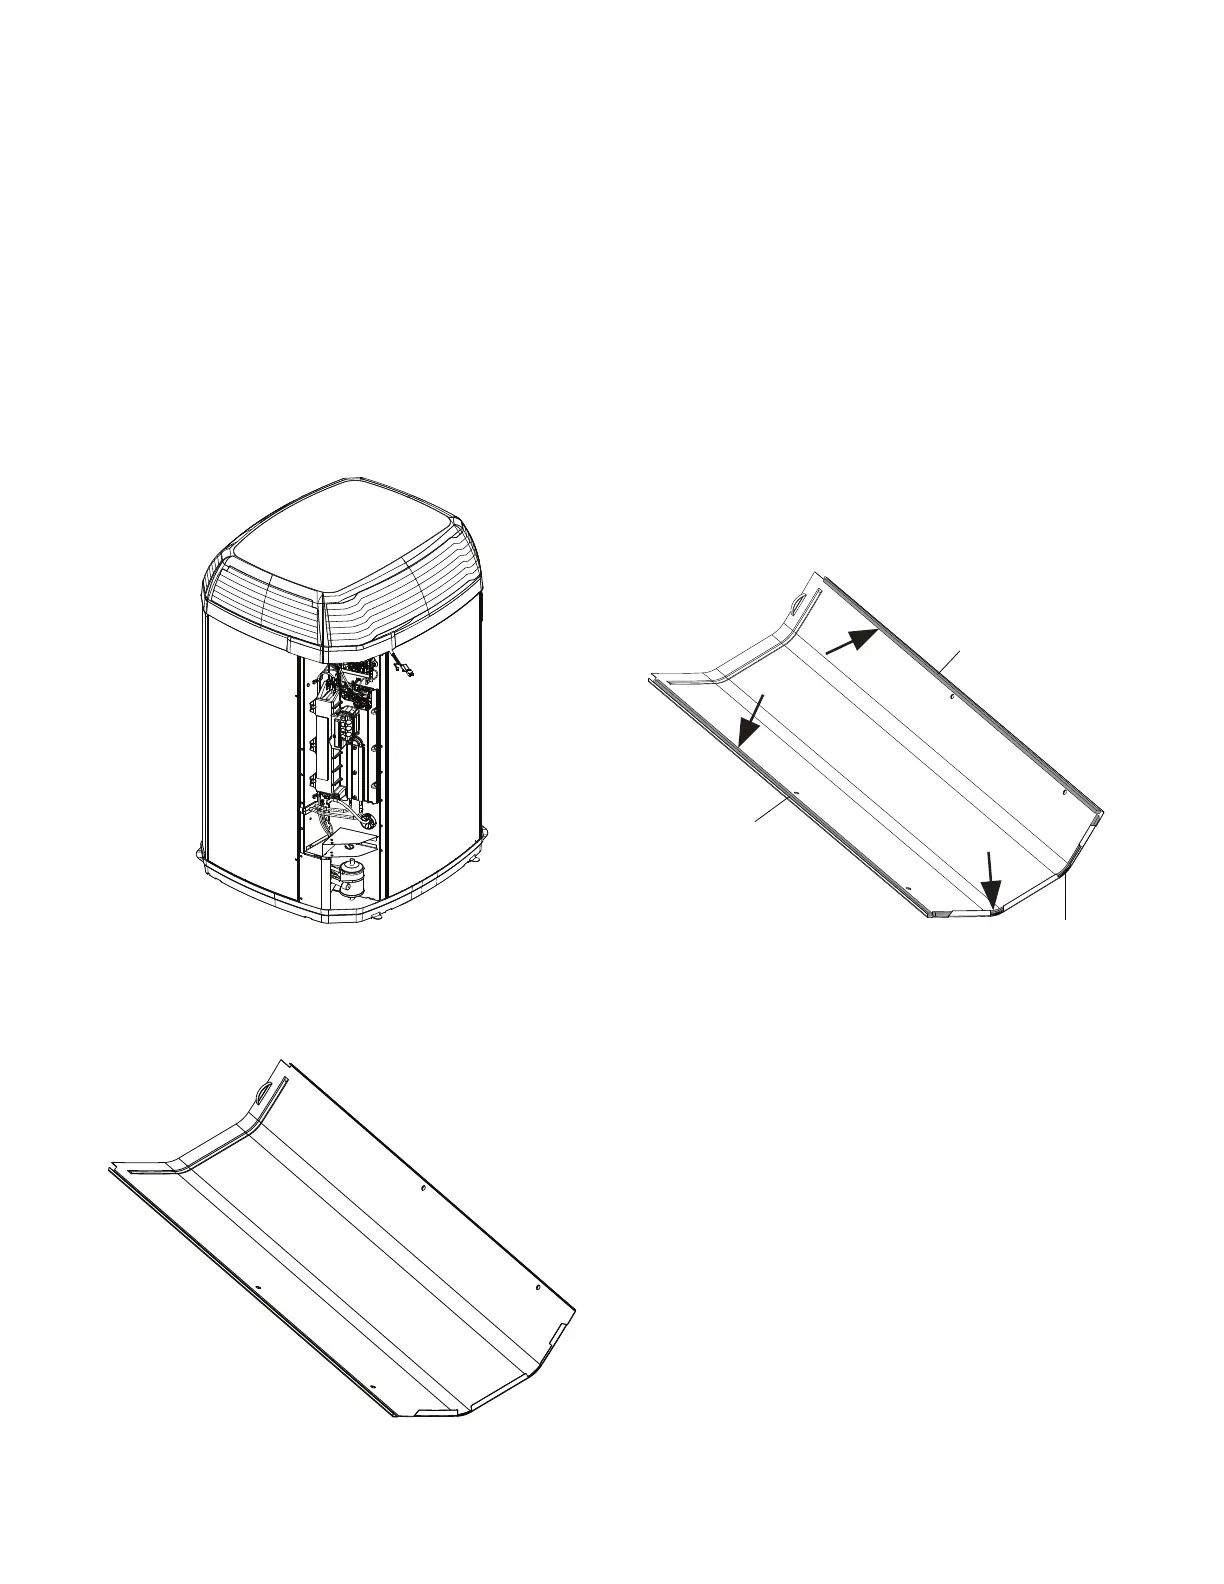
2. Remove the control box cover from the unit. See
Figure 1, p. 5.
Figure 1. Control Box Cover Removal
3. Place the control box cover on a stable surface with
the inside surface facing upwards.
See Figure 2, p. 5.
Figure 2. Control Box Cover
4. Remove the adhesive backing from both the side
foams.
5. Align and attach the side foams to each of the
longer side edges of the control box cover. See
Figure 3, p. 5.
NNoottee:: If the cover is shorter, cut the foams to the
correct length.
6. Remove the adhesive backing from the bottom
foam.
7. Attach the bottom foam onto the bottom flange of
the control box cover and between the side foams.
See Figure 3, p. 5.
Figure 3. Install Side and Bottom Foams
Side Foam
Side Foam
Bottom Foam
FFooaamm IInnssttaallllaattiioonn oonn tthhee UUnniitt
1. Install Duct Tape.
a. Cut two (2) pieces of duct tape of length 1 ½"
and width ¾" respectively.
b. Attach one (1) piece of duct tape over the gap
near the copper tube entry. See Figure 4, p. 6.
c. Attach the other piece of duct tape over the two
(2) holes in the bottom plate. See Figure 4, p. 6.
NNoottee:: If required, use silicone to fill the holes.