Page 6
INSTALLER'S GUIDE
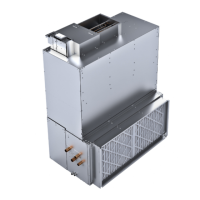
Hot Water
In
Hot Water
Out
C
US
ELECTRICAL SAFETY
NRTL LISTED
MET
UL 1995
CAN/CSA-C22.2 No. 236
E212365
STEP 4 - Attach flange to air handler and coil.
1. Using field supplied screws, attach the coil attachment
flange to the air handler and the coil.
2. Use four screws minimum per side.
3. Recommended screw length is 1/2" long.
Hot Water
Out
Hot Water
In
C
US
ELECTRICAL SAFETY
NRTL LISTED
MET
UL 1995
CAN/CSA-C22.2 No. 236
E212365
Four screws Minimum per side
Recommended
piping directions
Section 5. Piping
NOTE - The hydronic coil can be installed in upflow,
downflow, or horizontal positions. When the air han-
dler is installed in the horizontal orientation, an addi-
tional strap must be used on the coil section.
STEP 1 - Attach piping to the hydronic coil.
1. Piping must consist of two vertical pipes or two
horizontal pipes.
2. Use a low temperature braze solder to attach pipes.
NOTE - The recommended piping directions are
upward, and to either the right or left side when in the
upflow orientation.
In all orientations, the water lines should not cross
over the air handler unit.
HOT WATER
OUT
HOT WATER
IN
IMPORTANT - Follow all National and local codes
when piping the hydronic system.
 Loading...