22
CVHE-SVN04M-EN
Compressor Motor Assembly
Removal
NNOOTTIICCEE
CCoommpprreessssoorr DDaammaaggee!!
FFaaiilluurree ttoo ffoollllooww iinnssttrruuccttiioonnss bbeellooww ccoouulldd ccaauussee
tthhee iinntteerrnnaall ccoommppoonneennttss ttoo sshhiifftt wwhhiicchh ccoouulldd
rreessuulltt iinn sseerriioouuss ccoommpprreessssoorr ddaammaaggee uuppoonn
ssttaarrttiinngg tthhee uunniitt..
TThhee ccoommpprreessssoorr mmoottoorr aasssseemmbbllyy mmuusstt nnoott bbee
rreemmoovveedd ffrroomm tthhee cchhiilllleerr uunnlleessss ssppeecciiaall ddoowweelliinngg
hhaass bbeeeenn iinnssttaalllleedd aatt tthhee ffaaccttoorryy.. DDoowweelliinngg mmuusstt
bbee iinnssttaalllleedd ttoo pprreevveenntt tthhee iinntteerrssttaaggee ccaassiinnggss ffrroomm
sshhiiffttiinngg.. IIff tthhee ccoommpprreessssoorr//mmoottoorr aasssseemmbbllyy iiss
lliifftteedd wwiitthhoouutt ddoowweelliinngg iinnssttaalllleedd,, tthhee iinntteerrnnaall
aalliiggnnmmeenntt mmaayy sshhiifftt.. IItt wwoouulldd tthheenn bbee nneecceessssaarryy ttoo
ddiissaasssseemmbbllee aanndd tthheenn rreeaasssseemmbbllee tthhee ccoommpprreessssoorr
mmaakkiinngg ssuurree tthhaatt aallll iinntteerrnnaall cclleeaarraanncceess aanndd
ssppeecciiffiiccaattiioonnss aarree pprrooppeerr.. IIff ddoowweelliinngg iiss nnoott
ffaaccttoorryy iinnssttaalllleedd,, aanndd iitt iiss nneecceessssaarryy ttoo iinnssttaallll
ddoowweelliinngg,, ccoonnttaacctt tthhee llooccaall TTrraannee SSeerrvviiccee
CCoommppaannyy.. TThhee ccoommpprreessssoorr ddiisscchhaarrggee ffllaannggee aanndd
mmoouunnttiinngg ffoooott aarree aallssoo ddoowweelleedd aatt tthhee ffaaccttoorryy ttoo
pprroovviiddee pprrooppeerr aalliiggnnmmeenntt dduurriinngg rreeaasssseemmbbllyy..
Figure 7, p. 22 through Figure 10, p. 22 show factory-
installed compressor doweling. If components are not
factory doweled, doweling must be installed before
proceeding. Contact the local Trane Service Company.
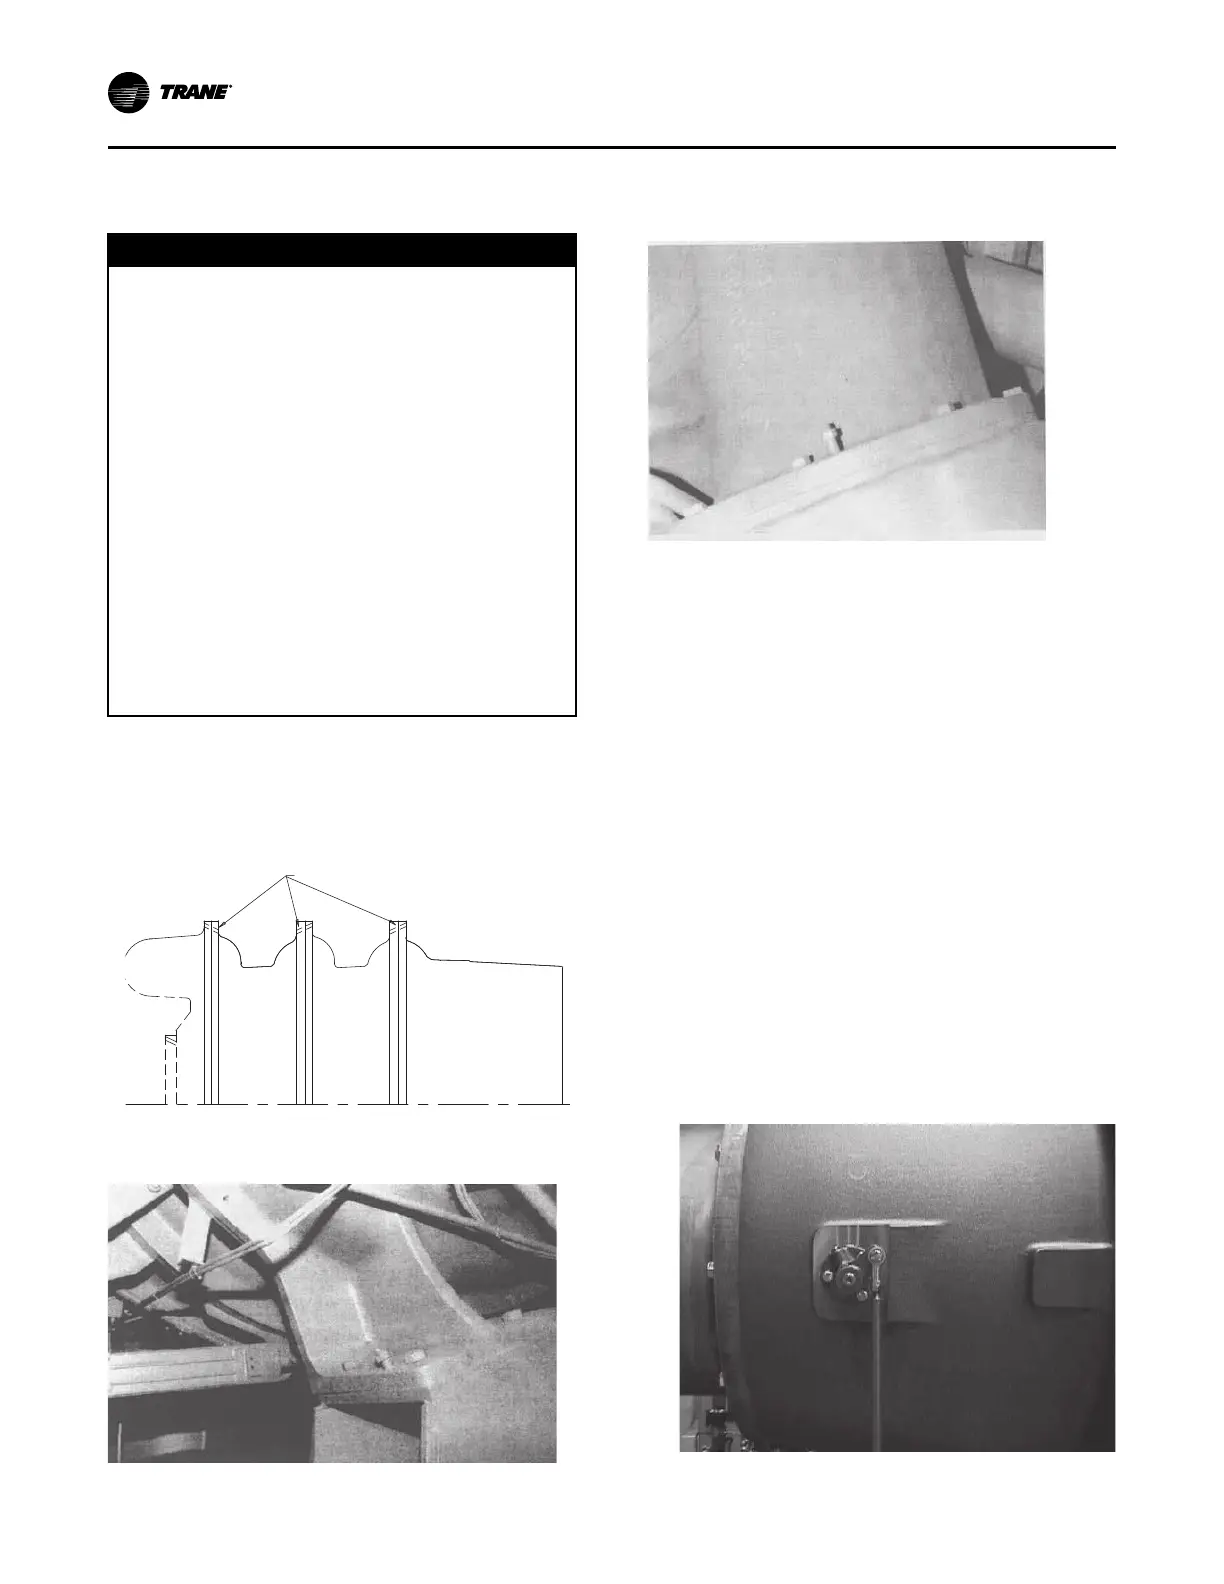
Figure 7. Compressor dowelings on casings
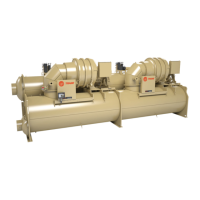
Figure 8. Compressor doweling on evaporator foot
(these are standard on all CenTraVac™™ chillers)
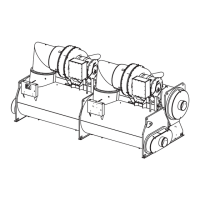
Figure 9. Compressor doweling on condenser
discharge flange (these are standard on all CenTraVac
chillers)
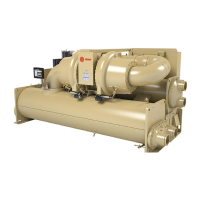
1. Disconnect the inlet vane linkage.
a. Disconnect the rod end bearings connecting the
inlet vane operator levers to the guide vane
links as in Figure 10, p. 22 and Figure 11, p. 23.
Leave the rod end bearing connecting the guide
vane links to the main drive levers attached.
NNoottee:: Do not rotate the rod end bearings on the
shaft as this will alter the inlet guide vane
operations and compressor performance.
b. Remove the cotter pin securing the vane
operator stud to the vane drive and slide the
stud out of the main drive. See Figure 12, p. 23.
c. Remove the hex head bolts securing the vane
drive support assemblies to the compressor
castings and remove the main drive and inlet
vane levers from the compressor as a unit. See
Figure 12, p. 23.
d. Remove the hex head bolts securing the vane
drive support assemblies to the compressor
castings and remove the main drive and inlet
vane levers from the compressor as a unit. See
Figure 12, p. 23.
Figure 10. Vane actuator level on suction cover
DDiissaasssseemmbbllyy