20
6. Maintenance
6.6 Belt Replacement
Where a belt guard has been supplied,
please remove the belt guard before
starting work.
To change the belt (or belts), first move
the motor towards the fan by a sufficient
amount to enable the old belts to be
taken off the pulleys and the new belts to
be put on.
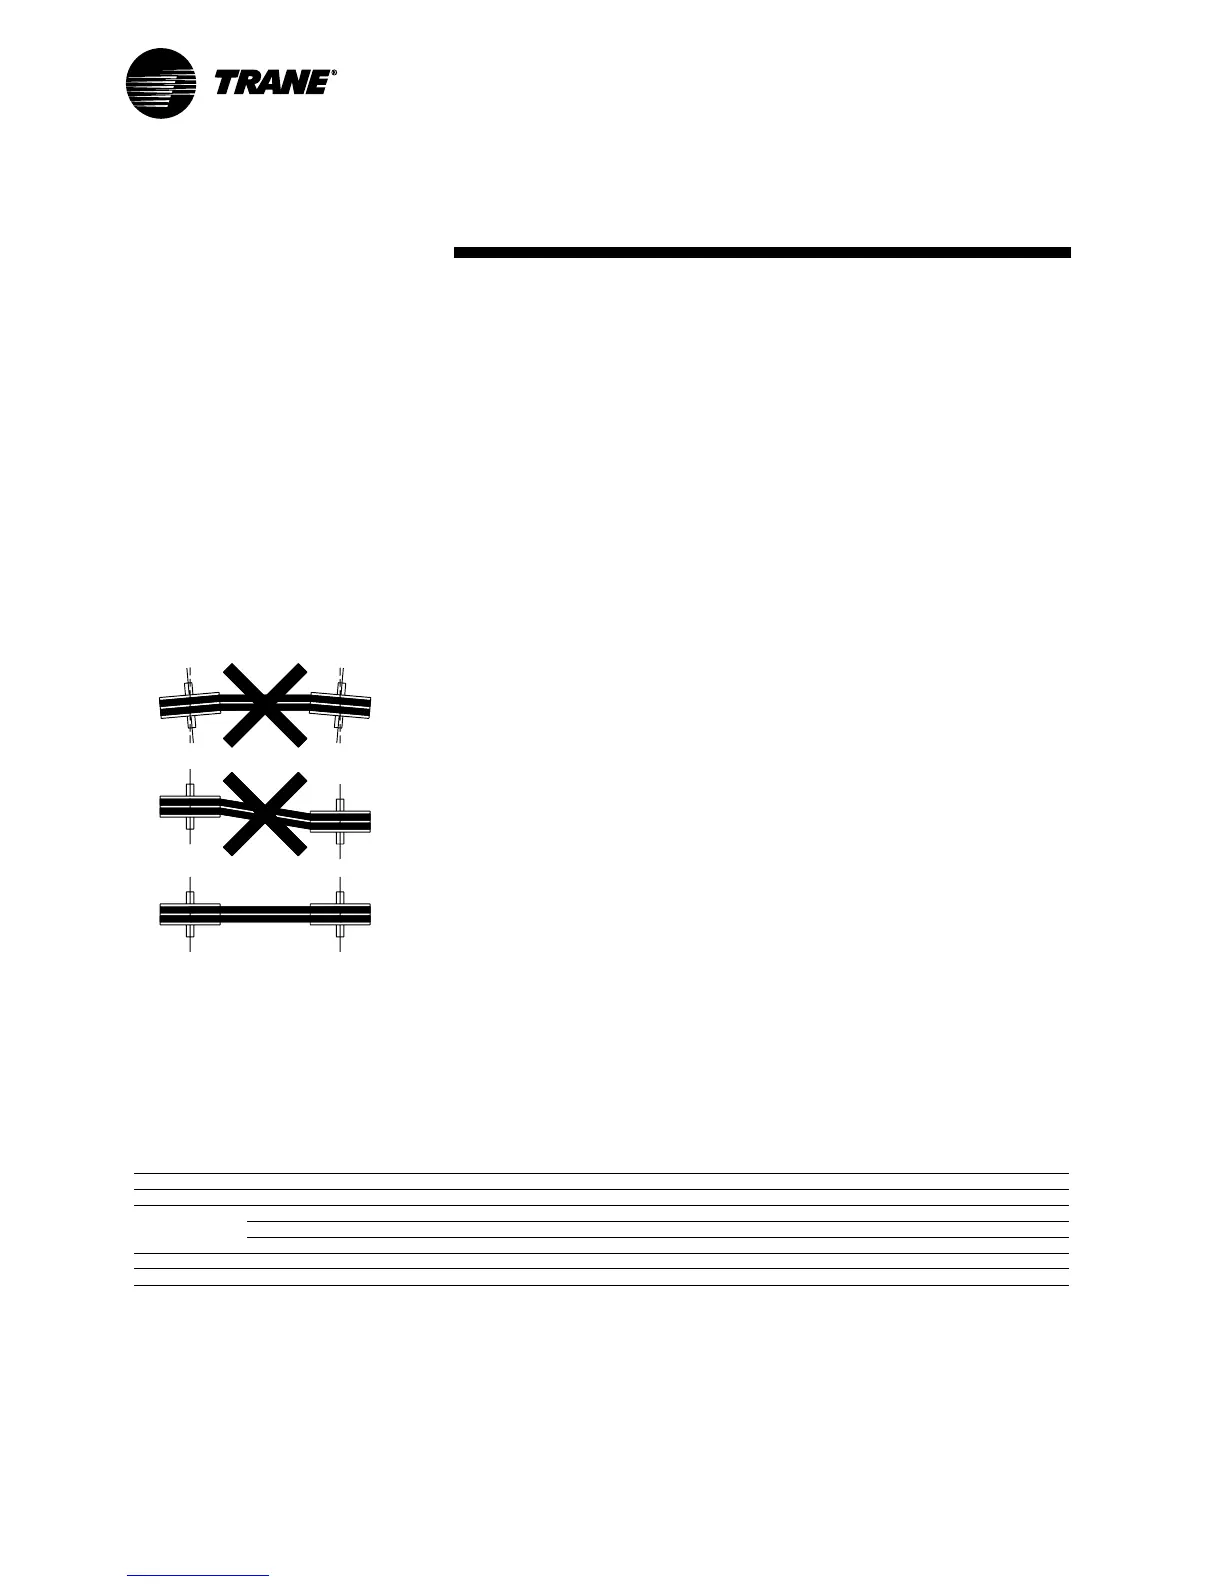
If the belt drive has more than one belt,
replace all belts at the same time (see
Figure 21). In such cases, use matched
belts, such as sets in which all belts are
exactly the same lengths.
Tension the belts as per Section 6.5.
Figure 21
Fenner is a registered trademark of J H
Fenner & Co Ltd.
Taper Lock and P B (Precision Built) are
registered trademarks of F P T Group.
Reproduced with permission of F P T
Group.
TO INSTALL
1. Remove the protective coating from
the bore and outside of bush, and bore
of hub. After ensuring that the mating
tapered surfaces are completely clean
and free from oil or dirt, insert bush in
hub so that holes line up.
2. Sparingly oil thread and point of grub
screws, or thread and under head of
cap screws. Place screws loosely in
holes threaded in hub.
3. Clean shaft and fit hub to shaft as one
unit and locate in position desired,
remembering that bush will nip the
shaft first and then hub will be slightly
drawn onto the bush.
4. Using a hexagon wrench, tighten
screws gradually and alternately to the
torques shown in Table 3.
5. Hammer against large end of bush,
using a block of sleeve to prevent
damage. (This will ensure that the bush
is seated squarely in the bore.) Screws
will now turn a little more. Repeat this
alternate hammering and screw
tightening once or twice to achieve
maximum grip on the shaft.
6. If a key is to be fitted, place it in the
shaft keyway before fitting the bush. It
is essential that it is a parallel key and
side fitting only, and has TOP
CLEARANCE.
7. After the drive has been running under
load for a short time, stop and check
tightness of the screws.
8. Fill empty holes with grease to exclude
dirt.
TO REMOVE
1. Slacken all screws by several turns.
Remove one or two according to the
number of jacking off holes. Insert
screws in jacking off holes after oiling
thread and point of grub screws or
thread and under head of cap screws.
2. Tighten screws alternatively until bush
is loosened in hub and assembly is
free on shaft.
3. Remove assembly from shaft.
Table 3 – Torque Settings
Bush Size 1008 1108 1210 1610 2012 2517 3020 3525 4030 4535 5040
Screw Tightening Torque (Nm) 5.6 5.6 20 20 30 50 90 115 170 190 270
Screw Details Quantity 22222 223 3 33
Size (BSW) 1/4" 1/4" 3/8" 3/8" 1/16" 1/2" 5/8" 1/2" 5/8" 3/4" 7/8"
Hexagon Socket Size (mm) 33555 6810121414
Large End Diameter (mm) 35.0 38.0 47.5 57.0 70.0 85.5 108.0 127.0 146.0 162.0 177.5
Approximate Mass (kg) 0.1 0.1 0.2 0.3 0.7 1.5 2.7 3.8 5.6 7.5 11.1
Fenner is a registered trademark of J H Fenner & Co Ltd.
Taper Lock and P B (Precision Built) are registered trademarks of F P T Group.
Reproduced with permission of F P T Group.
CLCH-SVX05A-GB