RT-SVX23D-EN 27
Installation
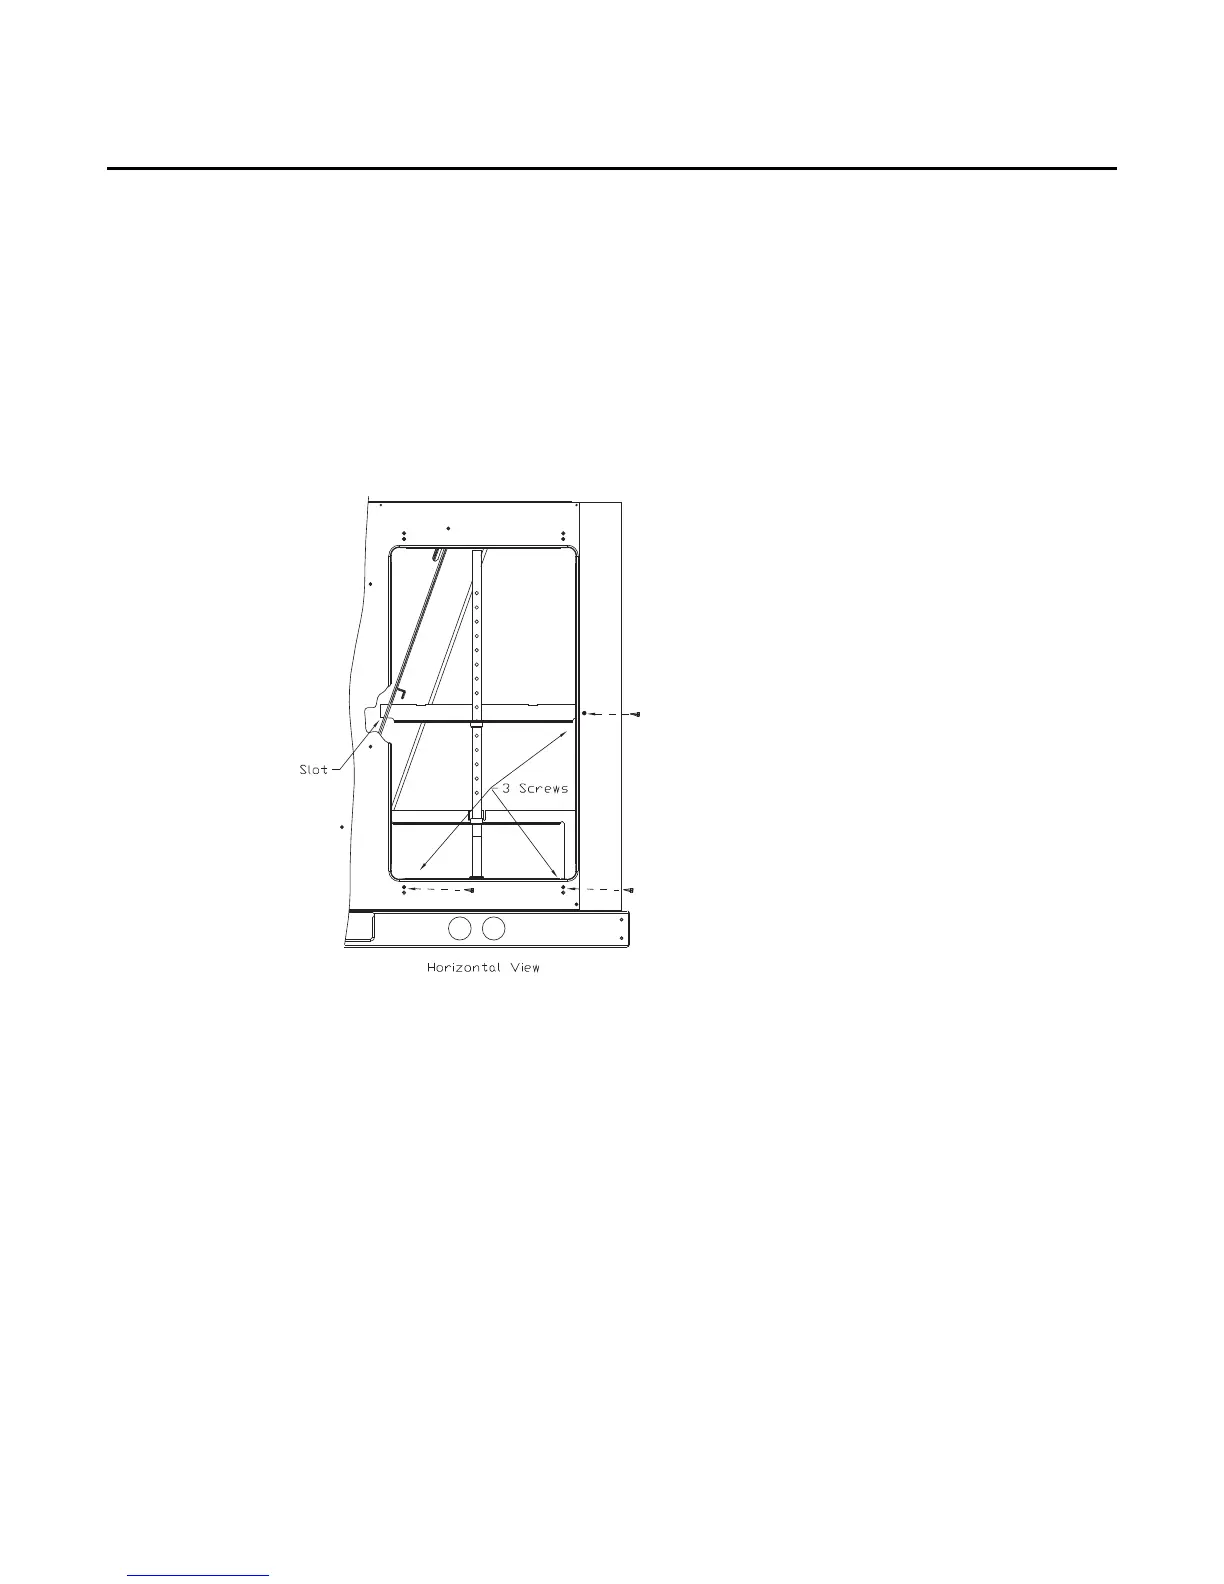
3. Lift the tube and bracket from the downflow duct opening. Rotate the tube and bracket
assembly 180° degrees ensuring that the holes on the copper sensing tube face away from the
unit and face the return air ductwork. Refer to Horizontal View.
Note: Check to insure that the flexible tubing lies flat on the base pan surface.
4. Slide the top bracket down the copper sensing tube, insert the tab on the left side into the slot
on the indoor coil blockoff and secure the right side of the bracket with one of the 3 screws
removed in step 2. Refer to Horizontal View.
5. Using the remaining 2 screws removed in step 2, secure the bottom bracket. Refer to Horizontal
View.
Main Electrical Power Requirements
• Verify that the power supply complies with the unit nameplate specifications.
• Inspect all control panel components; tighten any loose connections.
• Connect properly sized and protected power supply wiring to a field-supplied/installed
disconnect switch and to the main power terminal block (HTB1) in the unit control panel.
• Install proper grounding wires to an earth ground.
Note: All field-installed wiring must comply with NEC and applicable local codes.
Electric Heat Requirements
• Verify that the power supply com plies with the electric heater specifications on the unit and
heater nameplate.
• Inspect the heater junction box and control panel; tighten any loose connections.
• Check electric heat circuits for continuity.
Low Voltage Wiring (AC & DC) Requirements
• Install the zone thermostat, with or without switching subbase.
Figure 20. Horizontal View