-12-
(3) How to Operate
a. Turn the power switch ON. The heating element reaches the working temperature at
approximately 3 minute.
b. Place a package on the table top (The package must cover the Slide Table).
c. Properly adjust the strap tension according to various package.
d. Place the strap around the package to be strapped and insert the strap into the strapping
head until it stops.
e. The strapping and welding sequence should complete.
f. At end of strapping sequence the strap end is fed automatically, and Feeding Length
Knob is to adjust the strap length.
7. Adjustments
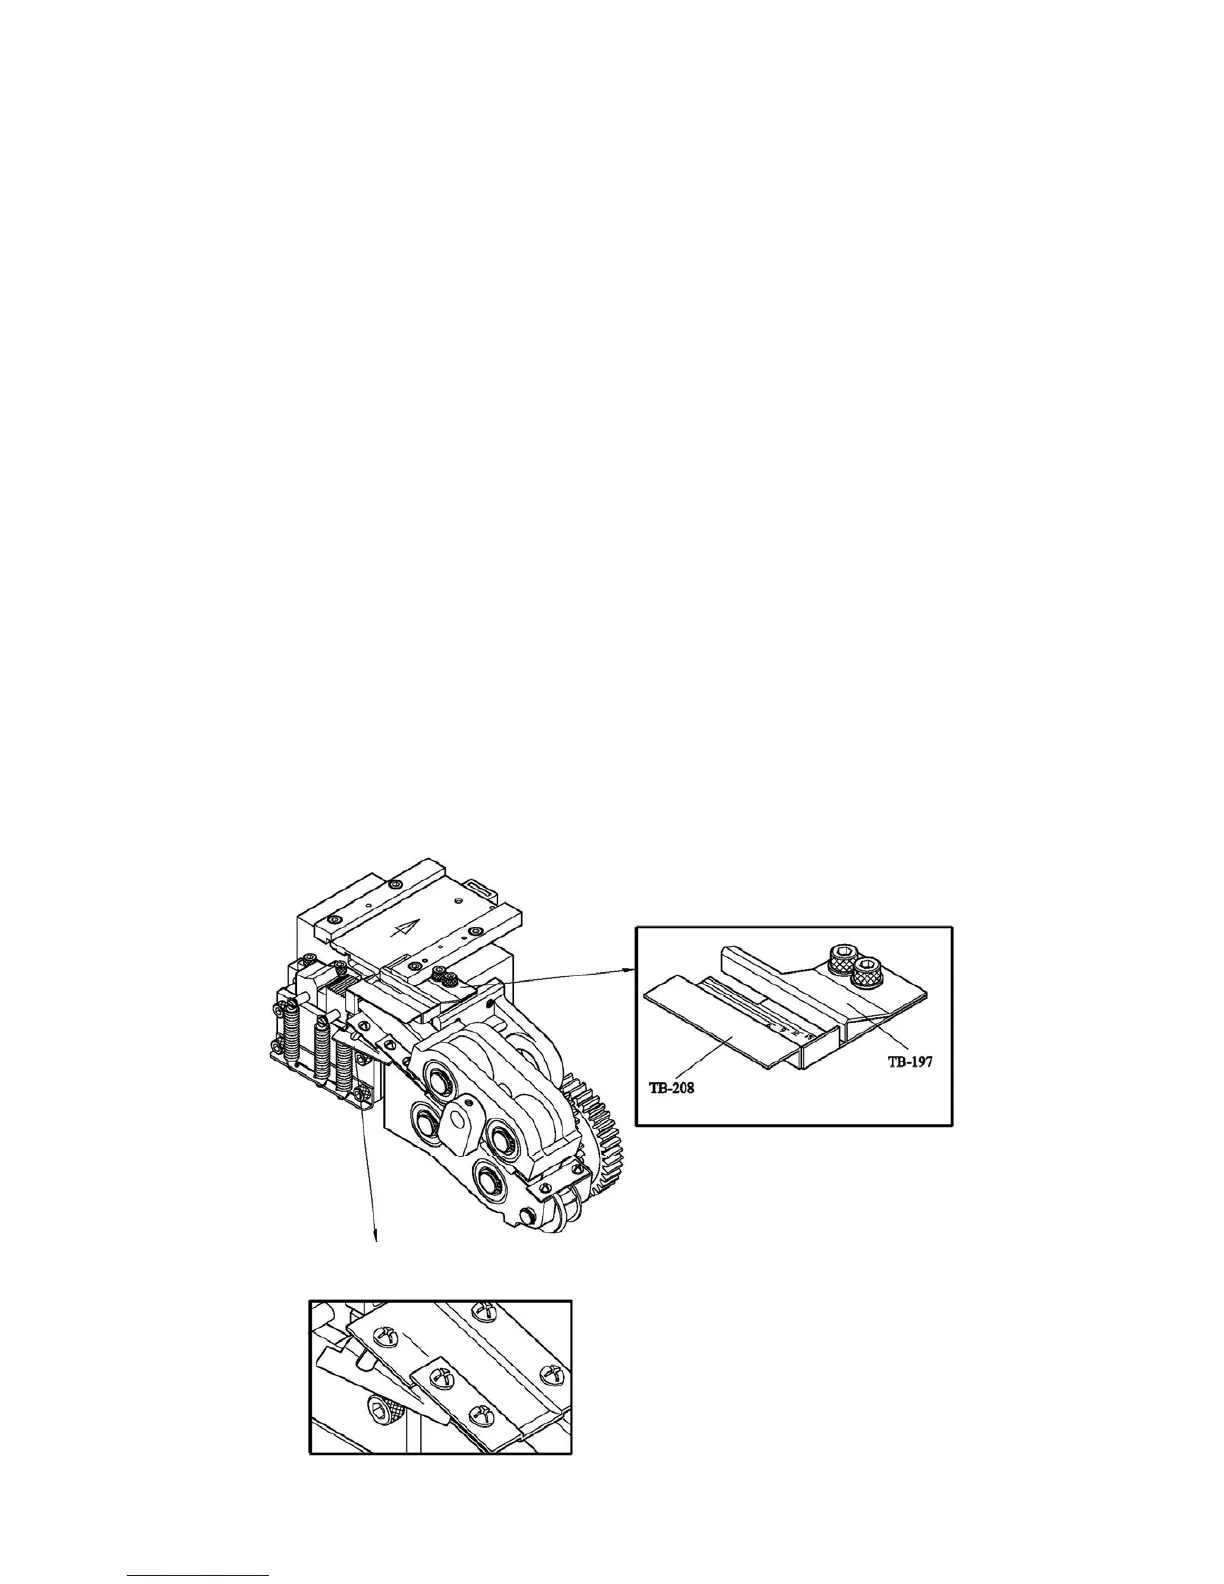
(1) Strap Width
Adjustment for strap in different width can be done with only one Philips recess
screw driver and a hex spanner. The adjustment must be made in two places, A (Strap
Outlet), B (Strap Inlet) as shown below.
For A, the width of band guide should be at 12.5mm to 13.0mm when using 9mm and
12mm strap and the width of band guide should be at 15.5mm to 16mm when using 15mm
strap.
For B, The width of band guide should be wider by 0.5mm to 1.0mm than the actual
strap width.
The adjustment is made with the
guide located on the top of the
table. Make both adjustments
by loosening two screws and
applying the strap which is to be
used.
Fig. A Strap Outlet
Fig. B Strap Outlet