13
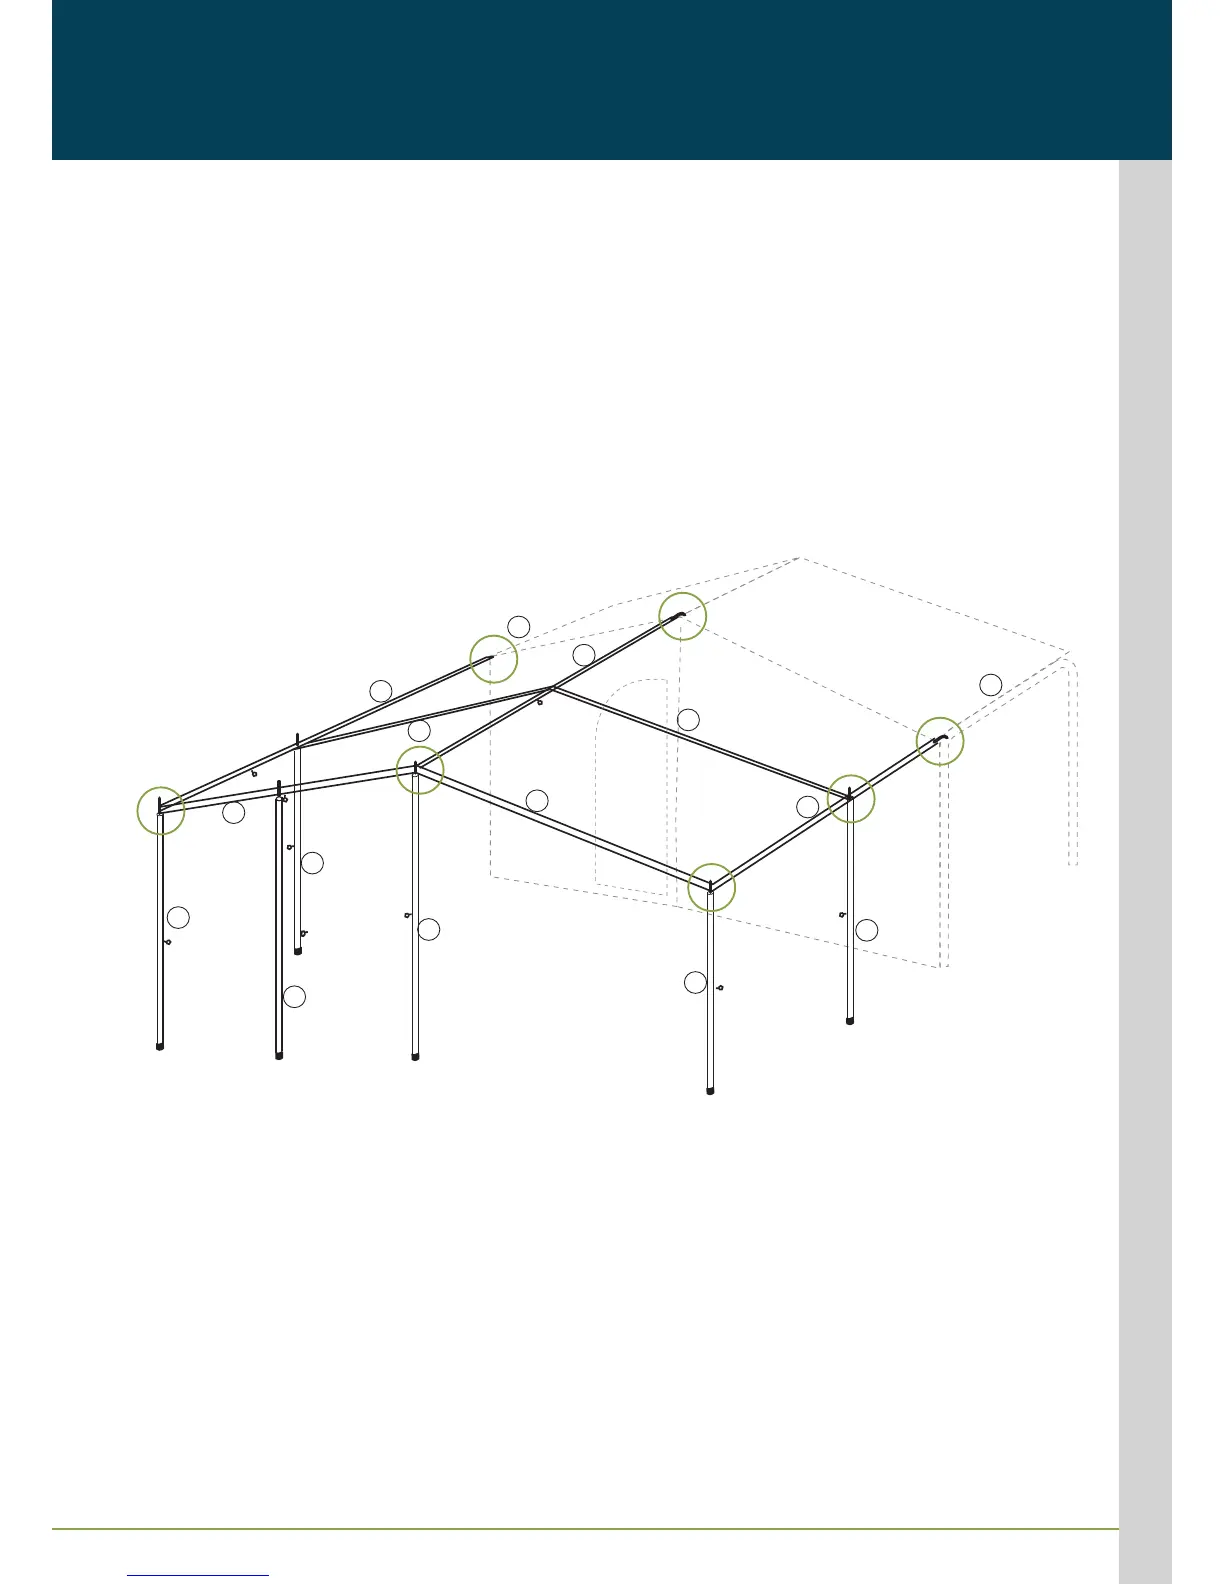
STEP 7
• At right hand rear corner of awning, insert 'L' shaped pin of third Roof Pole (10) into hole at other end of Pole (1).
STEP 8
• Pull roof into position over poles and insert eyelets through straight pin at top of each pole.
STEP 9
• Position Poles (11 & 15) through eyelet along sides of awning edge.
• Hook elastic straps around awning edge into holes located on upright poles.
• Position Rain Caps (F) over top of straight pin at each upright awning pole.
• Adjust all awning pole tee nuts until awning is tight.
DO NOT OVER STRETCH THE CANVAS.
STEP 10
• Attach guy ropes (E) to awning poles and
peg out using pegs.
• Tension guy ropes as required.
SPARE ROOM WALLS & FLOOR
• Start attaching the wall from the right hand top corner of the lounge room and work around to the front of the awning.
• Attach the two large sections of the spare room walls with D door & window to the front of the awning.
• Attach the fourth section of the spare room wall to the left hand of the lounge room.
• Work around to the front of the awning and join each two sections using Velcro.
• Secure walls to awning poles using hook and loop fastener.
• Attach the room divider using Velcro and loop fastener.
• When completed, ensure outside gutter edge of flooring is flush with ground.
• Peg out and tension spare room wall using internal stitched D Rings.
• Lay out the internal flooring and attach to the walls using Velcro.
NOTE: It is recommended to season canvas prior to use.