9
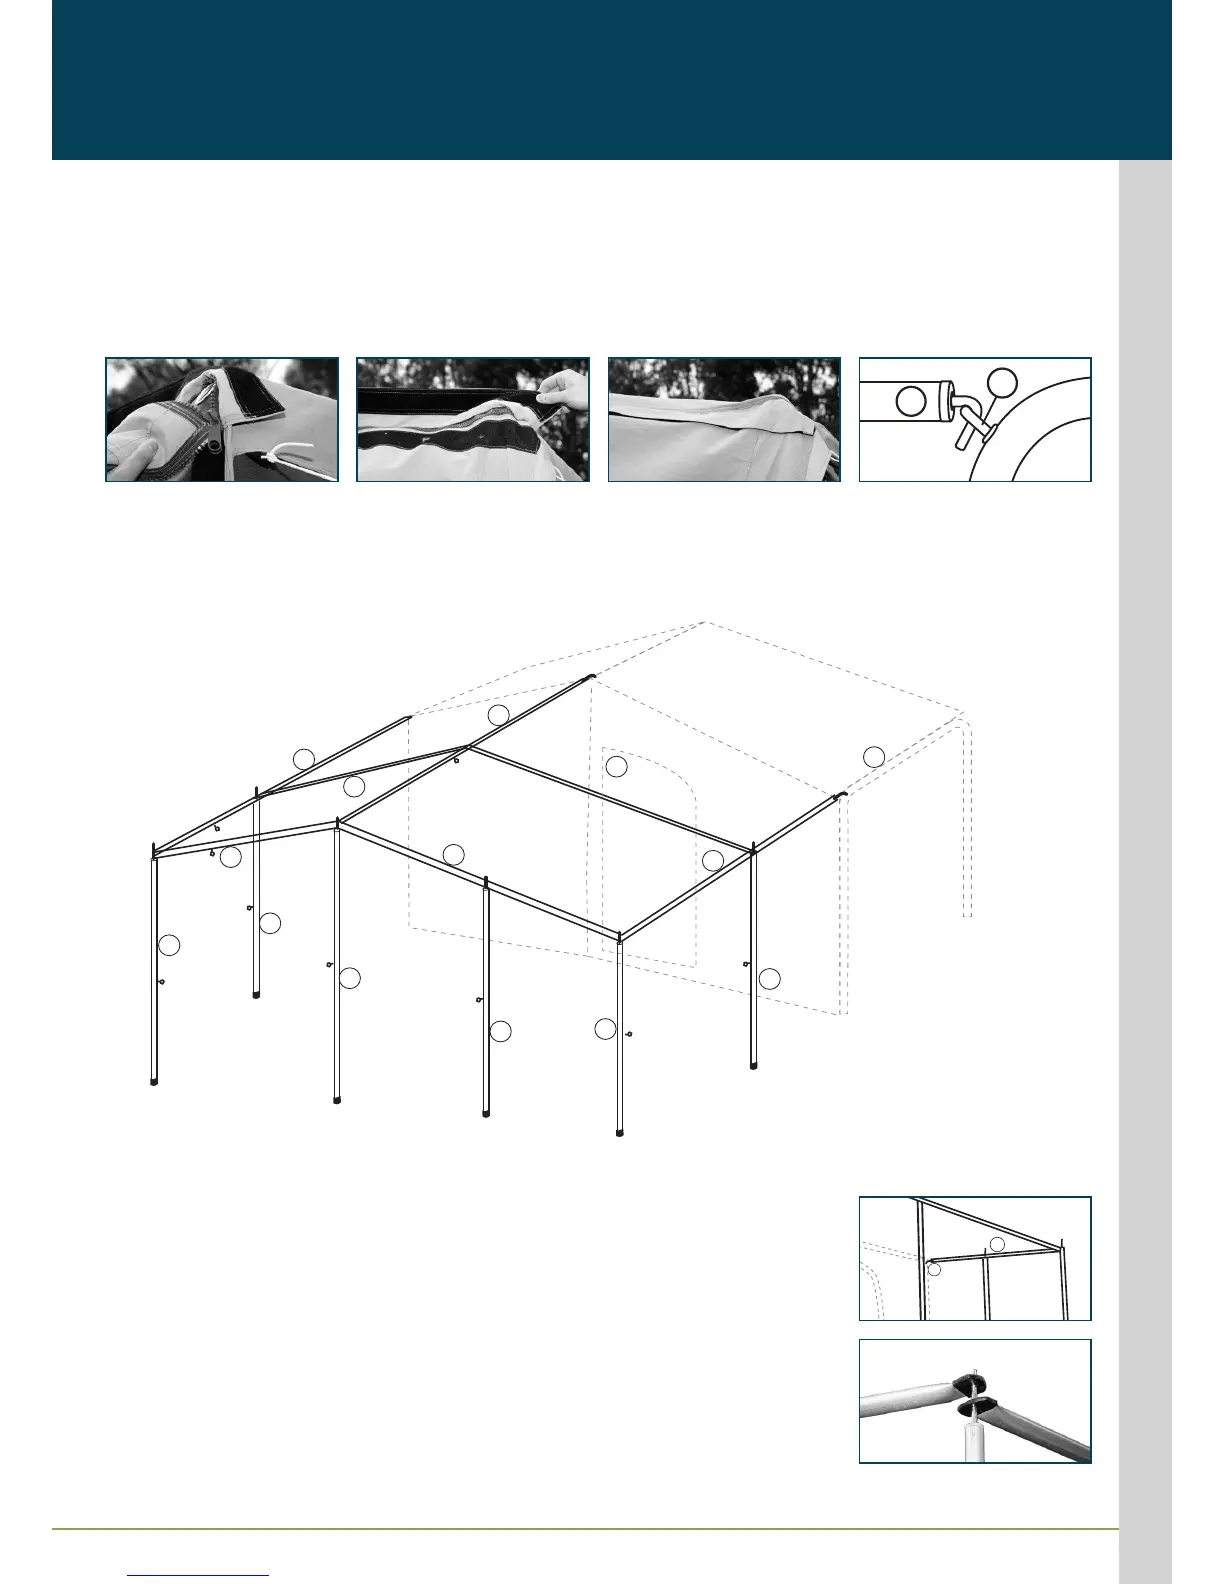
STEP 14 – Awning
• Attach awning using zipper along outer top edge of tent roof.
• Start at top right hand side of lounge room and finish at top left hand side of bedroom.
• Ensure the canvas flap fully covers the zipper using the attached hook and loop fastener.
Note: Pull attached awning back over roof of tent to allow assembly of awning poles.
STEP 15
• Insert ‘L’ shaped pin of Awning Roof Pole (10) through the tent eyelet at right hand corner into hole located on end
of Pole (4).
• Ensure pole (10) tee nuts are facing downwards.
STEP 16
• Insert straight pin of Awning Pole (15) into hole at other end of pole (10) and join with
end of Pole (12).
• Ensure Pole (12) tee nuts are facing downwards.
• Adjust Pole (15) in the upright position using the tee nuts.
STEP 17
• Insert ‘L’ shaped pin of second awning roof Pole (10) through the tent eyelet into
hole located on end of Pole (2).
• Ensure Pole (10) tee nuts are facing downwards.
Step 14 Step 15
Step 16
10
4