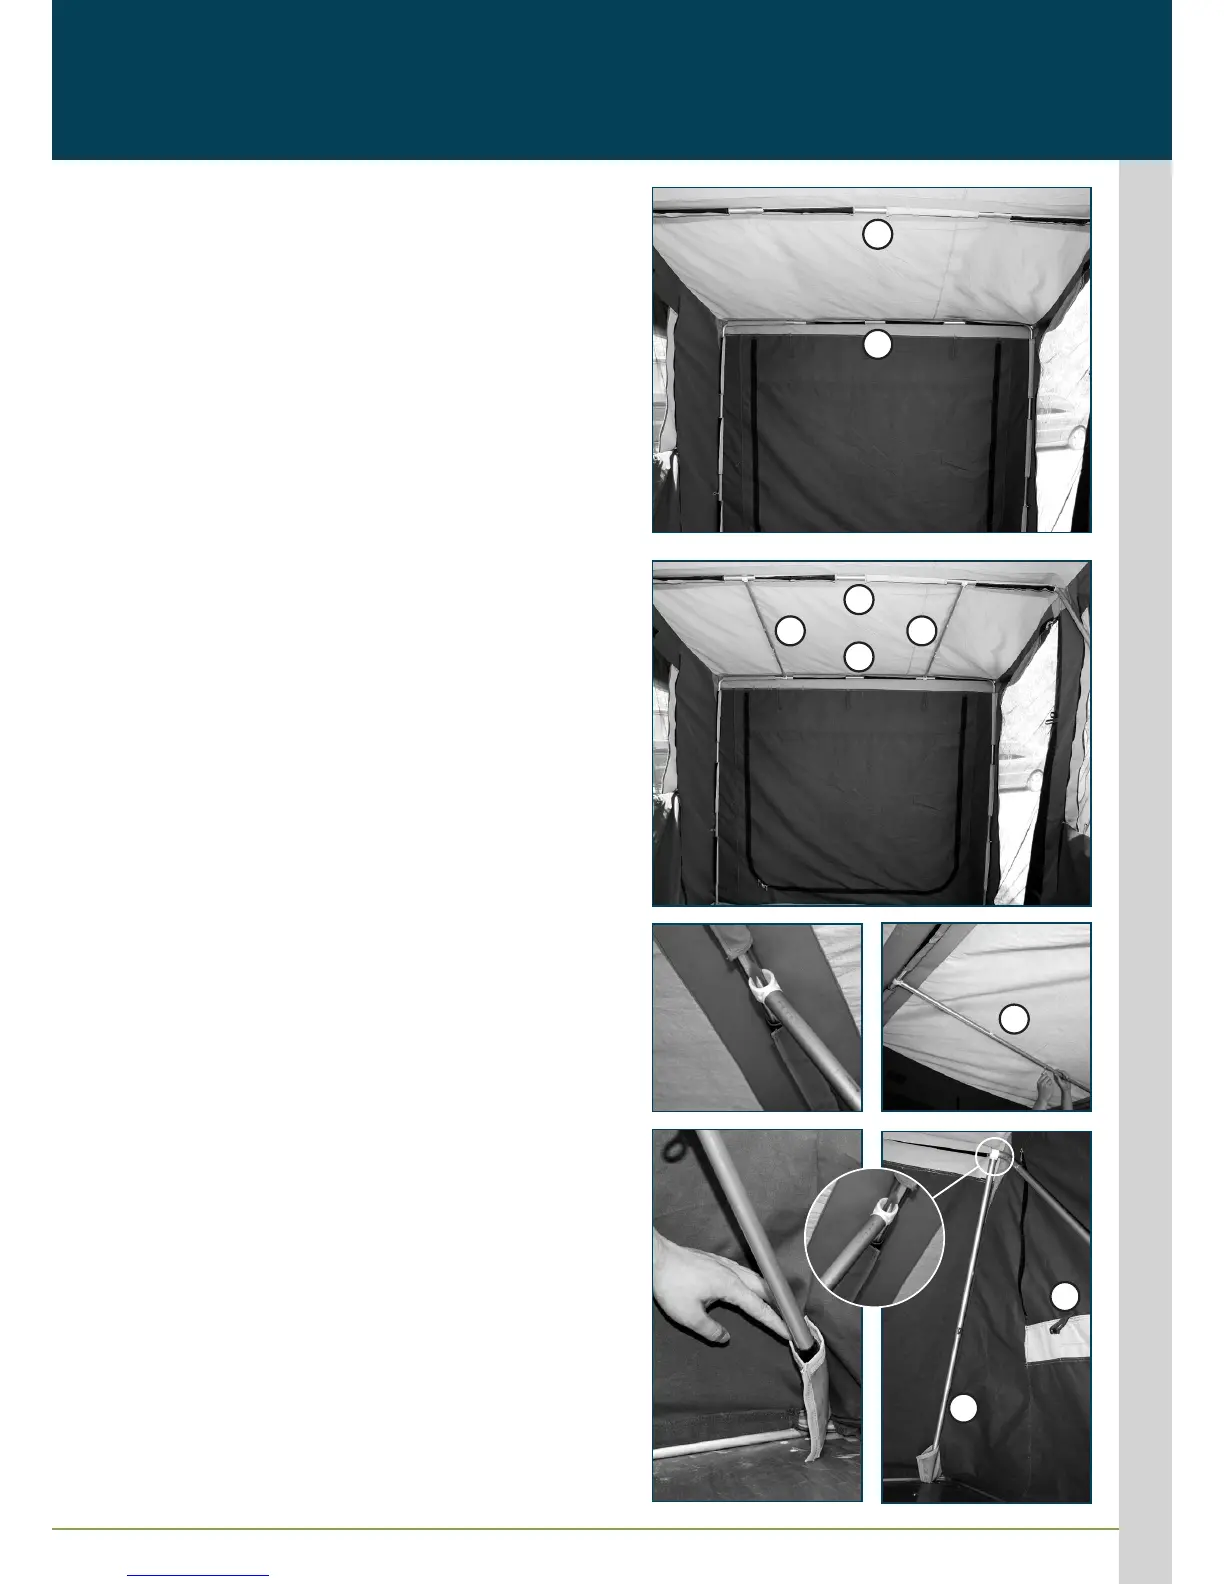
7
STEP 5
• Raise Pole (3) to centre position of lounge room and fasten
to roof using hook & loop tabs.
• Pull Pole (3) out of sleeve tube and position into PVC pocket
in centre position of lounge room floor.
• Adjust pole height & tighten tee nuts.
STEP 6
• Join together the spring- loaded sections of Pole (4).
• Position ends of Pole (4) into both bottom corners of
lounge room.
• Fasten to right hand side wall using hook and loop tabs.
• Adjust pole height and tighten tee nuts.
STEP 7
• Attach lounge room Tension Bars (5) to Poles (3) & (4)
using ‘C’ clip ends.
• Ensure tee nuts are facing downwards - adjust tension
bars.
STEP 8
• Pull the canvas outwards until the lounge room area has
taken shape.
• Peg out corners and sides at stitched D rings using
Pegs (D).
• Adjust Poles (1), (2), (3) & (4) using tee nuts until canvas is
tight. Do not over stretch the canvas.
STEP 9
• Attach ‘C’ clip end of bedroom Tension Bar (8) to Pole (1)
at corner.
• Insert other end into corner pocket located at bottom of
bedroom rear wall. Repeat procedure for both sides.
Adjust tension bars using tee nuts.
Step 5 & 6
Step 7
Step 8
Step 9
3
4
55
3
4
5
1
8