Special note for Bosch POF routers
For the Bosch POF range of DIY routers a
packing piece must be made in 3mm to 6mm
thick plywood or MDF. This is then placed
between the underside of the plate in the table
and the underside of the router base. The
fixing screws can then be used. Enlarging the
aperture in the base of the router is also
advised if large diameter tooling is to be used.
-6-
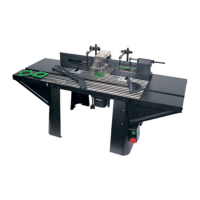
CRT MK2
Identification of Router Mounting
Holes and Screws (see pages 8 & 9).
■ Identify the mounting holes and fixing screws
(including washers & nuts if router base
requires re-drilling) which will be required to
suit your router.
■ Identify whether your router or the fixing plate
requires re-drilling.
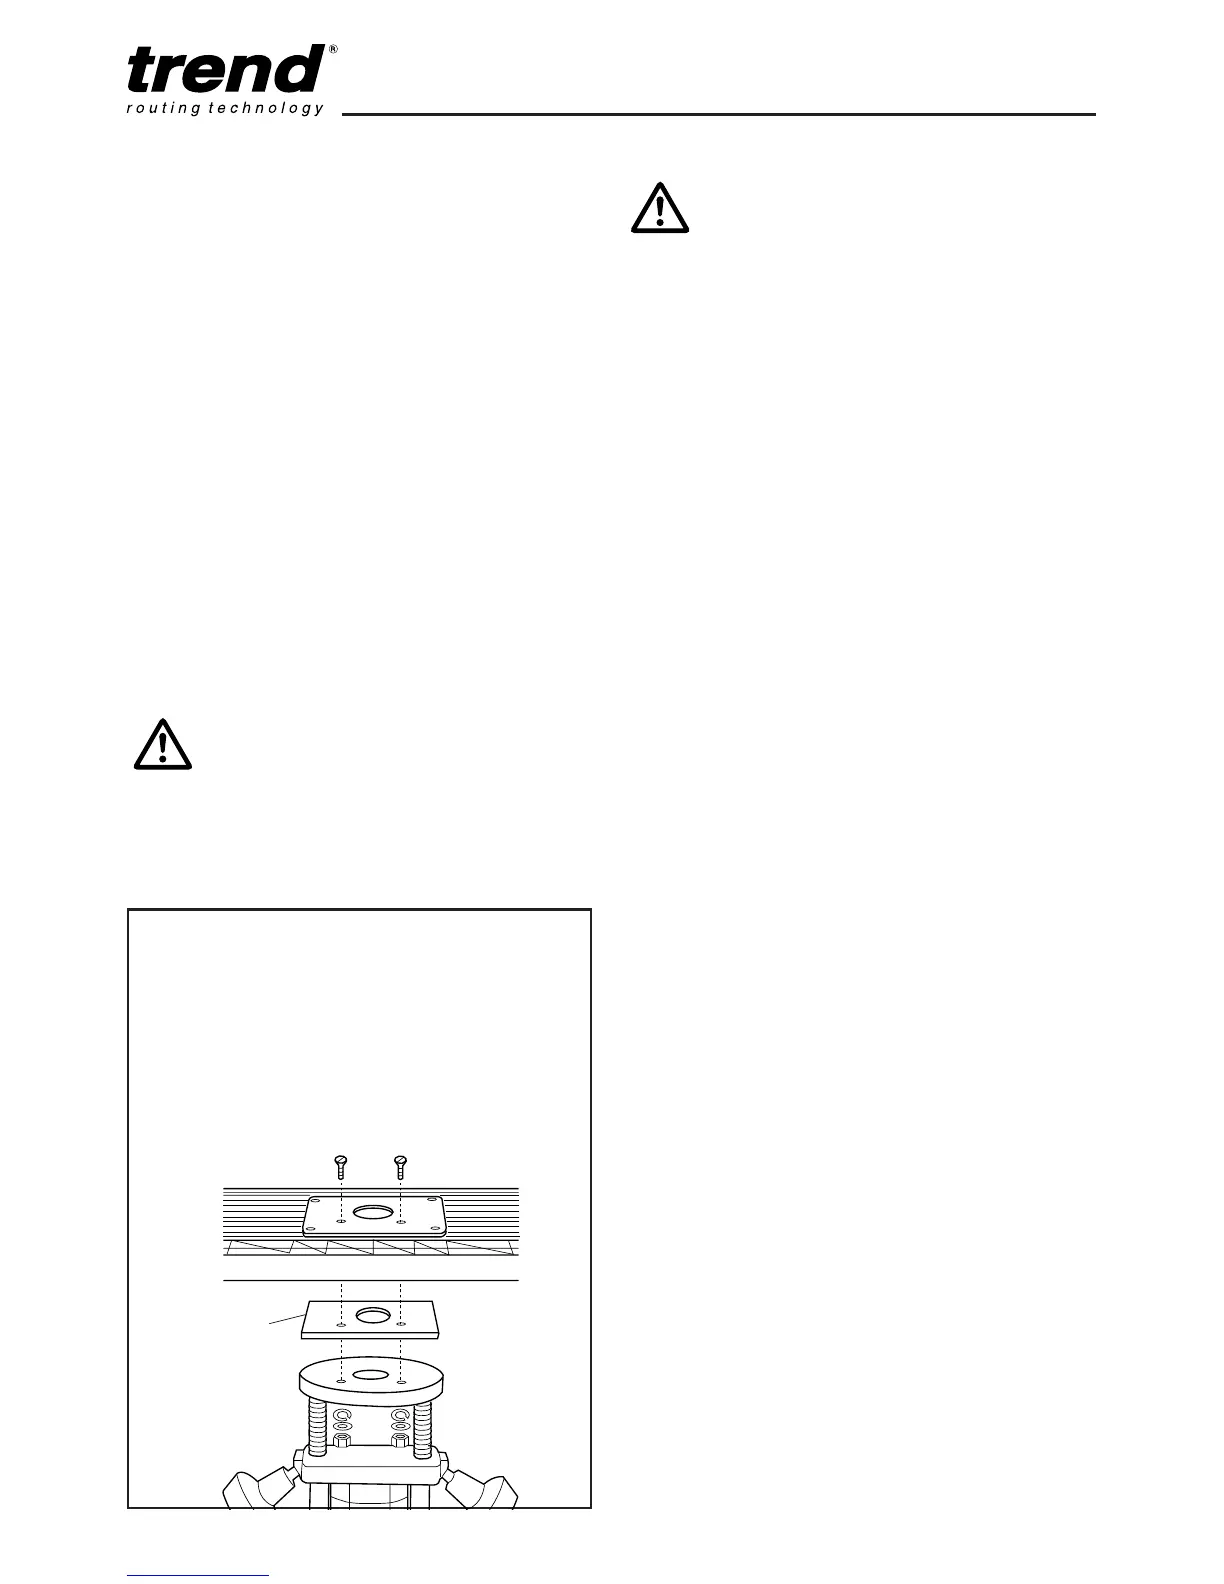
■ Bolt the router onto the fixing plate first with
the operating controls to the front, before
fitting to the table.
■ The fixing plate is symmetrical therefore once
the router is mounted to it, it can be fitted to
the router table in four different positions. The
orientation of the plate depends on which
router is fitted. It is advisable to position the
plate so that controls for speed or height are
easily accessible.
IMPORTANT!
Some routers may require the
removal of the plastic base
slider to allow fitting to plate.
IMPORTANT!
Carry out the following re-
drilling only if required.
Re-drilling Router Base Only
■ Invert and stand your router onto a suitable
surface.
■ Place the fixing plate facing upwards onto
the base of your router.
■ Identify holes 1 and 2, or holes 3 on fixing
plate (Ref. CRT/FP/A see page 8).
■ Fit a large diameter cutter (max. 53mm Ø)
into your router and tighten collet.
■ Retract plunge mechanism and lock off
allowing cutter to protrude through the base.
■ Adjust position of the fixing plate to
centralise the cutter within the centre hole.
Take care not to damage cutter or to touch
sharp edges.
■ Ensure that the holes you are about to drill in
the base do not interfere with any of the
features on the router or any webbings in the
casting of the router base. A slight turning of
the plate may be required to miss such
obstructions.
■ Mark the centre of the holes onto the base.
■ Remove plate and mark the centre of the
holes with a centre punch.
■ Drill a hole at these points with a 6mm
diameter drill bit.
■ Clean up edges of holes if required.
Re-drilling Fixing Plate Only
■ Remove the plastic base of the router.
Alternatively a photocopy or an outline of the
base can be made of the plastic base
instead.
■ Draw cross lines onto the plastic base of the
router.
■ Draw cross lines on the fixing plate with a
pencil. These cross lines should bisect the
plate on both sides.