-24-
CRT MK2
CRT/2
Routing without a Back Fence
IMPORTANT!
There is an increased danger of
injury since the router cutter is
freely accessible from all sides.
Fit the profiling top guard for
protection and the lead-on pin
to prevent kick-back.
■ Only use router cutters with a ball bearing or
pin guide.
■ Always work against the direction of rotation
of the router cutter.
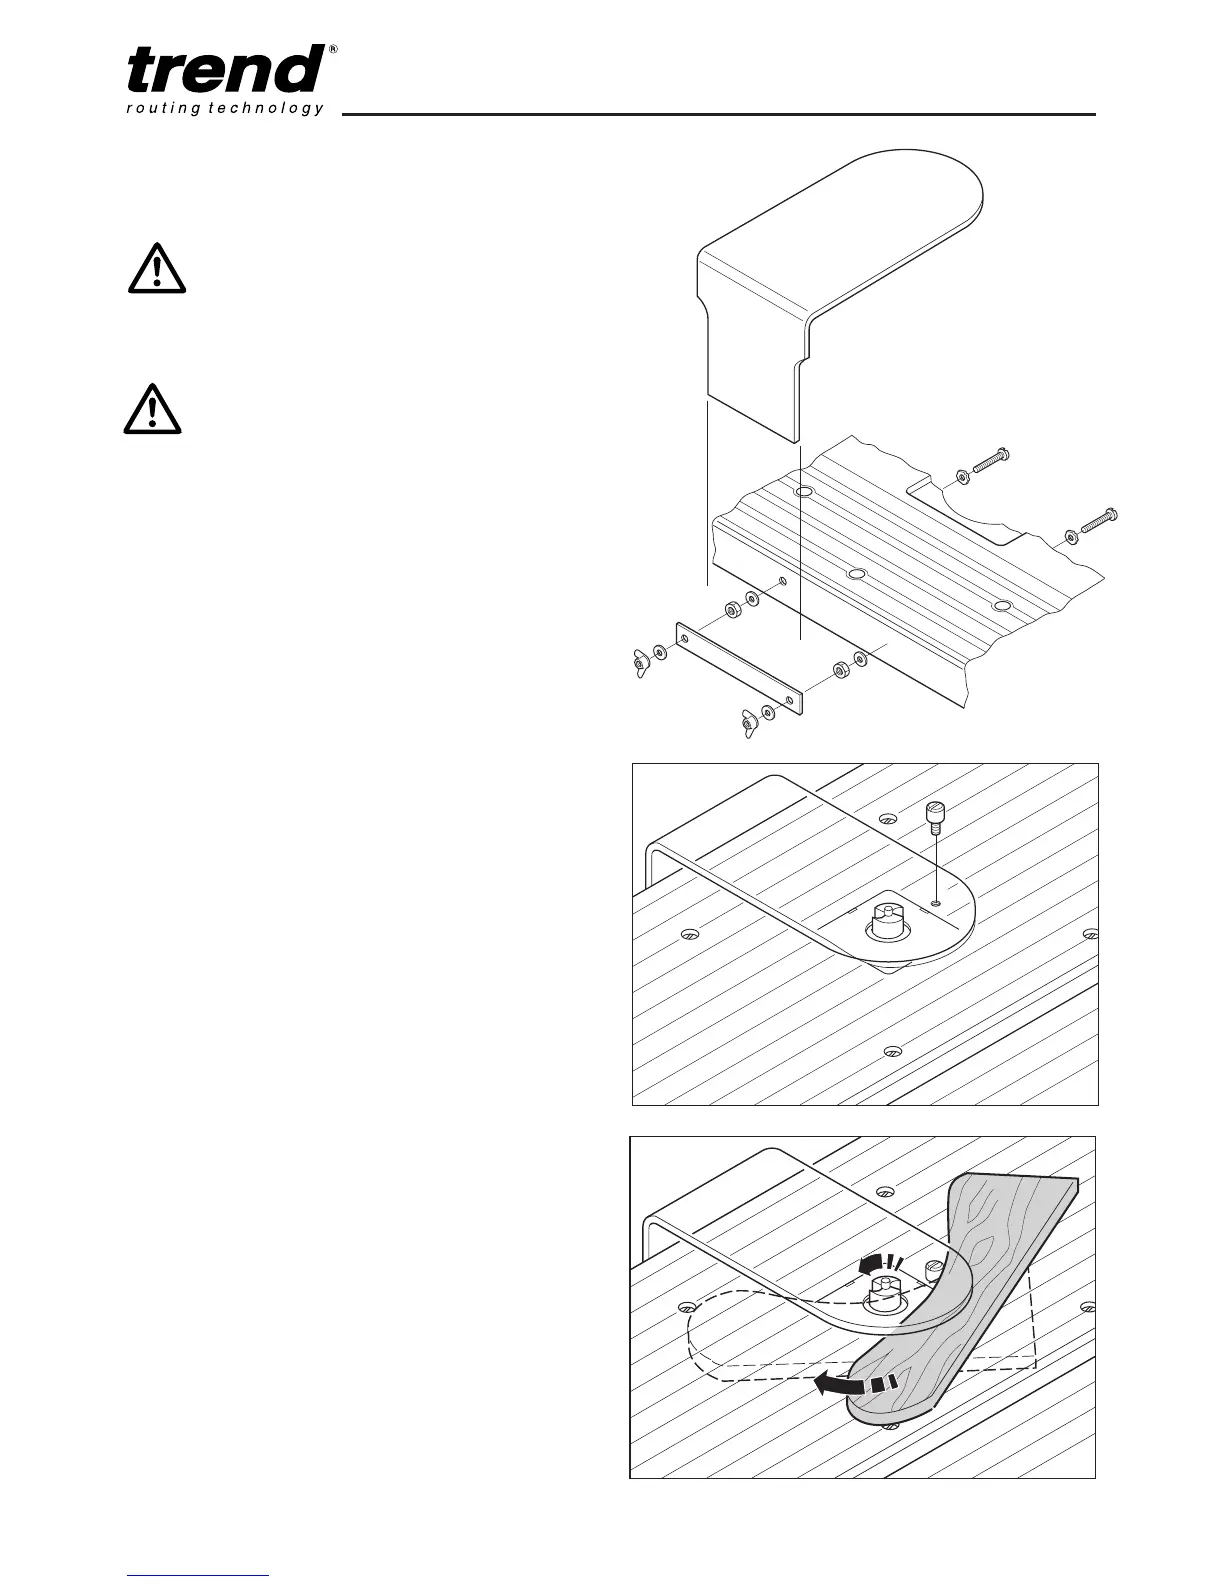
Mounting a Lead-on Pin
■ The lead-on pin should be screwed into the
table top as shown and tightened with a flat
screwdriver.
The pin is used as a guide for the workpiece
when the cut is first made. Correct working
procedure for this is critical especially when
using large diameter cutters.
Profiling Working Procedure
■ Switch router on and allow it to reach full
running speed.
■ Position the workpiece against the lead-on
pin as shown. The workpiece should not
contact the cutter.
■ Gradually swing workpiece towards cutter
until workpiece or template engages the ball
bearing or pin guide.
■ Feed workpiece against the rotation of the
cutter whilst swinging the workpiece away
from the lead-on pin. At this point the ball