© Copyright 2013 TRENDnet. All Rights Reserved.
TRENDnet User’s Guide
TEW751DR
Networking Basics
After you installed your new network or wireless adapter, by default, the TCP/IP
settings should be set to obtain an IP address automatically from a DHCP server.
By default the DHCP server option on your router is enabled.
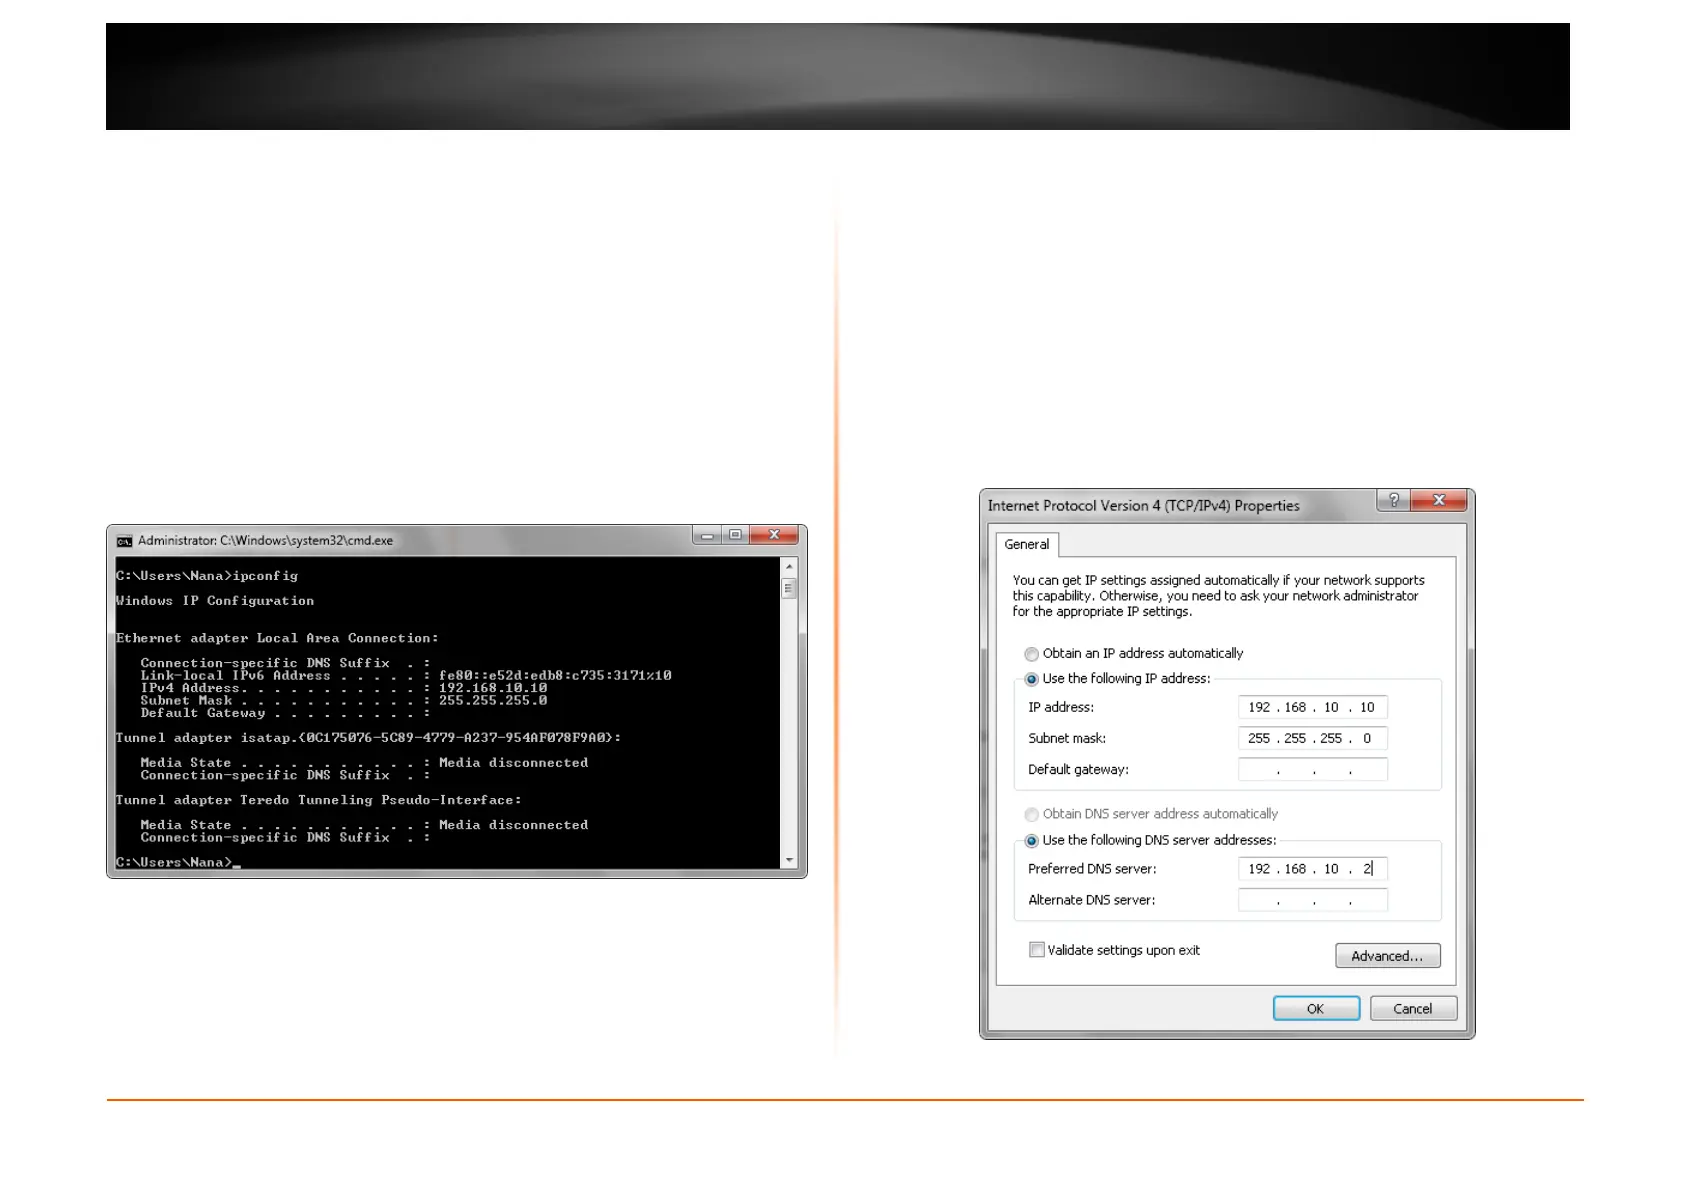
To verify your IP address, please follow the steps below:
• Click the Windows Start button and open the Run application.
• In the Open check box, type cmd and click OK.
• At the command prompt, type in the command ipconfig and press Enter.
This will display the IP address, Subnet Mask, and the Default Gateway
of your adapter. If the address is 0.0.0.0, it means that your network
adapter did not receive an IP address from the DHCP server. Check your
adapter installation, security settings, and the settings on your router.
Some firewall software programs may block a DHCP request on newly
installed adapters.
Statically Assign an IP address
If you are not using a DHCP capable gateway/router, or you need to assign a
static IP address, please follow the steps below:
• Click the Windows Start button and navigate to the Control Panel >
Network and Sharing Center and click the Change Adapter Settings
option on the left panel.
• Right-click the Local Area Connection, which represents your network
adapter, and select Properties.
• Select the Internet Protocol Version 4 (TCP/IPv4) option and click the
Properties button.
• Select Use the following IP address and enter an IP address that is on
the same subnet as your router. For example: If your router is running on
the IP address of 192.168.10.1, use any IP address from 192.168.10.2 to
192.168.1.254. Use the Subnet Mask of 255.255.255.0. Set Default
Gateway the same as the LAN IP address of your router. Set Preferred
DNS server IP address the same as the LAN IP address of your router.
The Secondary DNS is not needed at this stage.
• Click the OK button twice to return to the Network Connections window.