PRESTIGE Solo 60, 110, 175 and 250
HX Field Replacement
Kit
5
11. Disconnect the orange wire leads from the Low
Water Cut-Off (LWCO) pressure switch
(Shown as item 5 in Figs 1-3). Use care when
disconnecting the wire leads as not to damage
the LWCO terminals or the wire leads.
Removal of Electrical Connections (TriMax)
Before disconnecting any wire connections mark and
label all connections and locations of the connections.
1. Remove top access panel located above the heat
exchanger on the top jacket panel.
2. Slide left and right tabs of control panel inward
and lower control panel.
3. Pull the retaining tabs on top of the rear cover to
remove the rear control box cover.
4. Remove green ground wire from the igniter and the
ignition cable from the TriMax control module.
5. Remove air intake pipe (Shown as item 2 in
Figs. 1-3) from venturi. Place the intake pipe
aside, DO NOT discard as it will be re-used.
6. Disconnect the electrical connection(s) for the
blower at the blower housing.
7. Disconnect the Molex plug from the gas valve.
8. Disconnect the Molex plug from supply tem-
perature sensor (Shown as item 3 in Figs. 1-3)
located at the top of the heat exchanger.
9. Disconnect the Molex plug from return temper-
ature sensor (Shown as item 4 in Figs. 1-3)
located at the bottom of the heat exchanger.
10. Disconnect the orange wire leads from the Low
Water Cut-Off (LWCO) pressure switch
(Shown as item 5 in Figs. 1-3). Use care when
disconnecting the wire leads as not to damage
the LWCO terminals or the wire leads.
Removal of Gas Connection
1. Disconnect the gas supply piping inside the
boiler at the brass union located just below the
gas valve using two wrenches.
2. The gas piping can remain inside the boiler or
be removed for additional clearance / access.
Removal of Blower/Gas Valve/Venturi Assembly
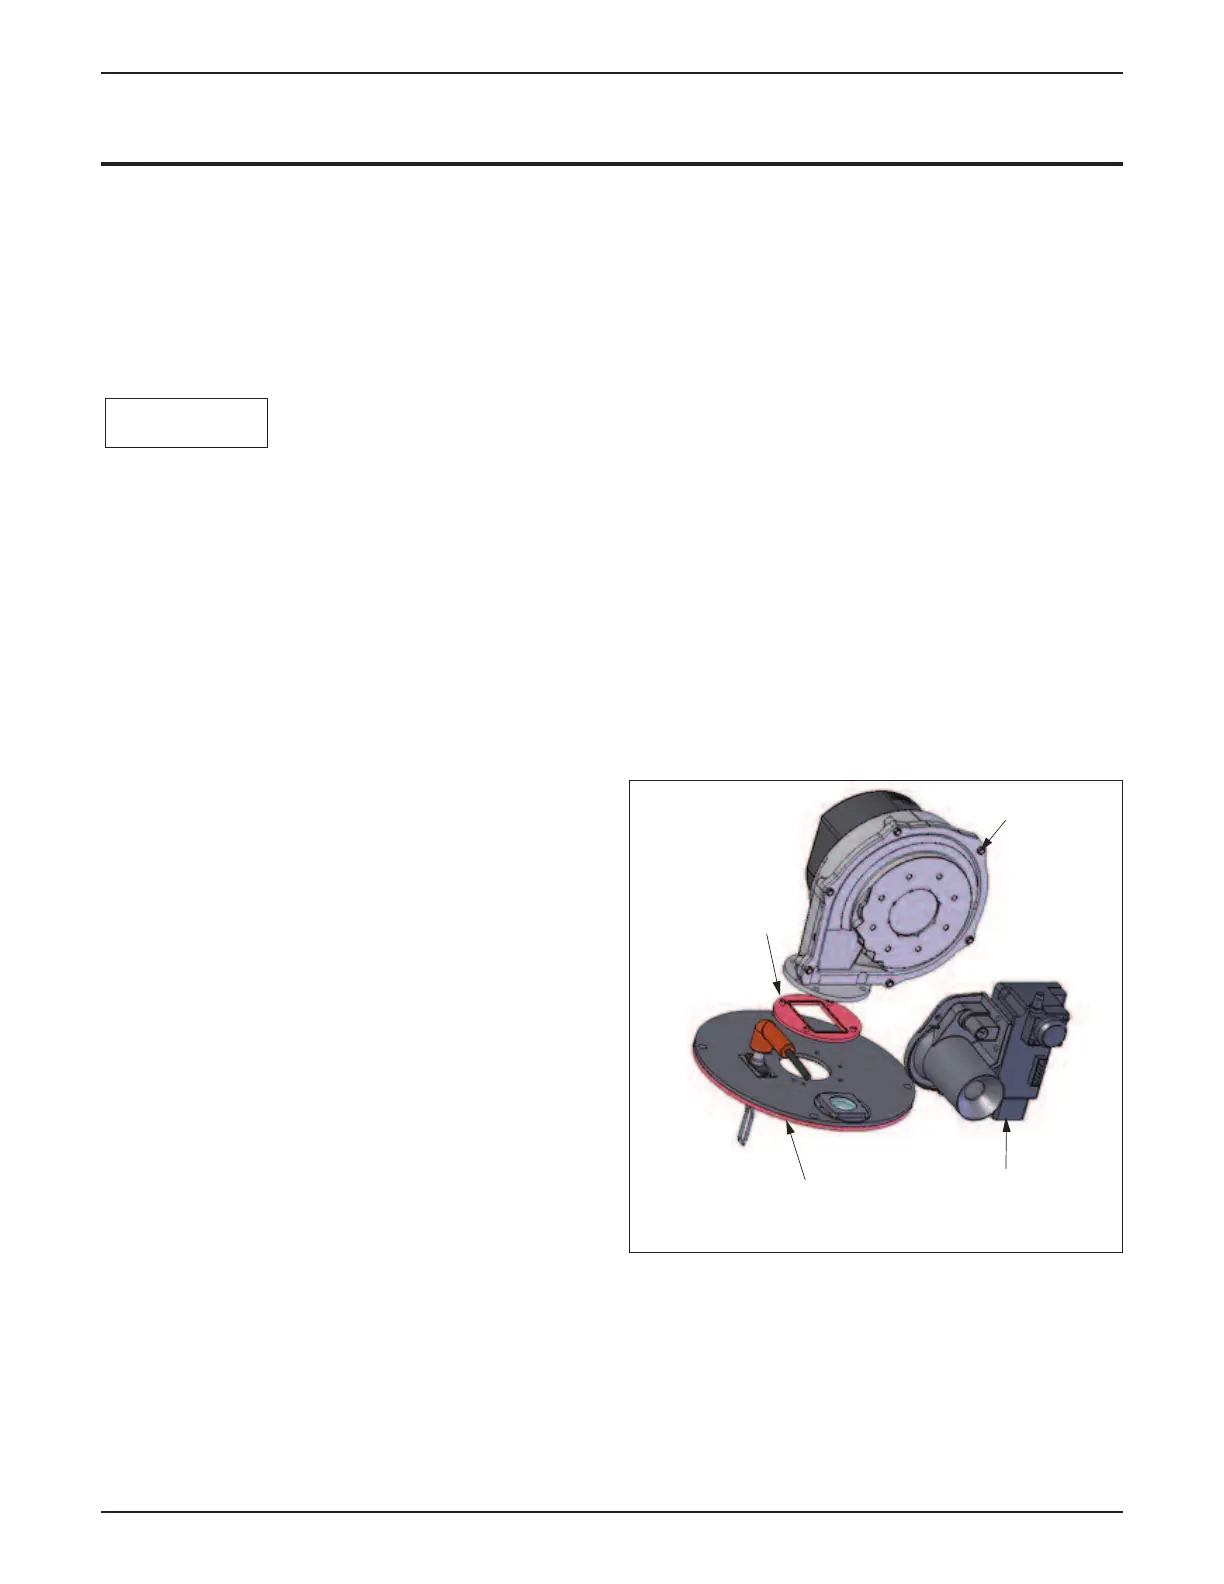
1. Remove 4 blower mounting screws from the
burner plate using the extended Phillips/Torx
head screw driver provided in the kit and
remove the blower/gas valve/venturi. Gas
valve and venturi assembly can remain connect-
ed to the blower housing. Discard old blower
gasket. (Fig. 7).
NOTICE
Venturi/Gas Valve
Assembly
Blower
Blower
Gasket
Bur
ner
P
l
ate
Fig.7 Blower/Gas Valve and Venturi Assembly
 Loading...